How To Build Your Own Solar Panels
Welcome to our step-by-step guide on how to build your own solar panels. Are you curious about harnessing the sun’s power to cut down on your electricity bills? Building your own solar panels can be a rewarding and cost-effective way to embrace renewable energy.
With increasing concerns over climate change and rising energy costs, many people are looking for sustainable alternatives. Solar power not only helps reduce your carbon footprint but also offers substantial savings in the long run.
Imagine turning sunlight into usable energy right from your backyard or rooftop! The good news is that creating solar panels doesn’t require a PhD in engineering. With some basic tools, materials, and guidance, you can take this eco-friendly step towards energy independence.
Let’s dive deeper into how you can embark on this exciting journey of building your very own solar panels!
Benefits of Using Solar Panels
Solar panels offer an array of benefits that extend beyond mere energy savings. They significantly reduce your electricity bill. Harnessing sunlight transforms it into usable power for your home. Another advantage is the environmental impact.
By switching to solar energy, you decrease reliance on fossil fuels and lower greenhouse gas emissions. This shift contributes to a cleaner planet. Additionally, solar panels increase property value. Homes equipped with this technology often attract eco-conscious buyers willing to pay more for sustainable features.
In many regions, government incentives make installation more affordable. Tax credits and rebates can offset initial costs, making the transition smoother. Using solar energy grants independence from utility companies. You gain control over your own power supply and protect yourself against fluctuating energy prices in the future.
Components of a Solar Panel System
A solar panel system consists of several key components that work together to harness sunlight and convert it into usable energy. At the core are the solar panels themselves, made up of photovoltaic cells that capture sunlight and generate electricity. These panels can vary in size and efficiency.
Next is the inverter, a crucial component that transforms direct current (DC) generated by the panels into alternating current (AC), which powers your home appliances. Battery storage systems come next, allowing you to store excess energy for use during cloudy days or nighttime.
This maximizes self-sufficiency. The mounting structure secures your panels in place, ensuring they stay oriented towards the sun for optimal performance. Wiring connects all these elements while monitoring tools help track energy production and consumption efficiently. Each part has its role in creating an effective solar energy solution tailored to your needs.
Step-by-Step Guide to Building Your Own Solar Panels
Building your own solar panels can be a rewarding project that brings energy independence. It starts with understanding solar energy and its benefits. This renewable source reduces electricity bills and minimizes environmental impact.
Before diving in, familiarize yourself with the essential parts of a solar panel: solar cells, the frame, wiring, and glass cover. Each component plays a crucial role in harnessing sunlight effectively.
Step #1. Gathering Materials and Tools
Gathering materials and tools is an exciting first step in your solar panel project. It sets the foundation for everything that follows. Start with a clear list of what you’ll need.
You’ll require solar cells, which can be purchased from various suppliers online or at local hardware stores. Look for high-efficiency monocrystalline or polycrystalline options based on your budget and goals.
Next, consider the frame materials. Aluminum extrusions are popular due to their durability and lightweight nature. Don’t forget about tempered glass for protecting your cells.
Assemble essential tools too—screwdrivers, a soldering iron, wire cutters, and safety gear like gloves and goggles are crucial.
Take time to check every item against your list before diving into building. This initial preparation helps prevent frustration down the line when you’re knee-deep in construction tasks.
Step #2. Building the Frame
Building the frame is a crucial step in creating your own solar panels. A sturdy and weather-resistant frame provides support for the solar cells, ensuring longevity and efficiency.
Begin by measuring the dimensions of your solar panel design. Use treated wood or aluminum for durability. Cut your chosen material to size, making sure all pieces fit together snugly.
Next, assemble the frame using screws or brackets to secure each corner. It’s important to reinforce joints; this will help withstand wind and other environmental factors over time.
Once assembled, consider sealing any exposed edges with paint or sealant to protect against moisture damage. This simple preventative measure can prolong the life of your solar panel setup significantly.
Make sure everything is level before proceeding; a solid foundation ensures optimal performance as you attach those vital solar cells next!
Step #3. Attaching the Solar Cells
Once your frame is ready, it’s time to focus on the solar cells. Carefully lay them out in the configuration you’ve planned. This step requires precision.
Use a strong adhesive or silicone to attach each cell securely to the frame. Make sure there are no gaps between them; any space can reduce efficiency.
Be gentle while handling these fragile components—they’re sensitive and can crack easily if mishandled.
After positioning, double-check that all cells align properly for optimal energy absorption. Any misalignment could affect performance.
Next, connect the tabs of adjacent solar cells using tabbing wire for seamless electricity flow. Soldering is typically required here, so ensure you have a steady hand and good technique.
Take your time with this step; rushing may lead to mistakes that could be costly down the line!
Step #4. Wiring and Connecting the Cells
Wiring and connecting the solar cells is a crucial step in your DIY solar panel project. This process ensures that all cells work together efficiently to generate electricity.
Start by laying out your solar cells on the frame. Make sure they’re arranged in the desired configuration, typically in a series for optimal voltage output.
Next, use tab wires to connect the positive terminal of one cell to the negative terminal of another. This creates a pathway for energy flow between them. Be careful with soldering; it requires precision and patience.
Once you’ve completed this wiring pattern, secure each connection with electrical tape or heat shrink tubing to prevent any accidental shorts.
After securing connections, double-check everything before moving ahead. It’s essential that no wires are loose or exposed as this could lead to safety hazards down the road.
Step #5. Installing the Panels and Connecting to the Grid
Installing your solar panels is the final and rewarding step in this journey. Start by choosing a sunny spot on your roof or property, ensuring minimal shading throughout the day.
Carefully lift the panels into place using appropriate safety gear. It’s essential that they are securely fastened to withstand wind and weather conditions. Use brackets or mounts specifically designed for solar installations.
Next, connect the panels to an inverter, which converts DC electricity generated by the cells into usable AC power for your home. Follow wiring diagrams closely to ensure proper connections.
Once connected, link your system to the grid if you plan on selling excess energy back or using grid backup during cloudy days. Check local regulations regarding permits and inspections before completing this connection; compliance is crucial for safe operation.
Double-check all connections before powering up the system—safety first!
Maintenance and Troubleshooting Tips for Solar Panels
Regular maintenance is key to ensuring your solar panels operate efficiently. Start by cleaning the surface with a gentle wash using soap and water. Dust, leaves, and debris can block sunlight and reduce energy production.
Check for any shading issues that might arise from nearby trees or buildings. Trim back branches as needed to keep your panels in direct sunlight. Inspect connections periodically for signs of wear or corrosion. A loose connection can lead to significant power loss over time.
If you notice underperformance, it may be worth checking individual cells for damage or defects. Using a multimeter can help identify issues more precisely. In case of severe weather conditions like hailstorms, inspect your panels afterward for physical damage—this ensures longevity and efficiency.
Keeping an eye on these elements will help maintain optimal performance throughout the life of your solar system.
Tips for Maximizing Efficiency and Cost Savings
To maximize efficiency with your solar panels, positioning is key. Install them in an area that receives ample sunlight throughout the day. Avoid shaded spots from trees or buildings. Regular maintenance can also enhance performance. Keep the panels clean and free from debris to ensure they absorb maximum sunlight.
Consider using a solar charge controller. This device regulates voltage and current, protecting batteries and extending their lifespan. If you’re handy, building your own mounting system can save costs significantly.
Ensure it’s sturdy enough to withstand weather conditions while optimizing angle for sun exposure. Monitor your energy consumption habits closely. Adjusting usage patterns during peak sunlight hours can lead to increased savings on energy bills over time.
Pros and Cons of DIY Solar Panels vs. Pre-made Panels
DIY solar panels offer a hands-on approach, allowing you to customize your setup according to specific needs. This can lead to significant cost savings if you’re handy and resourceful. The satisfaction of creating something yourself is also hard to beat.
On the flip side, building your own panels requires time and technical knowledge. Mistakes can be costly, both in terms of materials and efficiency. There’s also the risk that the system may not meet local safety standards. Pre-made panels come with warranties and are usually rigorously tested for performance.
They save time and effort but often come at a higher price tag. For those seeking convenience without the hassle, pre-made options make sense. However, DIY enthusiasts might appreciate learning opportunities while potentially saving money on installation costs.
Conclusion: The Future is Bright with Solar Power
Solar energy is rapidly becoming a preferred choice for many homeowners and businesses alike. As the world shifts toward sustainable practices, building your own solar panels can lead to significant cost savings and independence from traditional energy sources.
The steps outlined in this guide provide an accessible entry point for those looking to harness the power of the sun. With some basic tools and materials, along with patience and dedication, anyone can create a functioning solar panel system.
While DIY projects come with their challenges, they also offer unique rewards. Engaging in such projects fosters a deeper understanding of renewable energy while promoting environmental responsibility. However, it’s essential to weigh the pros and cons when deciding between building your own panels or purchasing pre-made ones.
As technology improves and awareness grows, more people are considering solar as an alternative energy source. By embracing this change now, you position yourself at the forefront of a brighter future powered by renewable resources that benefit both you and our planet.
With each step taken towards utilizing solar power effectively—whether through DIY solutions or other means—you contribute to creating a more sustainable environment for generations to come. Embrace this opportunity; after all, every small effort counts toward making a significant impact on our world’s energy landscape.
Related Posts
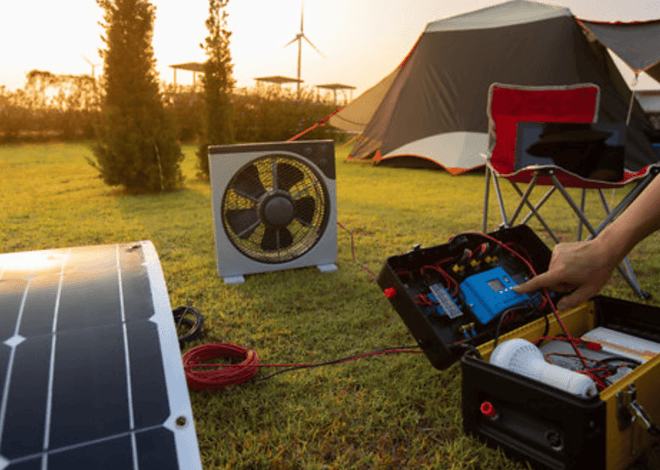
How To Build A Smart Solar Box
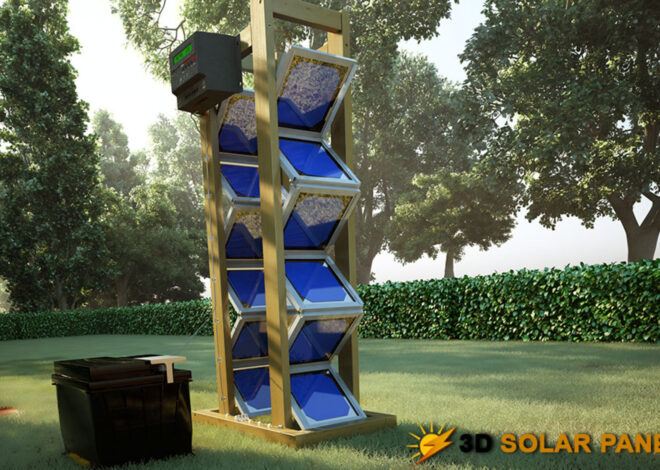
How To Build A 3D Solar Panel