How To Build A 3D Solar Panel
If you’re curious about this exciting technology and want to know how to build a 3D solar panel yourself, you’ve come to the right place! Imagine harnessing the power of the sun in a way that not only boosts your energy efficiency but also adds an innovative touch to your home.
3D solar panels are revolutionizing how we think about solar energy, blending functionality with cutting-edge design. These unique structures capture sunlight more effectively than traditional flat panels, providing a sleek aesthetic while maximizing output.
Let’s dive into what makes these panels so special and explore how you can create one from scratch. Your journey towards sustainable energy starts here!
What is a 3D Solar Panel?
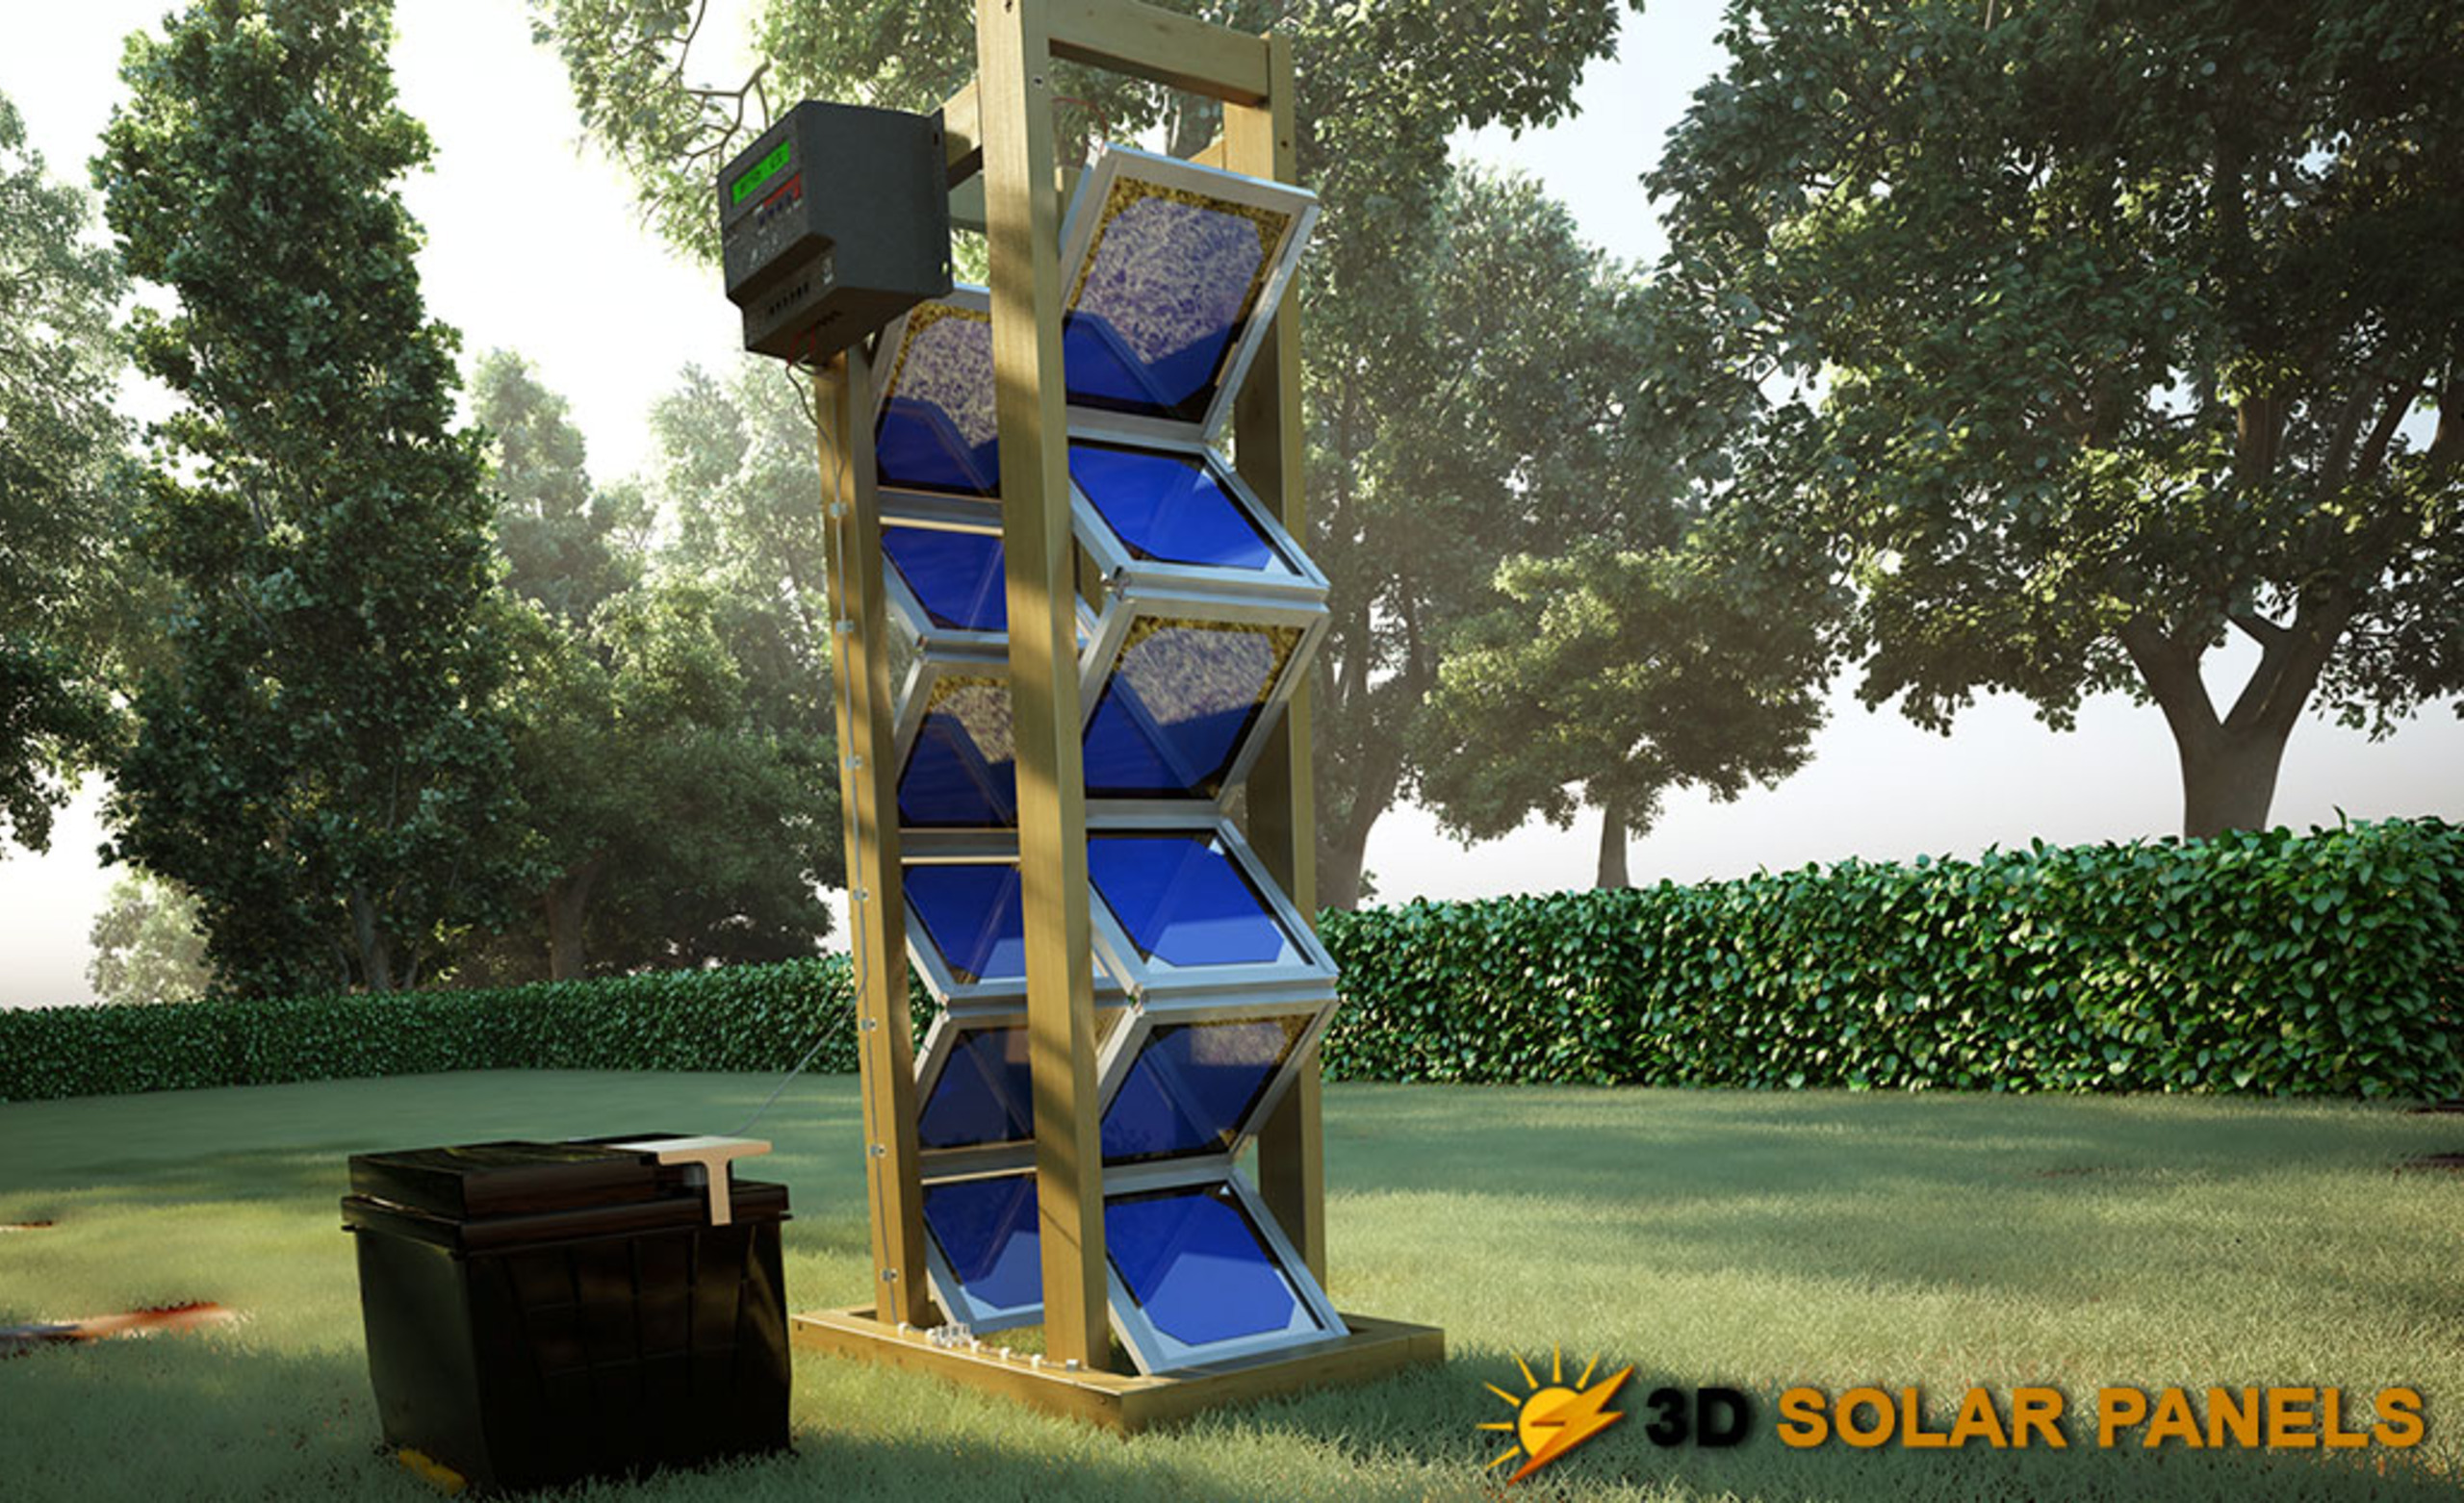
A 3D solar panel redefines traditional energy capture methods. Unlike standard flat panels, these innovative designs incorporate a three-dimensional structure that maximizes sunlight exposure. By utilizing angles and shapes, 3D solar panels can increase efficiency.
They harness light from various directions throughout the day. This technology often involves layering different materials to create surfaces that reflect or absorb sunlight more effectively. The result? Enhanced energy output in limited spaces.
Many designs also consider aesthetics, making them visually appealing additions to homes or public spaces. The adaptability of 3D solar panels opens up new possibilities for urban environments where space is at a premium. As interest grows, so does research into optimizing their performance further.
Advantages of Using 3D Solar Panels
3D solar panels offer several unique benefits that set them apart from traditional designs. Their innovative structure allows for greater surface area, which means more sunlight can be captured throughout the day.
Another advantage is their ability to maximize energy efficiency. The angled surfaces of 3D panels can capture sunlight at different times and angles, ensuring they harness as much energy as possible. Aesthetic appeal plays a role too.
These panels can blend seamlessly into various architectural styles, enhancing rather than detracting from the overall look of a building. Additionally, 3D solar panels often require less space for installation due to their vertical design.
This feature makes them ideal for urban settings where land is limited or where rooftops may not suffice. Many users report lower maintenance costs over time since these systems are designed with durability in mind.
Step-by-Step Guide to Building a 3D Solar Panel
Step #1: Design and Planning
Design and planning are crucial steps in building a 3D solar panel. Start by determining the size and shape that will best suit your needs. Consider where you intend to place the panel; this affects its efficiency.
Sketch out your design on paper or use software for precision. It’s essential to factor in the angle of sunlight throughout the day. A well-angled panel can capture more energy.
Next, decide on how many solar cells you want to include. This affects both power output and dimensions. Be mindful of spacing between cells for optimal performance.
Think about aesthetics as well as functionality. Your 3D solar panel should blend seamlessly into its environment while serving a practical purpose. Taking time during this phase ensures a smoother build process ahead.
Step #2: Gathering Materials
Gathering materials is a crucial step in building your 3D solar panel. Start by sourcing high-quality photovoltaic cells, as they will be the heart of your panel.
Next, you’ll need a sturdy frame. Consider using aluminum or PVC for durability and lightweight properties. These materials ensure that your solar panel can withstand various weather conditions while remaining easy to handle.
Don’t forget about insulation materials and protective coverings, like tempered glass or plexiglass. They not only shield the solar cells but also improve efficiency by reducing energy loss.
Stock up on wiring components such as connectors and junction boxes. Proper electrical connections are vital for maximizing power output from your DIY creation.
With everything gathered, you’ll be ready to move forward confidently into the construction phase of your project!
Step #3: Constructing the Frame
Constructing the frame is a pivotal step in building your 3D solar panel.
Start by measuring the dimensions based on your design plans. Precision matters here, as it sets the foundation for everything that follows.
Use sturdy materials like aluminum or PVC pipe to ensure durability. A strong frame can withstand various weather conditions and support the weight of solar cells without bending or breaking.
Assemble the pieces using screws or bolts for a secure fit. Make sure all joints are tight; any loose connections could lead to structural weaknesses down the line.
If you’re feeling creative, consider adding an adjustable angle feature to optimize sunlight capture throughout different times of day. This simple addition can enhance efficiency significantly.
Once assembled, check for any sharp edges or protruding parts that might pose safety risks later on. Smooth out rough areas to keep your project safe and user-friendly.
Step #4: Adding the Solar Cells
Now it’s time to bring life to your 3D solar panel by adding the solar cells. Carefully select high-quality photovoltaic cells for optimal energy conversion. These cells are crucial as they transform sunlight into electricity.
Start by laying out your design on the frame. Ensure that each cell is positioned for maximum sun exposure throughout the day. Proper spacing will help avoid shading, which can significantly reduce efficiency.
Using a strong adhesive or soldering technique, secure each cell onto the frame. Take care not to damage any delicate components during this process.
Check all connections and ensure everything is tightly fastened before moving forward. This meticulous attention to detail will pay off in terms of performance and durability down the line.
Step #5: Connecting the Wiring
Once your solar cells are securely in place, it’s time to focus on connecting the wiring. This step is crucial for ensuring that your 3D solar panel functions correctly.
Start by identifying the positive and negative terminals of each solar cell. Use color-coded wires—red for positive and black for negative—to avoid confusion. Connect the cells in series or parallel, depending on your desired voltage output.
Use soldering techniques to secure connections if you’re comfortable with them. Alternatively, utilize connectors which make it easier to troubleshoot later on. Ensure all connections are tight; loose connections can lead to inefficiencies.
After wiring up the cells, connect everything to an inverter if you plan on converting DC power into AC power for household use. Double-check all connections before moving forward; a small mistake can affect performance significantly!
Maintenance and Care for 3D Solar Panels
Maintaining your 3D solar panels is crucial for optimal performance. Start with regular cleaning to remove dirt, dust, and debris that can block sunlight. A simple rinse with water often does the trick. Inspect the panels periodically for any signs of damage or wear.
Look for loose connections or cracked frames that could affect efficiency. Addressing these issues promptly will keep your system running smoothly. Ensure the wiring remains protected from environmental elements. Check for fraying or corrosion, especially in areas exposed to moisture.
Seasonal checks are a good practice as well. After heavy storms or snowfall, ensure everything is intact and functioning properly. Monitor energy output frequently. Any sudden drop might indicate an underlying issue needing attention right away. Regular care not only extends lifespan but also maximizes energy production throughout their use.
Cost Comparison with Traditional Solar Panels
When evaluating the cost of 3D solar panels versus traditional options, several factors come into play. Initial investment for 3D models might be higher due to specialized materials and design intricacies. However, their unique structure often allows for better energy capture.
Long-term savings are another consideration. With improved efficiency, 3D solar panels can generate more electricity over time. This translates to lower utility bills and a quicker return on investment. Maintenance costs should also factor into your decision.
Traditional systems may require more frequent upkeep compared to the robust nature of many 3D designs. Consider installation expenses. The complexity of mounting a 3D panel might lead to higher labor costs initially but could offer greater durability in the long run, potentially saving you money as time progresses. Each option has its benefits; understanding these nuances will help guide your choice effectively.
Conclusion
Building a 3D solar panel can be a rewarding project that not only enhances your technical skills but also contributes to sustainable energy solutions. With their unique design and efficient use of space, 3D solar panels are becoming increasingly popular among eco-conscious individuals.
The advantages of using these panels extend beyond mere aesthetics. They offer improved energy efficiency, versatility in installation, and the ability to maximize sunlight absorption throughout the day. By following our step-by-step guide, anyone can embark on this DIY journey with relative ease.
Maintaining your homemade solar panel will ensure its longevity and optimal performance. Regular checks for dirt or debris accumulation can help maintain efficiency levels. Additionally, understanding cost comparisons with traditional solar panels allows you to make informed decisions tailored to your needs.
Whether you’re motivated by environmental concerns or simply want to reduce your electricity bill, mastering how to build a 3D solar panel is an excellent skill set for any homeowner or enthusiast. Embrace the process; enjoy the benefits of generating clean energy from your very own creation!
4 thoughts on “How To Build A 3D Solar Panel”
Leave a Reply
Related Posts

How To Build A Smart Solar Box

How To Build Your Own Electric Bicycle
Hi Jack,
Wow! Thanks for your time and energy in putting together this informative article on how to build a 3D solar panel.
Your article explains in detail the rudimentary process of building a 3D solar panel. What catches my fancy most is the idea of building it at home (DIY) and the design and planning stage; the aspect of it being aesthetic and functional—accurate design, blending with the immediate surroundings, while still working optimally.
I remember sometime ago, when someone in a particular country in Africa was seeking more information on this alternative and clean source of energy (solar energy), the only information I was able to supply was on the traditional solar panel. I didn’t have the kind of knowledge and information I have now reading through your article about this advanced 3D solar panel.
Jack, Your great and informative article could also serve as a guide to those seeking to build a career in this direction and those who are in that field already, aside the facts that it’s eco-friendly, energy-cost-saving, etc.
However, could you in your next article suggest and name some high-quality solar panel brands? Brands that have a proven track record in your professional view of points.
I’ll surely share this article with the people that asked me about solar panel earlier.
Thanks for sharing this insightful article.
– Makinde
Hey Makinde,
Thank you for stopping by and sharing your thoughts with us about building your own 3D panels. Solar energy is a great alternative to fossil fuels and saving money on utility bills. Also with power outages happening more frequently around the world. Have a solar powered system makes sense.
We just had hurricane Helene hit our area here in western North Carolina. We were without power, cell phone and internet services for ten days. If it wasn’t for my solar powered generator, we wouldn’t have had any power at all. There was no fuel available in our area so those with gas powered generators were powerless.
It doesn’t matter what part of the world you live in, anything can happen at any time changing your life in seconds. The best thing we can all do is prepare the best we can and deal with what ever may come our way. You just never know what the future may bring go or bad.
A 3D solar panel system is state of the art technology and generates more power than a conventional solar powered system. The key to this is the configuration of the solar panels which harvest more energy from the sun. Stay tuned, I will put together a list of the best solar panels money can buy.
Best wishes Makinde,
Thanks for this article. This is sure going to be my go to guide as soon as I am ready to build my own 3d Solar panel. You made the article really informative and removes any confusion. I really appreciate the step-by-step guide to building the panels, the materials I need, the wiring and the whole construction process as a whole. With the way the world is going, pretty much everyone should be looking at learning this in my opinion.
Hey Kris,
You are very welcome and I’m so happy you found our guide on how to build 3D solar panels useful. I tried to cover every angle possible in this DIY guide so anyone could successfully build their own 3D solar panel system. Even though the 3D solar panel system uses the same technology as a standard solar panel system.
The 3d solar panel system generates much more power and is more efficient. It’s all because of the way the solar panels are arranged maximizing the amount of solar energy you can store. So make sure you have more batteries to store your energy because you are going to need it.
Thanks for stopping by today and sharing your thoughts with us today. If you attempt to build your own 3D solar panel system. Please come back and share your experience with us. I would love to know how it turns out and how it is working for you as well. Good luck on your project!
Best wishes,