How To Recondition A Forklift Battery
In this guide, we’ll walk you through how to recondition a forklift battery step by step. Forklift batteries are the unsung heroes of warehouses and distribution centers. They power essential machinery that keeps operations running smoothly.
However, like all things in life, these batteries have a lifespan. When they start to show signs of weakness, it can disrupt your workflow and lead to costly downtime. But what if you could breathe new life into an aging forklift battery?
Reconditioning not only saves money but also helps reduce waste—a win-win for both your budget and the environment. Whether you’re looking to extend its lifespan or enhance performance, you’ll be equipped with all the knowledge needed for revitalization!

Signs of a Weak or Damaged Forklift Battery
Detecting a weak or damaged forklift battery early can save time and money. Look for slow lifting capabilities. If your forklift struggles to lift loads as it once did, that’s a red flag. Unusual noises during operation can also signal trouble.
Pay attention to any popping, hissing, or excessive vibration coming from the battery compartment. Frequent need for recharging is another indicator of declining performance. If you find yourself plugging in more often than before, consider assessing the health of your battery.
Check for physical signs like corrosion around terminals or leakage of fluid. These issues not only hinder functionality but can pose safety risks as well. Recognizing these symptoms promptly can help prevent unexpected downtime and costly repairs down the line.
Tools and Materials Needed for Reconditioning
To recondition a forklift battery effectively, you’ll need some essential tools and materials. Start with safety gear. Gloves and goggles are crucial to protect yourself from potential acid spills. Next, gather multimeter equipment for testing voltage levels.
A hydrometer will help measure the specific gravity of the electrolyte solution in each cell. Have a battery charger on hand, ideally one designed for deep-cycle batteries. This ensures proper charging without damaging the cells.
Distilled water is necessary if your battery requires topping up during maintenance. Avoid tap water; impurities can harm performance. Cleaning supplies like baking soda and a brush should also be ready to tackle corrosion around terminals.
Have containers handy to safely dispose of any old electrolyte or waste material generated during the process. Having these items prepared will streamline your reconditioning efforts significantly.
Steps for Reconditioning a Forklift Battery
Step #1: Safety Precautions
Safety is paramount when reconditioning a forklift battery. Start by wearing appropriate personal protective equipment (PPE). Gloves and safety goggles are essential to protect your skin and eyes from corrosive materials.
Always work in a well-ventilated area. Battery fumes can be hazardous, so fresh air is necessary to avoid inhalation risks. Ensure you have access to proper ventilation before beginning the process.
Disconnect the battery from any power source prior to starting. This reduces the risk of electrical shock during your work.
Keep flammable materials away from the workspace as batteries can produce sparks or leaks that ignite nearby items.
Have a spill kit handy in case of accidental leakage; dealing with sulfuric acid requires prompt action for cleanup.
Staying aware of these precautions will create a safer environment while you focus on rejuvenating that forklift battery effectively.
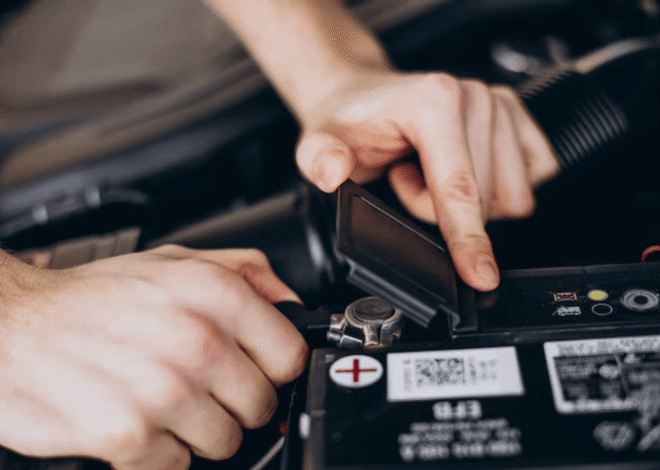
Step #2: Testing the Voltage and Specific Gravity of the Battery
Testing the voltage and specific gravity of a forklift battery is crucial for assessing its health. Start by using a digital multimeter to measure the voltage across the battery terminals. A fully charged battery should read around 12.6 volts or higher.
Next, you’ll want to check the specific gravity of each cell using a hydrometer. This tool will help determine the electrolyte concentration in your batteries, indicating their state of charge. Ideal readings typically range from 1.265 to 1.300 for well-functioning cells.
Record all measurements carefully for future reference. If you notice discrepancies between individual cells or if readings fall below optimal levels, it could signal deeper issues within the battery system that need addressing before proceeding with reconditioning efforts. Regular testing helps catch problems early and extends overall battery life.
Step #3: Charging the Battery
Charging the battery is a critical step in the reconditioning process. Begin by ensuring your charger is compatible with your forklift’s battery specifications. This will prevent any issues that could arise from using an incorrect charger.
Connect the charger to the battery terminals, making sure you attach positive to positive and negative to negative. Double-check these connections for safety.
Set your charger to a slow charge setting if possible. Slow charging promotes healthier cell recovery compared to fast charging, which can cause overheating or damage.
Keep an eye on the charging progress. Most chargers have indicators showing when it’s fully charged. It’s important not to overcharge, as this might lead to reduced lifespan or performance problems later on.
Once charged, allow some time for cooling before moving onto further steps in the reconditioning process. Proper attention during this phase sets a solid foundation for optimal battery function moving forward.
Step #4: Discharging and Equalizing the Battery Cells
Discharging and equalizing the battery cells is a crucial step in reconditioning a forklift battery. Begin by carefully discharging the battery to ensure that all cells reach a similar voltage level. This process helps prevent any single cell from becoming overworked, which can lead to further damage.
Use a resistive load or connect your forklift for this task. Monitor the discharge rate closely; aim for around 80% of the battery’s capacity before stopping.
Once discharged, it’s time to equalize those cells. Equalization involves charging each cell at a slightly higher voltage than normal, which helps balance their charge levels. This ensures that every cell operates efficiently during usage.
Keep an eye on temperature during this phase as excessive heat can indicate problems within specific cells. Adjust your approach if necessary, taking care not to harm any part of the battery unit in the process.
Step #5: Cleaning and Inspecting the Battery
Cleaning the forklift battery is crucial for optimal performance. Start by ensuring the area is well-ventilated and that you’re wearing protective gear, including gloves and goggles.
Use a mixture of baking soda and water to neutralize any acid spills on the battery terminals. Apply this solution with a soft brush. This helps prevent corrosion, which can affect connectivity.
After scrubbing away grime, rinse gently with clean water. Avoid getting moisture into cell openings as much as possible.
Next, inspect all connections carefully. Look for signs of wear or corrosion on cables and terminals. Replace any damaged components promptly to maintain efficiency.
Pay attention to physical cracks or bulges in the battery casing itself; these may indicate deeper problems that need addressing immediately. A thorough inspection combined with regular cleaning can significantly extend your forklift battery’s life.

Step #6: Adding Distilled Water (if necessary)
When reconditioning a forklift battery, maintaining the right electrolyte level is crucial. If you notice that the fluid in your battery cells appears low or below the recommended level, it’s time to add distilled water.
Using distilled water is essential because it lacks impurities found in tap water. These impurities can cause damage to the battery plates over time. Carefully remove any vent caps and check each cell individually.
If you find that some cells are noticeably dry, slowly pour distilled water until it reaches just above the lead plates but not overflowing. Avoid filling cells too high; this could lead to spillage when charging.
After adding water, always replace the vent caps securely. This keeps contaminants out while ensuring proper pressure inside each cell during operation. With this step completed, you’re one step closer to reviving your forklift’s power source effectively.
Step #7: Final Charging and Testing
After completing the earlier steps, it’s time to give your forklift battery a final charge. This process is crucial for restoring its capacity and ensuring optimal performance.
Connect your charger to the battery carefully. Make sure all connections are secure. Set the charger according to the manufacturer’s instructions for voltage and amperage. Monitor the charging progress closely during this phase.
Once fully charged, it’s important to test the battery again. Use a multimeter to check both voltage and specific gravity in each cell with a hydrometer. These readings will help you determine if reconditioning was successful.
If results show adequate levels, your battery is ready for use again. If not, consider troubleshooting or seeking professional advice before putting it back into service.
Tips for Maintaining a Healthy Forklift Battery
To maintain a healthy forklift battery, regular inspections are crucial. Check for signs of corrosion around the terminals and clean them promptly to ensure optimal conductivity. Proper charging practices also play an essential role.
Avoid overcharging or undercharging, as both can diminish battery life significantly. Use a quality charger designed specifically for your forklift’s power needs. Temperature matters too. Store batteries in a cool, dry environment away from direct sunlight to prevent overheating.
Don’t forget about water levels. Regularly check and top off with distilled water when necessary, especially after charging cycles to avoid damage from sulfation. Keep track of usage patterns. Knowing how often your battery is used allows you to schedule timely maintenance checks and prolong its lifespan effectively.
Benefits of Reconditioning vs. Buying a New Battery
Reconditioning a forklift battery can save you a significant amount of money. New batteries often come with high price tags, while reconditioning allows you to breathe new life into your existing one at a fraction of the cost. Another advantage is sustainability.
By choosing to recondition rather than dispose of old batteries, you’re reducing waste and contributing positively to the environment. Reconditioning also offers quicker turnaround times. You won’t have to wait for shipping or lead times associated with purchasing new equipment.
Additionally, the process can enhance your understanding of battery maintenance. This knowledge empowers you to extend the lifespan of your forklift’s power source in the long run. It allows for customization based on specific needs. You can tweak settings during reconditioning for optimal performance tailored to your working conditions.
Final Thoughts: Reconditioning a Forklift Battery
Reconditioning a forklift battery can be a rewarding experience that not only saves you money but also extends the life of your current equipment. By following the outlined steps carefully, you can revive a weak or damaged battery and restore its functionality.
Proper maintenance is key to ensuring optimal performance for as long as possible. Understanding how to recondition a forklift battery equips you with valuable knowledge that benefits both your operations and bottom line. With diligence and attention to detail, you’ll find that this process is not just feasible but often quite straightforward.
Whether you’re looking to save costs or reduce waste, reconditioning offers practical solutions worth considering in today’s economic landscape. Embrace this opportunity to enhance productivity while caring for your assets effectively.

2 thoughts on “How To Recondition A Forklift Battery”
Leave a Reply
Related Posts
How To Recondition A Boat Battery

How To Recondition A Cordless Drill Battery

This is a great guide on how to recondition a forklift battery! Thanks for sharing this valuable information.
It’s amazing how much money and waste can be saved by reconditioning these batteries instead of just replacing them. I’m curious, for those who have tried reconditioning, what’s been your biggest challenge in the process? And for those considering it, what’s holding you back? I’d also love to hear about any unexpected benefits you’ve experienced after reconditioning a battery. Let’s discuss it!
Eric
Hey Eric,
Thanks for stopping by and sharing your thoughts on how to recondition a forklift battery. Reconditioning a battery is simpler than you may imagine. My brother and I reconditioned his car battery last year and we had no real issues with the step-by-step process.
We just wanted to give it a try and see if it could really be done and to our surprise, it worked like a charm! The unexpected benefit we experienced was how easy it was to do it. So go ahead and give it a try but always remember safety first!
Best wishes,