How To Make Hardtack Biscuits
Welcome, today we are going to learn how to make Hardtack biscuits. Hardtack biscuits may not win any beauty contests, but they have stood the test of time as a staple food for adventurers and soldiers alike.
These simple yet durable crackers were designed to withstand long journeys, making them an ideal companion for those on the move. Whether you’re planning a camping trip or just want to explore culinary history in your kitchen, learning how to make hardtack biscuits can be both fun and rewarding.
With just a few basic ingredients and some patience, you can create your own batch of these historical treats. Not only will you appreciate their unique texture and flavor, but you’ll also gain insight into how generations before us sustained themselves during times of need. Ready to dive into this fascinating recipe? Let’s get started!
A Brief History of Hardtack
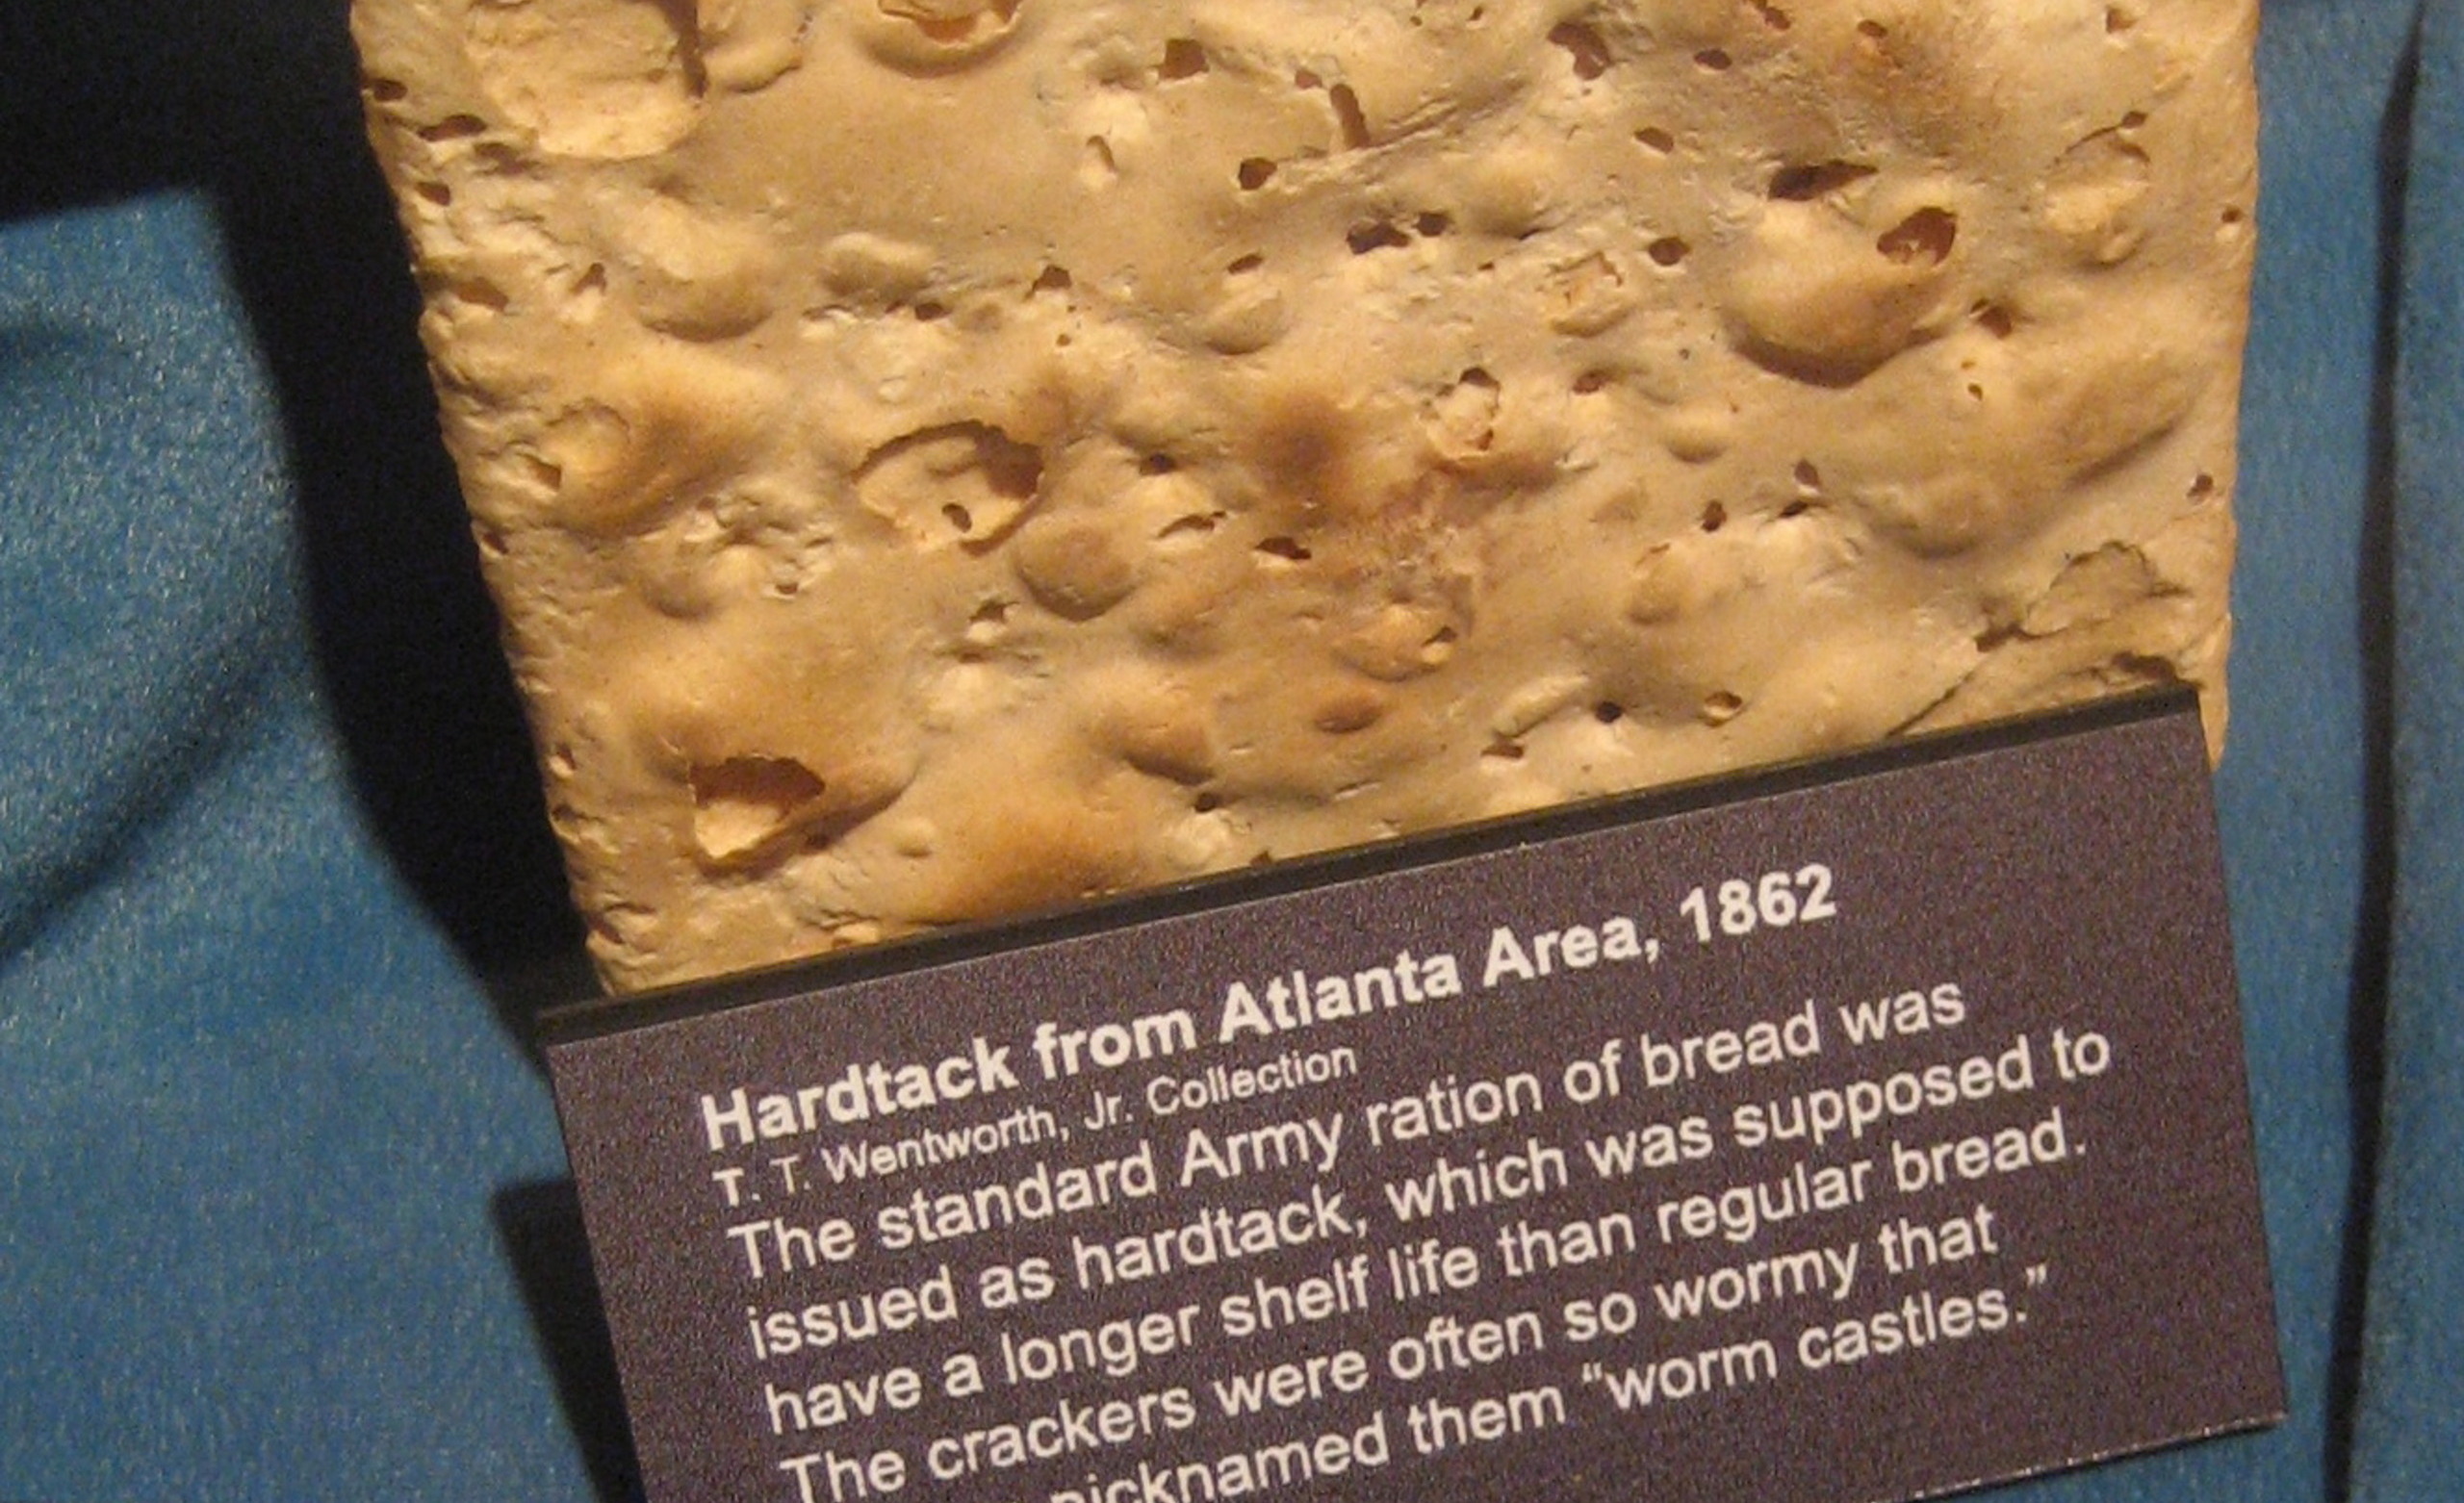
Hardtack has been a staple for sailors and soldiers since ancient times. This simple, dry biscuit was designed to last through long journeys when fresh food was scarce. During the Age of Exploration, naval crews relied on hardtack for sustenance on perilous voyages.
Its durability made it ideal for storing in ship holds. It could withstand moisture and pests better than other provisions. In the 19th century, hardtack became synonymous with military rations during conflicts like the American Civil War. Soldiers consumed it as a primary source of energy while facing harsh conditions.
Despite its unappealing texture and taste, hardtack served an essential purpose. It provided nourishment when no alternatives were available. Today, this historical food continues to capture interest among enthusiasts of traditional cooking and survival skills.
Ingredients and Equipment Needed
To make hardtack biscuits, you’ll need a few simple ingredients. The foundation lies in flour, ideally all-purpose or whole wheat. Both options provide the necessary structure and nutrition. Next up is water, which binds everything together. Use cold water for better results; it helps create a firmer dough.
Salt is essential too. A pinch adds flavor while also acting as a preservative, extending your hardtack’s shelf life. Now for the equipment: you’ll want to have measuring cups and spoons on hand for accuracy. A mixing bowl will be crucial in combining your ingredients effectively.
Don’t forget about parchment paper and a baking sheet—these are key to preventing sticking during the baking process. An oven will be required to bring it all together with heat that transforms your mixture into deliciously sturdy biscuits.
Step-by-Step Instructions for Making Hardtack Biscuits
Step 1: Mixing the Dough
Start by gathering your ingredients. You’ll need flour, water, and salt. Simple as that!
In a large bowl, combine 2 cups of flour with 1 teaspoon of salt. This adds flavor to your hardtack biscuits while keeping the mix basic. Stir them together until they are well blended.
Next, slowly add water to the dry mix. A quarter cup usually does the trick, but adjust as needed for consistency. Use your hands or a wooden spoon to bring everything together into a shaggy dough.
Knead it gently on a floured surface for about two minutes. The goal is to develop some elasticity in the dough without overworking it—too much kneading can make your biscuits tough.
Once you have a smooth ball of dough, you’re ready for the next step!
Step 2: Rolling and Cutting the Biscuits
Once your dough is perfectly mixed, it’s time for the fun part—rolling and cutting. Start by lightly flouring your countertop to prevent sticking. This step ensures that your hardtack biscuits won’t cling stubbornly to the surface.
Take a rolling pin and gently flatten the dough to about half an inch thick. The thickness matters; too thin, and they might burn; too thick, and they won’t dry out properly.
Next comes the cutting. Use a sharp knife or cookie cutter to create squares or rectangles, typically around 3 inches wide. Feel free to get creative with shapes if you’re in the mood!
After cutting, make sure each biscuit has its own space on a baking sheet lined with parchment paper. This allows for even cooking without crowding them together during baking!
Step 3: Pricking and Baking the Biscuits
Now that your biscuits are shaped, it’s time to prick and bake. This step is essential for achieving the traditional hardtack texture.
Using a fork or toothpick, gently poke holes in each biscuit. These tiny vents allow steam to escape during baking, preventing them from puffing up too much.
Preheat your oven to 375°F (190°C). Line a baking sheet with parchment paper for easy cleanup. Place the pricked biscuits on the sheet, giving them space to expand slightly as they cook.
Bake for about 30 minutes until they’re golden brown. Keep an eye on them; you want a firm exterior but not overly browned. The biscuits should be crunchy once cooled, perfect for long-term storage or snacking later!
Letting them cool completely will enhance their hardness—as hardtack should be! Enjoy watching this age-old recipe come together right before your eyes.
Tips for Flavoring Hardtack
Hardtack is a blank canvas. Don’t hesitate to get creative with flavors. A pinch of salt enhances the biscuit’s natural taste and adds a rustic touch.
Consider incorporating herbs into your dough for an aromatic twist. Dried rosemary or thyme can elevate your hardtack, making it more enjoyable.
For those who prefer sweetness, mix in some sugar or honey. This creates an interesting contrast when paired with savory toppings.
Spices are another excellent option. A sprinkle of cinnamon or nutmeg can transform basic hardtack into something special.
If you want to add texture, try throwing in seeds like sesame or flaxseed during mixing. These not only provide crunch but also boost nutritional value.
Experimenting with different flavor combinations allows you to customize your hardtack biscuits to suit your palate perfectly.
Tips for Storage and Serving
Once you’ve made your hardtack biscuits, proper storage is key to maintaining their longevity. Keep them in an airtight container at room temperature. This will help prevent moisture from ruining their crisp texture.
If you plan on storing them for an extended period, consider vacuum-sealing the biscuits. This method keeps air out and prolongs freshness significantly.
When it comes to serving hardtack, think outside the box. They can be enjoyed plain or paired with spreads like peanut butter or cheese. For a twist, crumble them into soups for added texture.
Some people enjoy soaking hardtack in water or broth before eating to soften it up. Experiment with different liquids for varied flavors—stock works wonderfully! Don’t hesitate to get creative; these simple biscuits can complement many dishes when prepared thoughtfully.
Creative Ways to Use Hardtack Biscuits
Hardtack biscuits can be surprisingly versatile in the kitchen. Try crumbling them into soups or stews for added texture and a hearty flavor boost. They absorb liquids well, making your meals more satisfying.
For a snack, spread some peanut butter or cheese on top of hardtack. It transforms a simple biscuit into a delicious treat that’s perfect for hiking or camping trips.
If you’re feeling adventurous, crush hardtack and use it as a breadcrumb substitute in casseroles or meatloaf recipes. This method adds an interesting twist to traditional dishes.
You can even experiment by soaking hardtack in coffee or tea until soft, then enjoy them like biscotti alongside your favorite hot beverage. The unique taste will surprise you!
Conclusion
Hardtack biscuits are more than just a historical curiosity; they offer a simple and practical way to enjoy homemade snacks. Whether you’re exploring your culinary skills or seeking sustainable food options for camping trips, mastering how to make hardtack biscuits can be satisfying.
With only a few basic ingredients and minimal equipment, anyone can create these durable treats. The rich history behind them adds an intriguing layer of appreciation. Plus, their versatility allows for various uses in meals or as standalone snacks.
Don’t shy away from experimenting with flavors or using them creatively in your kitchen. By understanding the proper storage methods and innovative serving suggestions, hardtack biscuits can become a staple in your pantry.
So why not give it a try? Dive into your own baking adventure today!


Thanks so much for this excellent guide on how to make hardtack biscuits! I love the straightforward recipe; its long shelf life makes it a valuable addition to my pantry. I’m excited to try it, especially experimenting with different flavors to mix things up. Great job explaining everything clearly—I’m inspired to start baking! Thanks again!
Hey Vlad,
You are going to be amazed at how easy it is to make hardtack biscuits at home. Make sure you have a great set of teeth before biting into a biscuit. They didn’t call it hardtack for nothing. Fun fact: During the American Civil War, hardtack was one the main food rations for both the Union and Confederate armies. Soldiers would dip their hardtack biscuits in coffee, soup and even water just to soften the biscuits.
You’ll see what I mean once you make your own hardtack biscuits. It is a great food source and is inexpensive to make. Hardtack is easy to store and can last for a very long time without spoiling. There are still examples of hardtack from the American Civil War around today and still edible. Thanks for stopping by and please come back and share your experience making your own hardtack at home. Best wishes and good luck Vlad.
I will have to tell my kids to get ready for an unforgettable weekend bonding experience! Making Hardtack Biscuits. It will not only be a delicious adventure but also a fantastic way to teach them about cooking and history at the same time.
I will have to give this a shot thanks for the post as it gives me something interesting to teach the kiddos.
Hey Chris,
Thanks for stopping by to learn how to make hardtack biscuits. Just so you know, hardtack is not very tasty at all. It is only made from flour and water so you do need to spice things up a bit. Also keep in mind that hardtack is as hard as a rock so you’ll have to soften it by dipping it in soup or something else to your liking. Thanks again for stopping by. Enjoy making hardtack biscuits with your kids. There’s nothing better than spending time with family. Best wishes to you and your family.