Starting A Fire With A Fire Plough
Starting a fire with a fire plough will take you on an ancient adventure. While modern conveniences have made fire-starting easier than ever before, there’s something profoundly satisfying about mastering age-old methods like this one. One ancient method of igniting flames is the fire plough—a technique that combines skill and patience to create a spark from wood friction.
Fire has been a cornerstone of human survival for millennia, providing warmth, cooking capabilities, and protection. Imagine standing in the great outdoors with nothing but natural materials at your disposal. You’re equipped not just with tools but with the knowledge passed down through generations.
The fire plough offers an opportunity to connect with our ancestors while honing your primitive skills. Whether you’re camping under a starlit sky or preparing for an emergency situation, knowing how to start a fire using this method can be both practical and exhilarating.
Ready to embrace this fascinating technique? Let’s dive into everything you need to know about starting a fire with a fire plough!
History of Fire Ploughing
Fire ploughing is an ancient technique that traces its roots back to prehistoric times. Early humans discovered the art of creating fire through friction, and the fire plough emerged as one of their innovative solutions. This method involves using a wooden stick to create heat by sliding it along a groove in another piece of wood.
Archaeological evidence suggests that various cultures across continents employed this technique long before modern conveniences existed. In many indigenous societies, the fire plough was not just a tool but also held cultural significance. It often symbolized survival and resilience.
As civilizations evolved, so did their methods for starting fires. Yet, despite technological advancements, fire ploughing remains appreciated for its simplicity and effectiveness in wilderness skills training today. The process connects us with our ancestors who mastered the elements long ago.
Advantages of Using a Fire Plough
Using a fire plough offers several compelling advantages for outdoor enthusiasts. One major benefit is the simplicity of the technique. It doesn’t require complex tools or materials, making it accessible to anyone interested in traditional fire-starting methods. Another advantage is its effectiveness in various weather conditions.
Unlike matches or lighters that may fail when wet, a fire plough can still produce enough friction to create sparks and ignite tinder. Fire ploughing also fosters a deeper connection with nature. The process encourages mindfulness as you engage directly with your environment, selecting suitable wood and preparing your workspace thoughtfully.
Furthermore, mastering this skill can be incredibly rewarding. Successfully starting a fire using just your hands and natural materials instills confidence and self-sufficiency, essential traits for survival situations or camping adventures.
Disadvantages of Using a Fire Plough
While fire ploughing can be an effective method for starting a fire, it does come with its drawbacks. One notable disadvantage is the physical effort required. Creating friction through a fire plough demands strength and endurance, which may not suit everyone—especially in challenging outdoor conditions.
Additionally, success isn’t guaranteed. It often takes multiple attempts to generate enough heat and spark to ignite the tinder. This trial-and-error process can lead to frustration. Another concern lies in environmental factors.
Wet or damp ground makes it nearly impossible to produce sufficient friction, leaving you without a reliable means of ignition when you need it most. There’s the learning curve involved. Newcomers may find themselves struggling initially before mastering this ancient technique, making other methods more appealing for those needing quicker results.
Materials Needed for a Fire Plough
To embark on the journey of starting a fire with a fire plough, you’ll need a few essential materials. First and foremost, select two sturdy pieces of wood: one for the plough itself and another as your baseboard. Softwoods like pine or cedar are ideal choices due to their fibrous nature.
Next, gather some dry tinder. This could be shredded bark, dried grass, or fine twigs that will catch the spark easily. You’ll also want kindling—small sticks about pencil thickness—to help transition from tinder to larger fuel once your flame is established.
A sharp knife will come in handy for shaping both the plough and baseboard to ensure they fit together seamlessly during use. Having patience is vital since creating fire through friction requires practice and perseverance. With these materials ready at hand, you’re set to master this ancient technique!
Step-by-Step Guide: Starting a Fire with a Fire Plough
Step 1: Preparing the Ground
Before you can ignite a flame with your fire plough, the ground needs to be ready. Choose a dry area free from debris and flammable materials. This ensures safety while you work.
Clear away any leaves, twigs, or grass that might obstruct your process. You want a clean surface for maximum friction and efficiency. Look for soil that’s soft enough to allow the plough to carve into it easily.
Consider how level the ground is as well. An even surface makes it easier to control your movements when starting the fire. If possible, find a spot sheltered from wind; this keeps embers contained once you get going.
Taking these steps will lay the foundation for successful fire-making ahead. With everything prepped right, you’re one step closer to mastering this ancient technique!
Step 2: Shaping the Plough and Baseboard
Shaping the plough and baseboard is a critical step in mastering fire ploughing. Begin with a sturdy piece of wood, ideally hardwood for durability.
Carve one end into a sharp point or edge—this will serve as your friction surface against the baseboard.
The baseboard should be flat and wide enough to accommodate your movements while providing stability. Aim for smoothness; rough surfaces can hinder effective friction.
Make sure both pieces fit comfortably together, allowing you to apply consistent pressure without slipping. Experiment with angles; finding the right position will make all the difference during ignition.
This crafting phase requires patience and precision, so take your time to ensure everything aligns perfectly before proceeding further. Each detail matters when you’re starting a fire with such an ancient technique.
Step 3: Collecting Tinder and Kindling
Gathering the right materials is crucial when starting a fire with a fire plough. You’ll need tinder and kindling to create that initial spark.
Tinder should be dry, fluffy, and easy to ignite. Look for natural items like dried grass, leaves, or small twigs. Even birch bark is excellent due to its flammability.
As for kindling, opt for slightly larger sticks—about the thickness of a pencil works well. These will help transition from your tinder to bigger logs later on. Collect pieces from dead branches or fallen trees nearby.
Don’t forget about storage! Keep your collected materials dry by placing them in a sheltered spot until you’re ready to use them. This preparation sets you up for success as you move forward in your fire-starting journey.
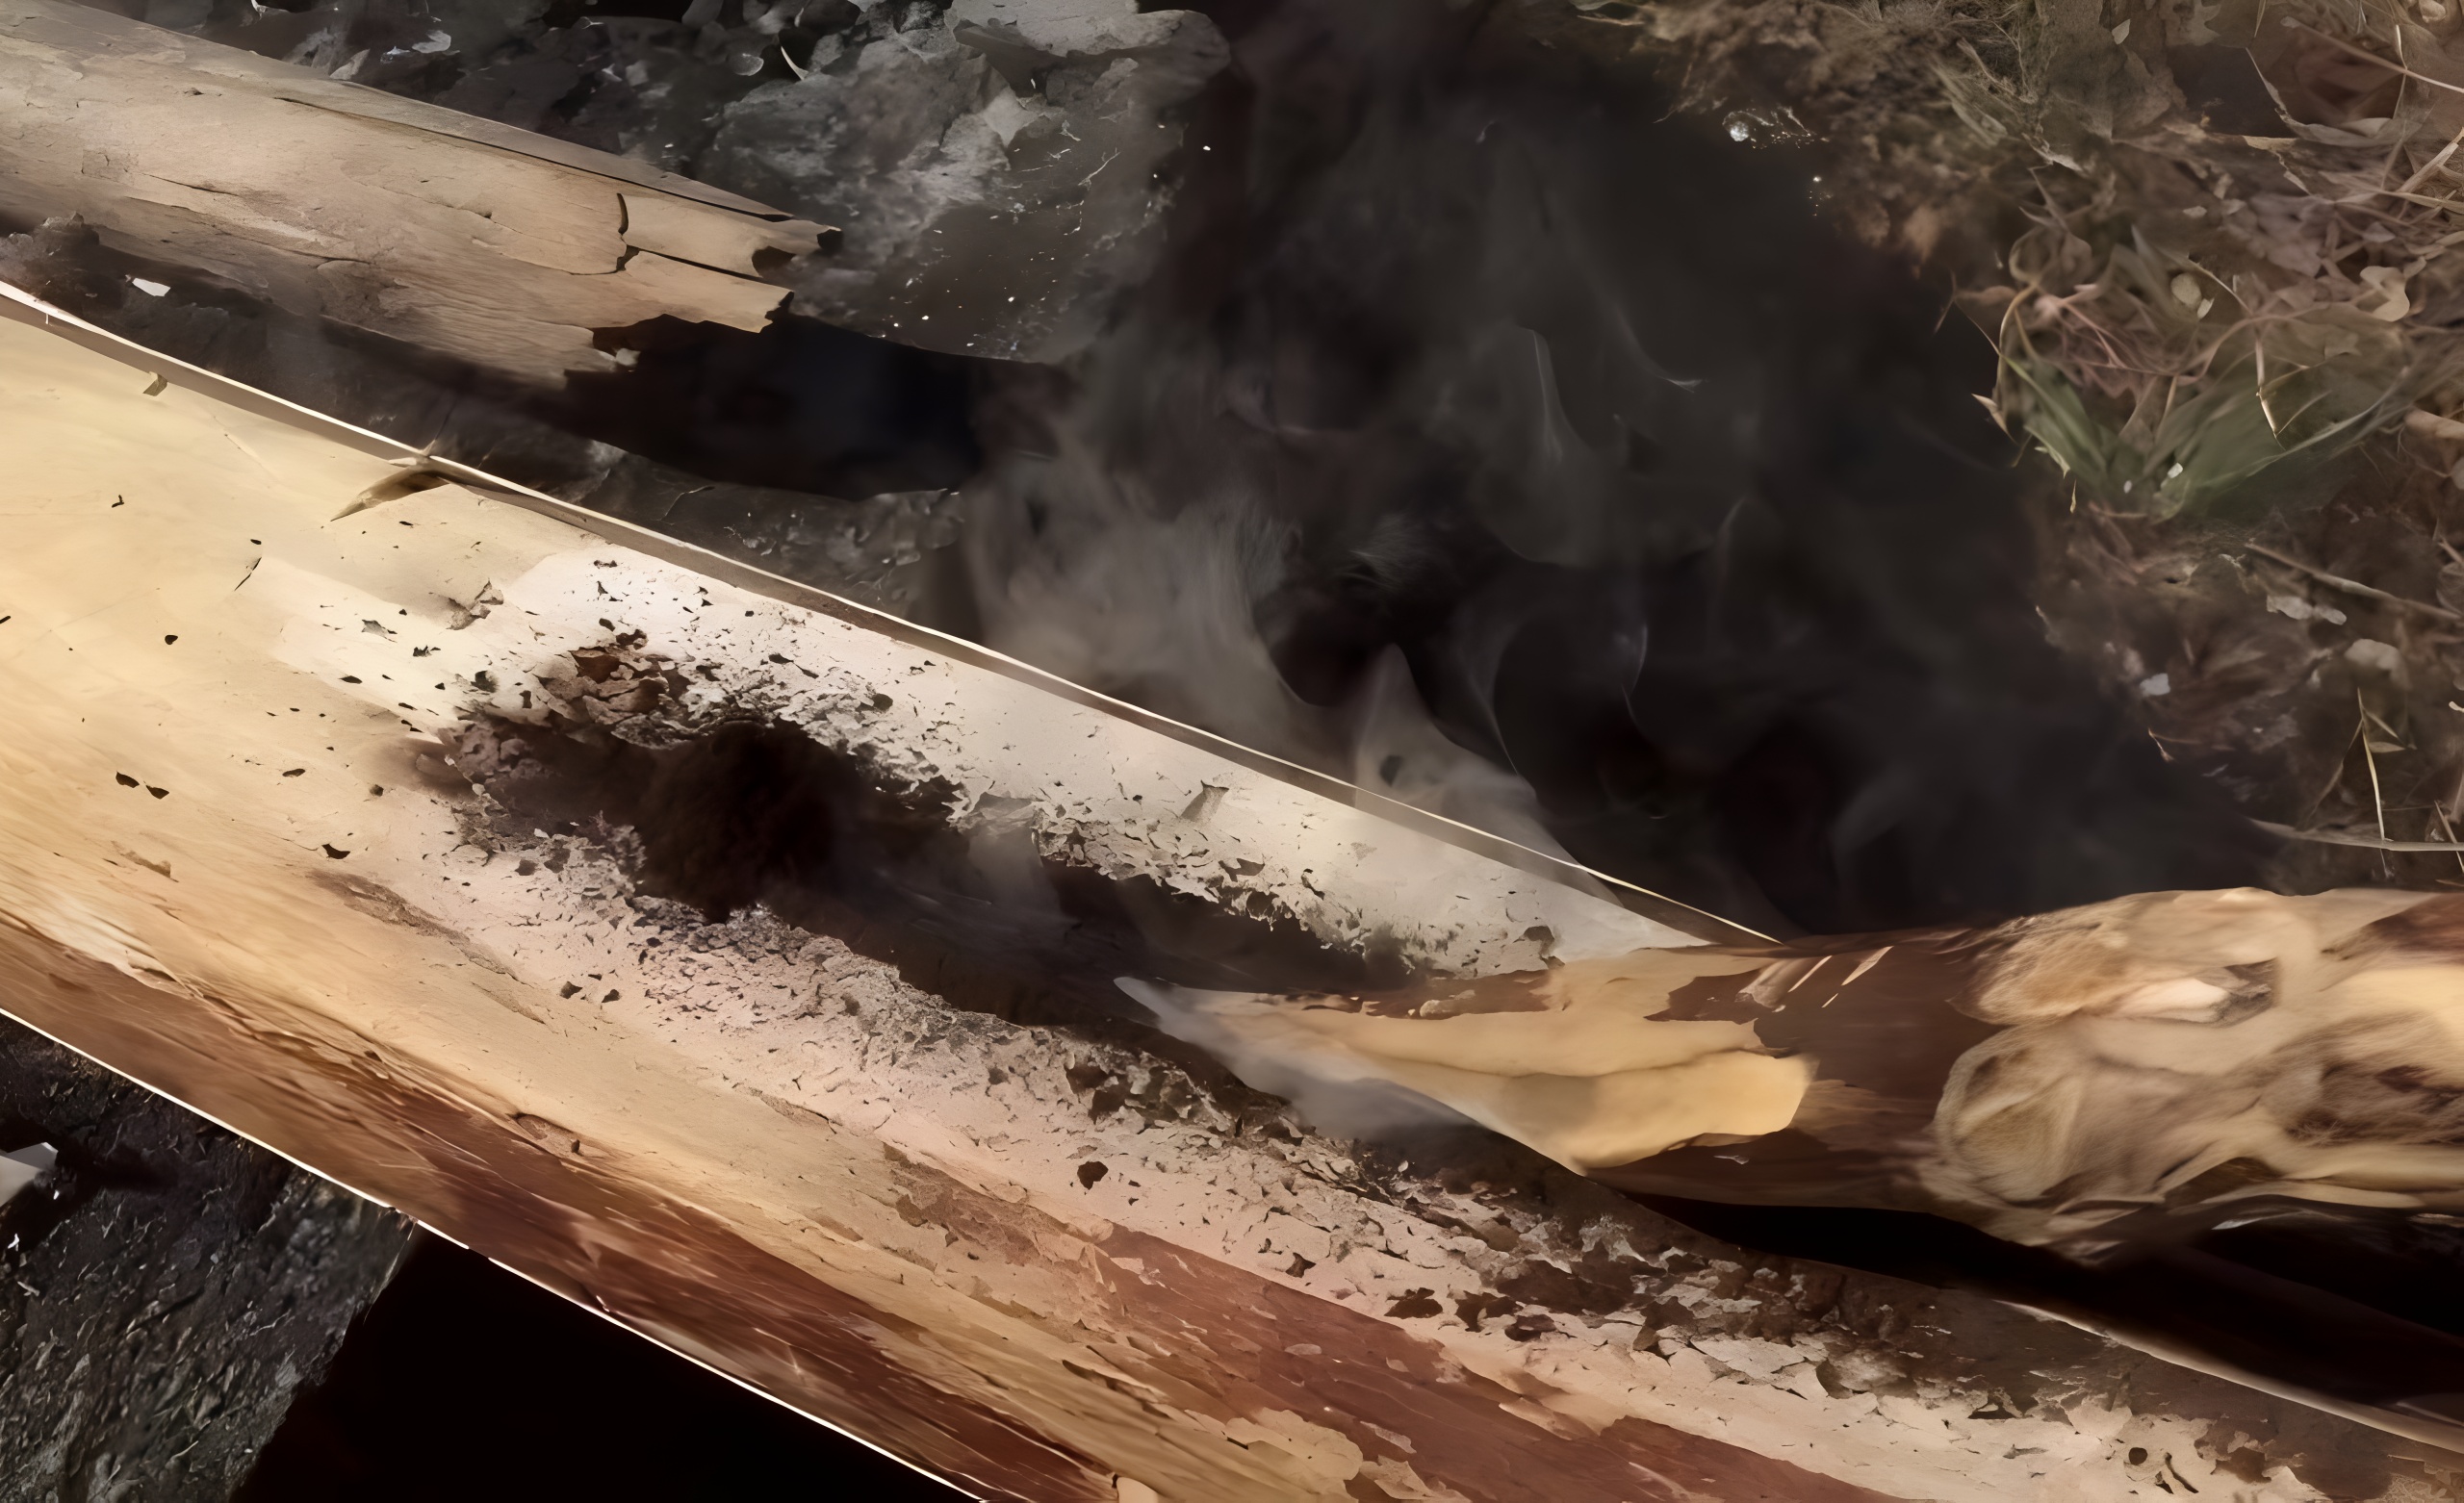
Step 4: Starting the Friction Process
Now it’s time to ignite the spark. Position your plough on the baseboard, ensuring both parts are secure.
With a steady grip, press down and pull back along the groove. This motion creates friction between the wood surfaces. The goal is to generate heat through this repetitive action.
Keep your movements deliberate and consistent. It’s crucial not to rush; patience is key here. As you continue, fine wood dust will accumulate in the groove – that’s good news!
This powder acts as a flammable material when enough heat builds up. Keep an eye on any smoke or signs of ember formation. When you see it start to smolder, you’re close!
Stay focused during this process. Distractions can hinder progress and slow down your fire-starting efforts significantly.
Tips and Tricks for Successful Fire Ploughing
To excel at fire ploughing, practice is key. Familiarize yourself with the technique before relying on it in an emergency. Choose dry wood for both the plough and baseboard. The drier the material, the easier it will be to generate friction and heat.
Position your body correctly while applying pressure to maintain a steady rhythm. This consistency is crucial for effective friction generation. Consider using softer woods for your baseboard; they tend to ignite more easily than harder varieties. Don’t rush through the process—patience can make all the difference when starting a fire this way.
Keep tinder materials handy nearby throughout your efforts. Quick access allows you to capitalize on any sparks that might fly during operation. Always remember: wind direction matters! Shield your work area from gusts that could extinguish fledgling flames or scatter embers away from your setup.
Safety Precautions when Using a Fire Plough
When using a fire plough, safety should always be a top priority. Start by ensuring that you’re in an open area away from flammable materials like dry grass or leaves. A clear space helps minimize the risk of unwanted fires. Always wear protective gear.
Sturdy gloves can prevent burns, while durable footwear guards against sharp debris and potential slips. Keep water or dirt nearby to extinguish any accidental sparks immediately. This simple precaution can save your surroundings from catching fire unintentionally.
It’s wise to have a buddy with you when starting a fire this way. They can assist if something goes wrong and help keep an eye on the environment around you during the process. Make sure you’re familiar with local regulations about outdoor fires. Understanding these rules ensures that your fire-making efforts remain safe and compliant with community guidelines.
Alternative Methods for Starting a Fire in the Out
When it comes to starting a fire outdoors, there are several alternative methods you can try. Each has its own charm and effectiveness. A flint-and-steel combination is popular among campers. Striking steel against flint creates sparks that ignite dry tinder quickly.
This method requires minimal materials, making it a favorite for survivalists. Another option is the bow drill technique. Using friction from a wooden spindle and bowstring can create enough heat to start an ember. It demands practice but offers a rewarding challenge.
Fire starter kits are also convenient. These often include wax-coated cotton balls or chemical ignitors designed to catch flame readily. Don’t overlook the good old magnifying glass! On sunny days, focusing sunlight onto dry leaves or grass can spark flames with precision.
Each of these methods offers unique experiences in mastering fire-making skills while enjoying nature’s beauty.
Conclusion: Starting a Fire with a Fire Plough
Starting a fire with a fire plough is an ancient technique that connects us to our ancestors and offers a unique challenge for modern adventurers. This method not only cultivates essential skills but also fosters a deep appreciation for the elements.
It can be rewarding to master, providing both warmth and comfort in outdoor settings. Equipped with the right materials, careful preparation, and patience, anyone can learn this skill. Embracing its advantages while being mindful of potential downsides will enhance your experience significantly.
Additionally, understanding safety precautions ensures you enjoy the process without unnecessary risks. As you venture out into nature or find yourself preparing for emergencies at home, remember that starting a fire with a fire plough embodies resilience and resourcefulness.
Whether you’re connecting with history or seeking self-sufficiency in wilderness survival scenarios, this age-old technique can ignite more than just flames; it sparks inspiration within us all. So grab your tools and embrace the journey—this could be the beginning of many fiery adventures ahead!
Related Posts

How To Survive Your Wife’s Death
Starting A Fire With A Ferro Rod
