Starting A Fire With A Ferro Rod
Welcome to our step-by-step guide on starting a fire with a ferro rod. When it comes to outdoor adventures, nothing beats the warmth and comfort of a crackling fire under the stars. But how do you get that fire roaring without relying on matches or lighters?
Enter the ferro rod—a small but mighty tool that can turn your survival skills up a notch. With just a few sparks, you can transform dry tinder into glowing embers, ready for roasting marshmallows or warding off the chill of night.
Whether you’re camping in the wild, hiking through rugged terrain, or preparing for an emergency situation, knowing how to start a fire with a ferro rod is an invaluable skill. It’s not only effective; it also connects you with ancient methods of survival—methods that have stood the test of time.
So grab your gear as we dive into everything you need to know about starting a fire with this essential piece of equipment!
Advantages of Using a Ferro Rod for Fire Starting
Using a ferro rod for fire starting offers reliability that few other methods can match. Unlike matches or lighters, it works in wet conditions and at high altitudes. This makes it an essential tool for outdoor enthusiasts. The lifespan of a ferro rod is impressive.
With proper care, it can produce thousands of strikes, ensuring you have plenty of opportunities to ignite a flame when needed. Additionally, the sparks generated by a ferro rod are extremely hot. They reach temperatures around 3,000 degrees Fahrenheit, allowing them to catch tinder easily even if it’s damp.
Moreover, using a ferro rod enhances your survival skills. It encourages you to learn more about natural materials available for fire creation while promoting self-sufficiency during wilderness adventures. The tactile experience of striking the rod adds another layer of satisfaction to the process as well.
Choosing the Right Ferro Rod
Choosing the right ferro rod is essential for effective fire starting. Not all ferro rods are created equal, and understanding their differences can make a significant impact on your success. First, consider the size. A longer rod can produce more sparks but might be cumbersome to carry.
Compact options fit easily in a pocket or survival kit while still delivering reliable performance. Next, look at the material composition. Most ferro rods are made from magnesium or iron alloys. High-quality materials will provide better durability and heat output.
Pay attention to the thickness as well; thicker rods last longer than slimmer ones, giving you more value over time. Think about additional features like built-in strikers or lanyards that improve usability in various scenarios. Choosing wisely enhances not just your fire-starting ability but also boosts overall outdoor preparedness.
Essential Materials Needed for Fire Starting with a Ferro Rod
To successfully start a fire with a ferro rod, the right materials are crucial. Begin with tinder—this can be dry leaves, grass, or even cotton balls soaked in petroleum jelly. The goal is to have something that ignites quickly.
Next, gather kindling. Small twigs and branches about the thickness of a pencil will help build your fire’s initial structure. They should catch fire easily from your glowing tinder. Also consider larger pieces of fuel wood for sustaining the flame once it’s established.
Aim for logs that vary in size; this helps create a steady burn as they ignite at different rates. Don’t forget tools like a knife to prepare your materials and an optional container for organizing everything. Being prepared sets you up for success when starting your fire!
Step by Step Guide: How to Start a Fire with a Ferro Rod
Starting a fire with a ferro rod is an art that anyone can master. It begins long before you strike the rod.
Step 1: Gather Tinder and Kindling
Gathering tinder and kindling is a crucial first step in the fire-starting process. Tinder consists of small, easily ignitable materials that catch sparks quickly. Look for dry leaves, grass, feathers, or even cotton balls. These items will help your fire ignite swiftly.
Next comes the kindling. This should be slightly larger than your tinder but still thin enough to catch flames easily. Twigs, small branches, and pine needles work well here. Aim for pieces about the thickness of a pencil.
Remember to collect these materials before you start the actual fire-making process. Having everything ready at hand creates an efficient workflow.
Keep them dry by storing them in a bag if you might encounter moisture outdoors. The right preparation sets you up for success when using your ferro rod later on!
Step 2: Create a Fire Lay
Creating a proper fire lay is essential for a successful fire. It sets the stage for your flames to thrive.
Start by selecting a flat, dry surface. Clear away any debris or flammable materials around your chosen spot to prevent unwanted fires.
Next, think about the structure of your fire lay. A popular choice is the teepee design, where you arrange kindling in a cone shape over your tinder bundle. This promotes airflow and helps ignite larger pieces of wood.
Alternatively, consider the log cabin method. Stack two larger logs parallel with some space between them and then place smaller sticks on top in two crossways layers—like building blocks.
Whichever configuration you choose, make sure it allows air circulation while securely holding everything in place. The right setup can mean the difference between a flicker and roaring flames!
Step 3: Prepare the Ferro Rod and Striker
To start your fire using a ferro rod, the next step involves preparing your tools. Grab your ferro rod and striker. Ensure both are clean; any dirt or debris can hinder performance.
Hold the ferro rod firmly in one hand while keeping it close to your tinder bundle. This positioning allows for an efficient transfer of sparks when you strike.
Now, take the striker in your other hand. Position it at a slight angle against the ferro rod—this increases friction and produces better sparks.
With everything ready, check that you have enough space around you to operate safely without distractions or obstacles that could interfere with striking accurately. Your focus should be solely on producing those vital sparks needed for ignition!
Step 4: Strike the Ferro Rod to Create Sparks
To ignite your fire, hold the ferro rod securely in one hand. The position matters; grip it firmly for control.
With your other hand, take a metal striker or even the back edge of a knife. Angle it slightly to catch the rough surface of the rod.
Now comes the magic: scrape downwards with quick, firm strokes. You’re aiming to create those hot sparks that will dance into your tinder bundle.
Timing is crucial. Don’t hesitate—swift movements generate more sparks. Keep an eye on where they land and adjust accordingly.
If you miss initially, don’t fret! Practice makes perfect. Each strike gets you closer to that desired flame.
Step 5: Transfer Sparks to Your Tinder Bundle
Once you’ve created those bright, dancing sparks from your ferro rod, it’s time for the delicate transfer. Carefully position the tinder bundle close to where the sparks land. This step requires a steady hand and some patience.
Aim for the center of your tinder nest. The goal is to catch that spark without losing momentum. If possible, tilt the bundle slightly upward; this angle can help capture any stray embers.
As soon as you see smoke or a small flame flickering, resist the urge to blow on it too hard. Gentle breaths can encourage growth without extinguishing what you’ve started. Keep an eye on it as it catches; that tiny spark holds potential for a roaring fire.
Watch how quickly your dry materials ignite with just a bit of care and focus. Each moment matters when nurturing that fragile beginning into something great!
Step 6: Add Kindling and Fuel Wood
Once your tinder bundle is glowing, it’s time to introduce kindling. This small, dry material helps sustain the fire and gives it a boost. Look for twigs or thin branches that can easily catch flame.
Place the kindling around your burning tinder in a teepee shape. This arrangement promotes airflow, which is crucial for building heat and sustaining the fire’s growth. Make sure not to smother the flames; space them out enough so they have room to breathe.
As the flames consume the kindling, gradually add larger pieces of fuel wood. Start with smaller logs before moving onto bigger ones. The key here is patience—let each layer ignite properly before adding more wood.
Monitor how everything interacts as you build up your fire. Adjusting placement can make all the difference in keeping those flames roaring strong!
Tips and Tricks for Successful Fire Starting with a Ferro Rod
When starting a fire with a ferro rod, preparation is key. Always have your tinder dry and finely shredded. Natural materials like dry grass or cedar bark work wonders. Practice your striking technique before you need it in an emergency.
A quick flick of the wrist can produce sparks that ignite even stubborn tinder. Consider using char cloth or cotton balls coated in petroleum jelly as part of your kit. These items catch sparks easily and burn longer, giving you more time to add kindling.
Adjust the angle of the ferro rod for optimal spark production. A downward strike often yields the best results. Protect your setup from wind if you’re outdoors. Creating a small windbreak can help maintain focus on getting that fire started without distractions.
Safety Precautions when Using a Ferro Rod
When using a ferro rod, safety should always be your top priority. Begin by ensuring you’re in an open area free from flammable materials nearby. This way, sparks won’t unintentionally ignite anything. Wear protective eyewear if you’re striking vigorously.
A stray spark can cause eye injuries, especially in windy conditions. Keep your hands steady and positioned correctly when using the striker. It’s easy to slip and misfire if you’re not careful. Additionally, avoid wearing loose clothing that might catch fire or obstruct movement while you work on starting your flame.
Make sure there is a water source or dirt nearby for extinguishing any unwanted flames quickly. Always have an emergency plan in case of unexpected flare-ups. Practice with your ferro rod before relying on it during critical situations like camping trips or survival scenarios—familiarity breeds confidence and enhances safety.
Alternative Fire Starting Methods
When it comes to fire starting, a ferro rod is just one of many methods. Some people prefer using matches for their simplicity and ease. A waterproof match can be a lifesaver in damp conditions. Lighters are another popular choice. They provide instant flames with minimal effort.
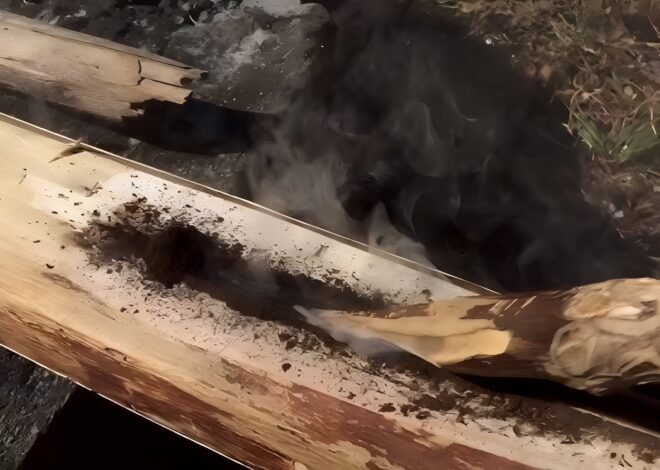
However, they rely on fuel, which can run out at the worst possible moment. For those who enjoy nature’s resources, flint and steel create sparks by striking two hard materials together. This process requires practice but connects you closely with traditional techniques.
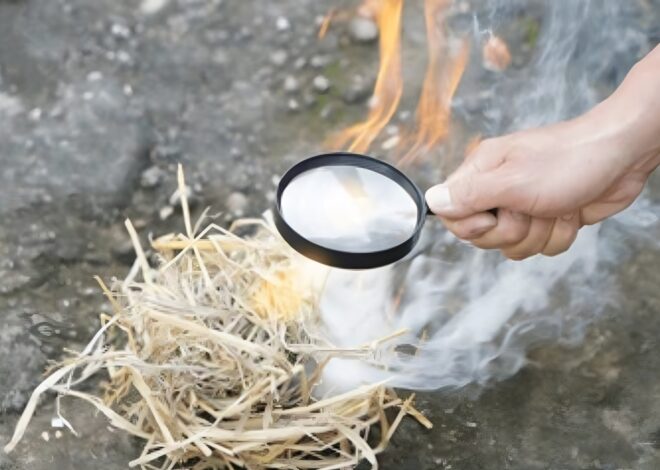
Another interesting method involves using a magnifying glass to harness sunlight. On bright days, this technique can ignite dry tinder quickly if aimed correctly. Some survivalists use chemical reactions involving potassium permanganate and glycerin for rapid ignition. While less common, these alternatives showcase the creativity behind fire-starting skills.
Conclusion: Starting A Fire With A Ferro Rod
Mastering the art of starting a fire with a ferro rod can be an incredibly rewarding skill. It’s not just about getting warm; it’s about survival, comfort, and even creating a cozy atmosphere during outdoor adventures. Ferro rods are compact, lightweight tools that offer reliability in various weather conditions.
Understanding their advantages sets you up for success. With practice and patience, anyone can learn how to use one effectively. The key is preparation—gather your tinder and kindling ahead of time to ensure everything is ready when you’re ready to strike. Remember that safety should always come first.
Fire starting is both powerful and potentially dangerous if handled improperly. As you refine your technique, don’t hesitate to explore alternative methods as well. Each approach adds layers to your skills and enhances your confidence in any situation where fire might be needed.
Embrace the journey of learning this essential skill—it opens doors to countless possibilities in nature’s embrace!


