Starting A Fire With A Bow Drill
Welcome to our step-by-step guide on starting a fire with a bow drill. Imagine standing in the great outdoors, surrounded by towering trees and the sounds of nature. The sun begins to set, casting a warm glow over your campsite. You reach for your gear, but instead of flicking on a lighter or striking a match, you decide to take it back to basics.
You’re about to embark on an ancient journey: starting a fire with a bow drill. This traditional technique is not just about survival; it’s an art form that connects us to our ancestors who relied on it for warmth and cooking long before modern conveniences existed.
Whether you’re prepping for a camping trip or looking to hone your wilderness skills, mastering the bow drill can be both rewarding and exhilarating. Ready to ignite some sparks? Let’s dive into this age-old practice and explore how you can create fire with just wood and string!
The History of Fire-Making
Fire has been a cornerstone of human civilization for thousands of years. Early humans likely discovered fire through natural occurrences, such as lightning strikes or volcanic eruptions. This newfound element transformed their lives. Initially used for warmth and protection, fire also became essential for cooking food.
The ability to prepare meals unlocked new dietary possibilities and improved nutrition. As societies evolved, so did the methods of creating fire. Ancient cultures refined techniques using flint stones or friction-based methods like striking metal against rock. These innovations spread across continents, each region contributing its unique approach.
The bow drill emerged as an efficient tool in this evolution. It allowed our ancestors to generate heat quickly and efficiently from wood friction—a game changer in survival skills. Throughout history, the mastery of fire-making has symbolized progress and ingenuity, influencing cultural practices around the globe while shaping humanity’s journey forward.
What is a Bow Drill?
A bow drill is a simple yet ingenious tool used for creating fire through friction. It consists of four main components: the spindle, fireboard, bow, and string. Each part plays a crucial role in generating enough heat to produce an ember.
The spindle is typically a straight stick that rotates against the fireboard—a flat piece of wood with a small notch carved into it. The bow, resembling its name, is made from flexible material like wood or cordage and helps turn the spindle efficiently when pulled back and forth.
The beauty of the bow drill lies in its simplicity. With practice and patience, anyone can master this ancient technique. It’s not just about survival; it’s also an art form that connects us to our ancestors who relied on similar methods for warmth and cooking long before modern conveniences existed.
Materials Needed for Making a Bow Drill
To create a successful bow drill, gathering the right materials is essential. You’ll need a sturdy baseboard from softwood, such as pine or cedar. This piece will serve as your foundation. Next comes the spindle. Choose a straight stick about 6-8 inches long and roughly the thickness of your finger.
Ideally, it should be made from a hardwood like oak or hickory for optimum friction. For the fireboard, select another thin slice of softwood. This will help catch the ember created during drilling. You’ll also require some string to connect your bow; natural fibers work best here—think jute or cotton.
Don’t forget about tinder! Dry grass, leaves, or bark can ignite quickly once you have that precious ember ready to go. Having all these materials on hand sets you up for success in starting a fire with this ancient technique.
Step-by-Step Guide to Using a Bow Drill:
Step 1: Preparing the Baseboard
Preparing the baseboard is a crucial first step when starting a fire with a bow drill. This piece will serve as the stable foundation for your fire-making process.
Choose hardwood for your baseboard—something like oak or maple works well. Avoid softwoods, which can easily splinter and won’t provide the durability you need.
Once you’ve selected your wood, cut it into a rectangular shape about 6 inches wide and 12 inches long. The thickness should be around half an inch to ensure it’s sturdy but not too heavy to manage.
Next, carve out a small notch on one side of the board. This notch will collect the ash produced during the drilling process, making it easier to ignite that all-important tinder later on.
With these preparations complete, you’re ready to move forward in creating fire from friction using this essential component of your bow drill setup.
Step 2: Creating the Spindle and Fireboard
Creating the spindle and fireboard is a crucial step in your bow drill journey. The spindle should be a straight, sturdy stick about 6 to 8 inches long. Choose materials like cedar or poplar for ease of use. A sharp knife can help you shape it evenly.
Next, turn your attention to the fireboard. This piece needs a flat surface with a small notch carved into it. The notch will catch the ember produced by friction between the spindle and board. Make sure it’s not too deep; just enough to hold that precious spark.
Once you’ve crafted both pieces, their fit is essential. The spindle must spin freely but snugly against the fireboard without wobbling too much. These components are vital for generating heat through friction, so take your time perfecting them before moving ahead.
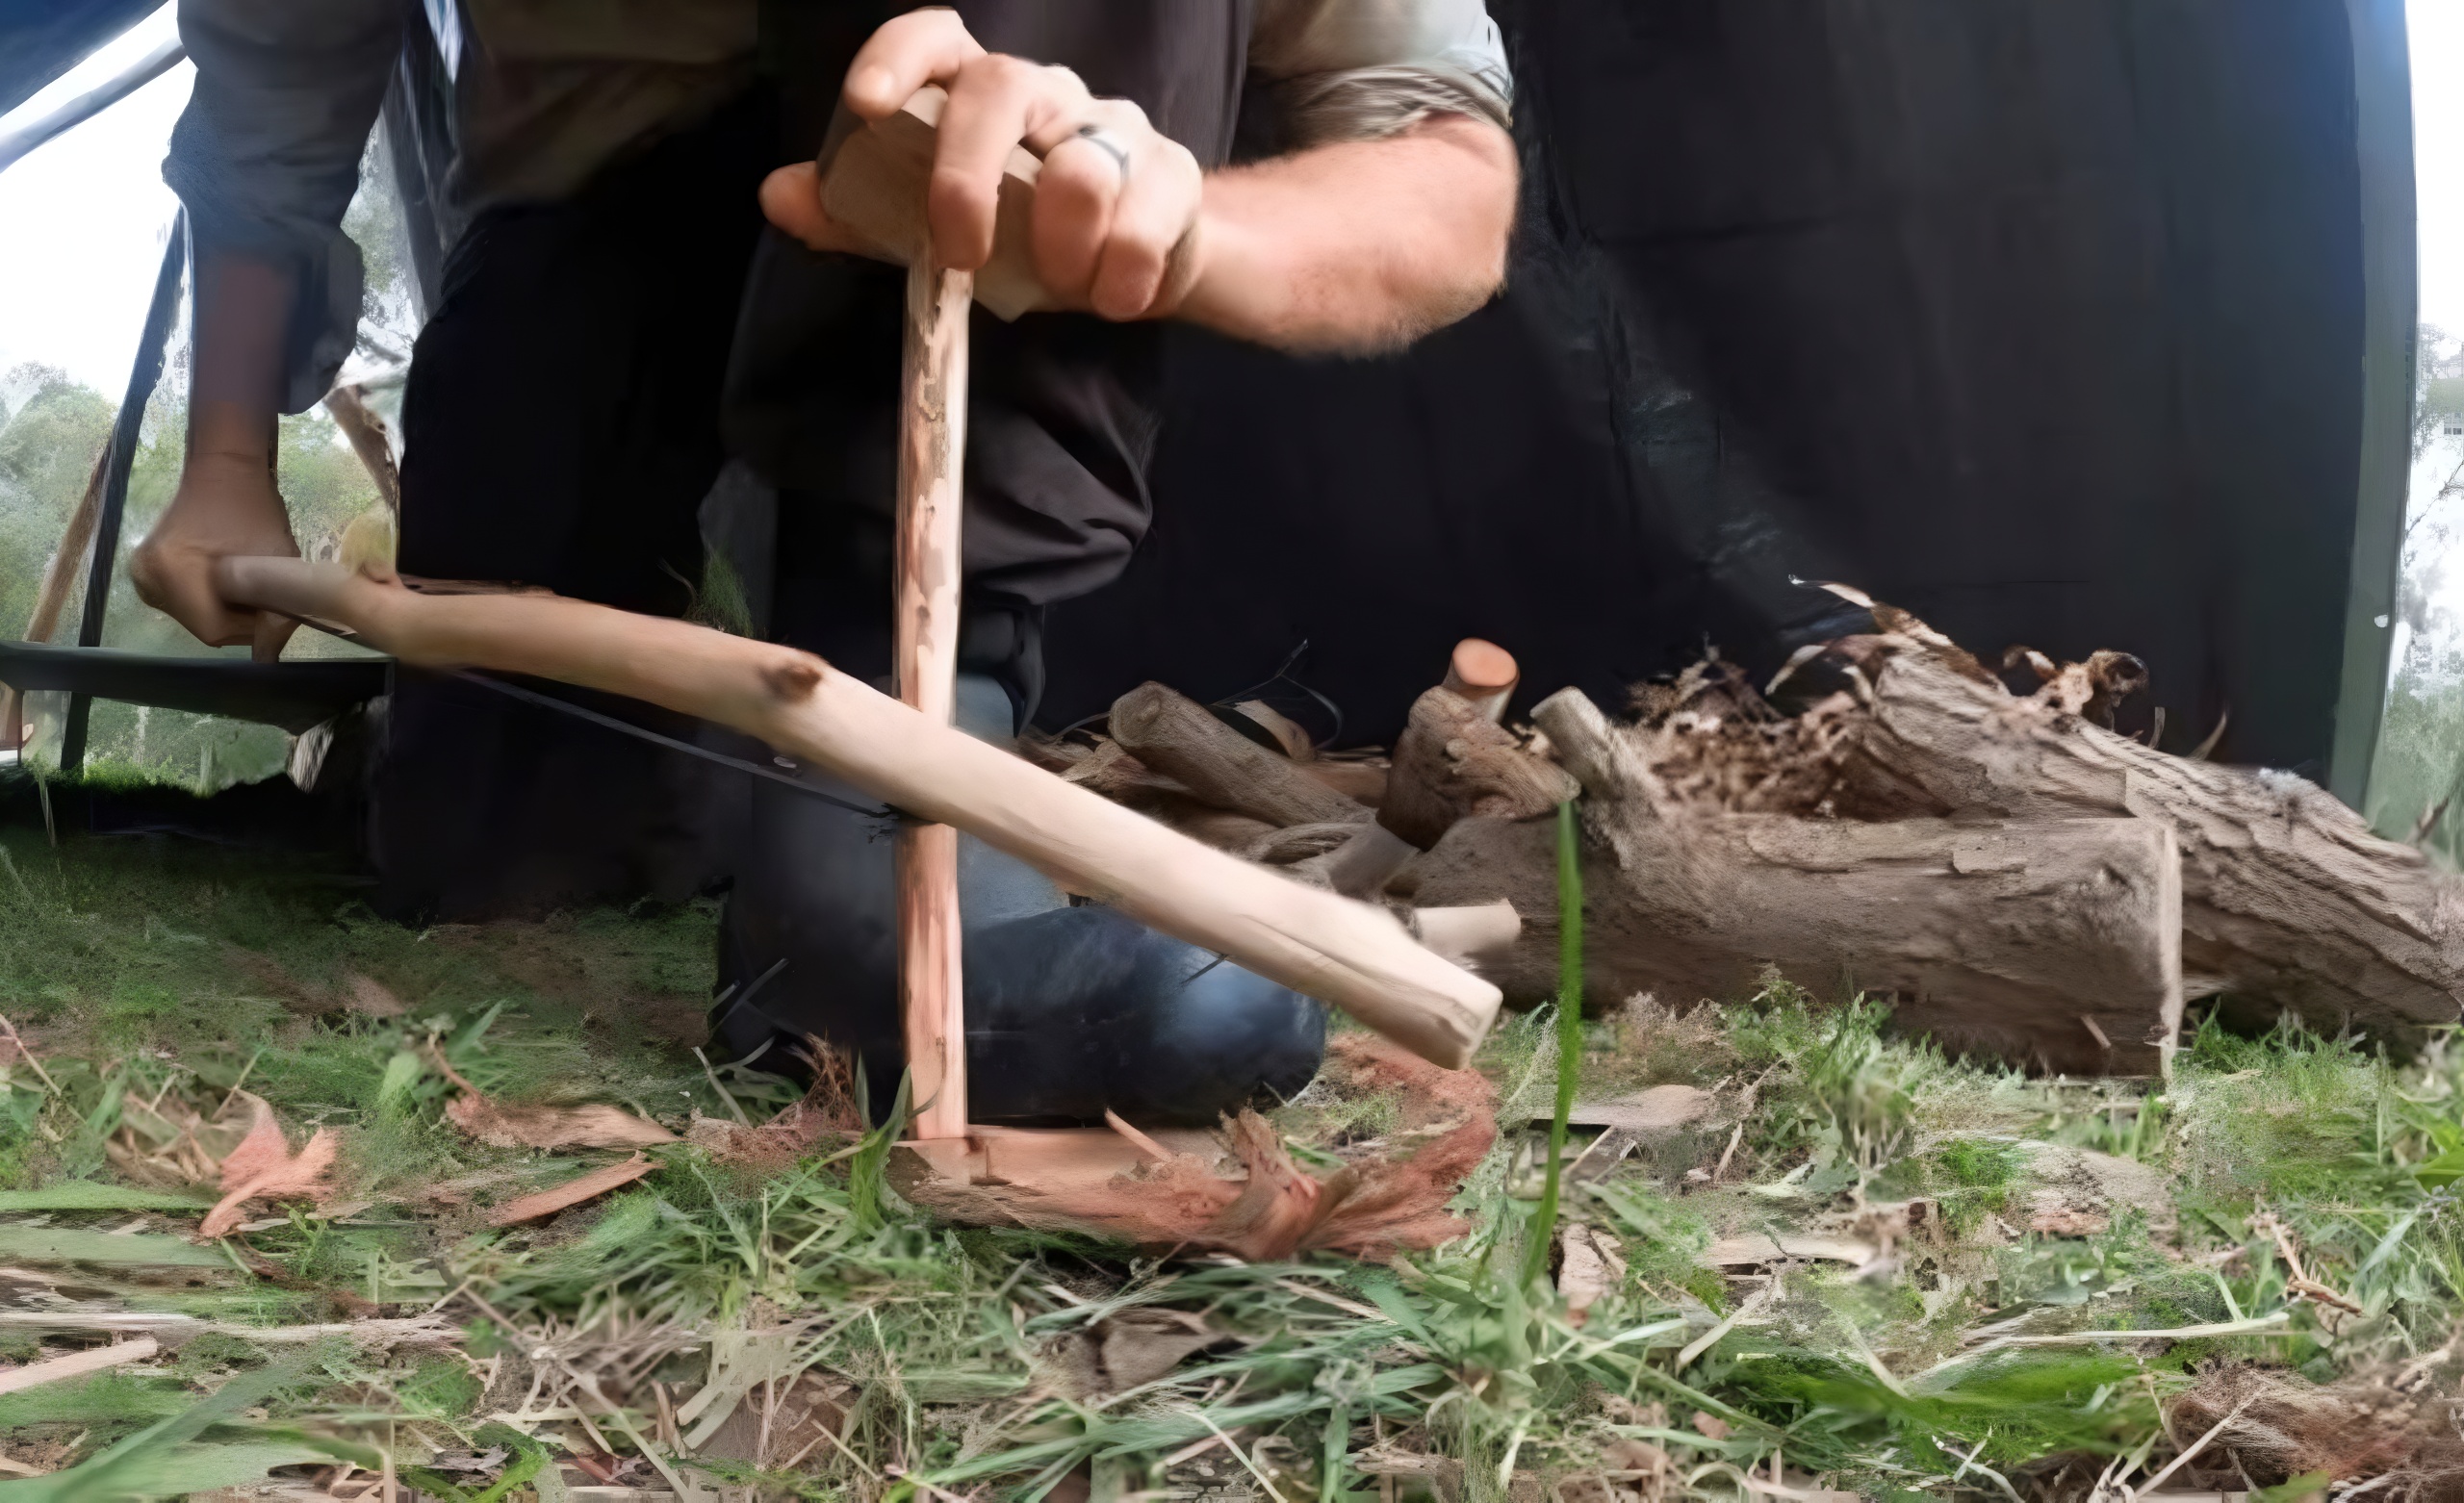
Step 3: Assembling the Bow and String
Assembling the bow and string is a crucial step in mastering the art of starting a fire with a bow drill. You’ll need to create an effective tool that can generate enough friction to ignite your tinder.
Begin by selecting a sturdy yet flexible branch for the bow. It should be about three feet long, allowing you to apply sufficient pressure while maintaining control. Bend it gently into a curved shape and tie off both ends securely with some cord or natural fiber.
Next comes the string, which connects the spindle to your bow. Use strong twine or even shoelaces if you’re improvising. The length of this string should allow for enough tension but not too tight that it hinders movement during operation.
Attach one end of the string to your spindle using a simple loop knot. This setup will ensure stability as you start generating heat through friction, bringing you closer to creating fire from scratch.
Step 4: Starting the Fire with the Bow Drill Technique
With your bow and spindle ready, it’s time to ignite that spark. Position the spindle in the notch of your fireboard, ensuring it fits snugly.
Now, press down on the top of the spindle with a bit of weight. This pressure is crucial; it creates friction as you start to move the bow back and forth smoothly.
Keep a steady rhythm. The speed matters—a consistent pace generates heat more effectively than rushing through each stroke. As you work, watch for fine dust accumulating at the base; this tells you you’re close to creating an ember.
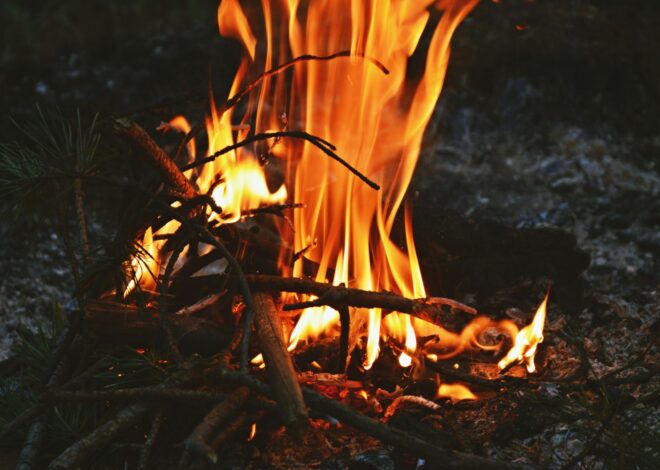
After several strokes, check for smoke rising from your fireboard. That’s a good sign! Once visible smoke appears, increase your efforts slightly until a small glowing ember forms at the bottom. Be patient—this step requires persistence but is incredibly rewarding when executed correctly.
Troubleshooting Common Problems
When starting a fire with a bow drill, you might encounter some challenges. One common issue is not producing enough friction. Ensure your spindle and fireboard are both made from dry, soft woods. If they’re too hard or damp, the process becomes nearly impossible.
Another problem can be inadequate dust accumulation. You need to create fine powder from the friction generated between the spindle and fireboard. Adjust your pressure—more isn’t always better; it’s about finding that sweet spot. If you don’t see any smoke, check for a proper fit between the spindle and fireboard.
It should rotate freely without wobbling but still maintain contact. If you’re struggling to ignite your tinder bundle after creating an ember, make sure it’s dry and fluffy enough to catch sparks easily. A little patience goes a long way when troubleshooting these hurdles in your quest for fire!
Benefits and Drawbacks of Using a Bow Drill
Using a bow drill offers several benefits, especially for those seeking a deeper connection with nature. It’s an ancient skill that fosters self-reliance and patience. Mastering this technique can increase your confidence in wilderness survival. On the flip side, it requires practice to achieve success.
Beginners may find it challenging and frustrating at first. The physical effort involved can be daunting, demanding strength and stamina. Moreover, weather conditions play a significant role in effectiveness. Damp materials or high humidity can hinder your chances of igniting a fire quickly.
Despite these challenges, many enthusiasts enjoy the meditative process of creating fire this way. It’s not just about warmth; it’s also about embracing traditional methods that link us to our ancestors’ survival techniques.
Safety Tips for Fire-Making
Safety is paramount when making fire, especially with primitive methods like a bow drill. Always choose an appropriate location away from flammable materials. A clear area helps prevent unwanted fires. Before you begin, ensure your surroundings are safe.
Keep water or dirt nearby to extinguish any accidental flames quickly. Wear protective gear if necessary. Gloves can protect your hands while handling tools, and eye protection is wise when working with sharp implements. Be mindful of wind direction. Wind can spread embers unexpectedly, leading to potential hazards.
Always have a plan for what to do in case of an emergency. Inform others around you about your activity so they’re aware and can assist if needed. Clean up thoroughly after you’re done. Ensure all embers are out before leaving the site to avoid unintentional fires later on.
Conclusion: Starting a Fire
Starting a fire with a bow drill is an ancient skill that connects us to our ancestors. It requires patience, practice, and the right materials. This technique not only serves as a practical method for creating fire in survival situations but also fosters a deeper appreciation for nature and self-sufficiency.
As you embark on your journey of starting fires this way, remember that mastery takes time. Don’t be discouraged by initial failures; each attempt brings you closer to success. Embrace the learning process and enjoy the experience of connecting with one of humanity’s most essential skills.
Whether you’re camping in the wilderness or just exploring primitive techniques at home, mastering the bow drill can be incredibly rewarding. So gather your materials, follow those steps carefully, and ignite your passion for outdoor skills while embracing this timeless craft!
Related Posts

How To Survive Your Wife’s Death
Starting A Fire With A Ferro Rod
