Making An Ice Lens To Start A Fire
Making an ice lens to start a fire is not just an impressive skill; it’s also an excellent way to connect with the outdoors while mastering a unique method of fire-starting. Have you ever found yourself in a survival situation, surrounded by nature’s beauty yet desperately seeking warmth and light?
What if I told you that with just a few simple steps, you could harness the power of ice to start a fire? Intrigued? You should be! Whether you’re prepping for your next outdoor adventure or simply looking to enhance your survival skills, creating an ice lens can provide both challenge and excitement.
Let’s dive into the fascinating world of turning water into flame!
The Science Behind an Ice Lens Fire Starter
An ice lens functions as a natural magnifying glass. Its curved surface focuses sunlight into a concentrated beam. This concentrated light generates enough heat to ignite tinder. The clarity of the ice is crucial. Impurities can scatter light, reducing effectiveness.
When made correctly, an ice lens can create a hot spot that reaches temperatures capable of lighting dry materials quickly. Temperature plays a role too; colder conditions make it easier for water to freeze clearly without bubbles or debris.
The shape of the lens matters as well; the curvature influences how effectively it gathers and directs sunlight onto your chosen ignition source. Understanding these principles transforms ordinary water into an innovative survival tool, showcasing nature’s power in unexpected ways.
Necessary Supplies for Making An Ice Lens
To create an effective ice lens, you’ll need a few essential supplies. Start with a clear container. This could be anything from a plastic bottle to a mold made from silicone. The clearer the material, the better your lens will work.
Next, gather some pure water. Tap water often contains impurities that can cause cloudiness in your ice. If possible, use distilled or filtered water for optimal clarity. You’ll also want access to freezing temperatures. A consistent cold environment is crucial for achieving solid results.
Additionally, have some materials ready for igniting your fire once you’ve created the lens—dry tinder and kindling are ideal choices. Consider bringing along gloves when handling frozen items; they can get quite slippery! With these supplies on hand, you’re well on your way to mastering this unique fire-starting technique.
Step-by-Step Guide to Creating an Ice Lens:
Creating an ice lens is a fascinating process. Let’s get started!
Step 1: Collecting Clear Water
The first step in making an ice lens to start a fire is collecting clear water. This may sound simple, but clarity is key. The clearer the water, the better your ice lens will perform.
Look for fresh sources of water like lakes or streams. If you can access spring water, that’s even better. Avoid murky or polluted areas; they’ll only complicate your project.
To enhance clarity, consider filtering the water through a clean cloth or coffee filter. This process helps remove impurities that can cloud your final product.
When gathering your water, fill a container that suits your desired mold shape later on. A shallow dish works well for wider lenses while deeper containers yield thicker pieces of ice.
Make sure to collect enough to fill your chosen mold completely—this ensures you have ample material to work with as you proceed in creating an effective fire-starting tool.
Step 2: Creating the Mold
Creating the mold is a crucial step in making an ice lens. You’ll want to choose materials that are easy to work with and can withstand freezing temperatures.
Common options include small containers, like cups or bowls made from silicone or plastic. These materials allow for smooth removal of the frozen water later on.
To shape your lens properly, consider using a round container. A cylindrical shape helps focus light more effectively when you’re ready to start your fire.
For added stability, place your chosen container inside another larger bowl or tray before filling it with water. This support will help prevent spills as you move towards the next steps.
Once everything is set up, ensure there are no air bubbles trapped in the bottom; they might distort your lens’s clarity when frozen. With this meticulous attention to detail, you’re one step closer to creating an effective fire-starting tool!
Step 3: Freezing the Water
Once your mold is ready, it’s time to freeze the water. The ideal temperature for this step is below freezing—32°F or 0°C.
Pour clear water into the mold carefully. Fill it just enough to avoid spills but not so full that it overflows as it freezes.
Place the mold in a stable spot where it won’t be disturbed. A flat surface works best. You don’t want shifting ice ruining your hard work.
Depending on environmental conditions, freezing could take several hours or even overnight. Check periodically for progress if you’re curious about how things are going.
You might notice some bubbles forming within the ice as it solidifies. These can affect clarity later, so aim to create a bubble-free result if possible by using very pure water and pouring slowly.
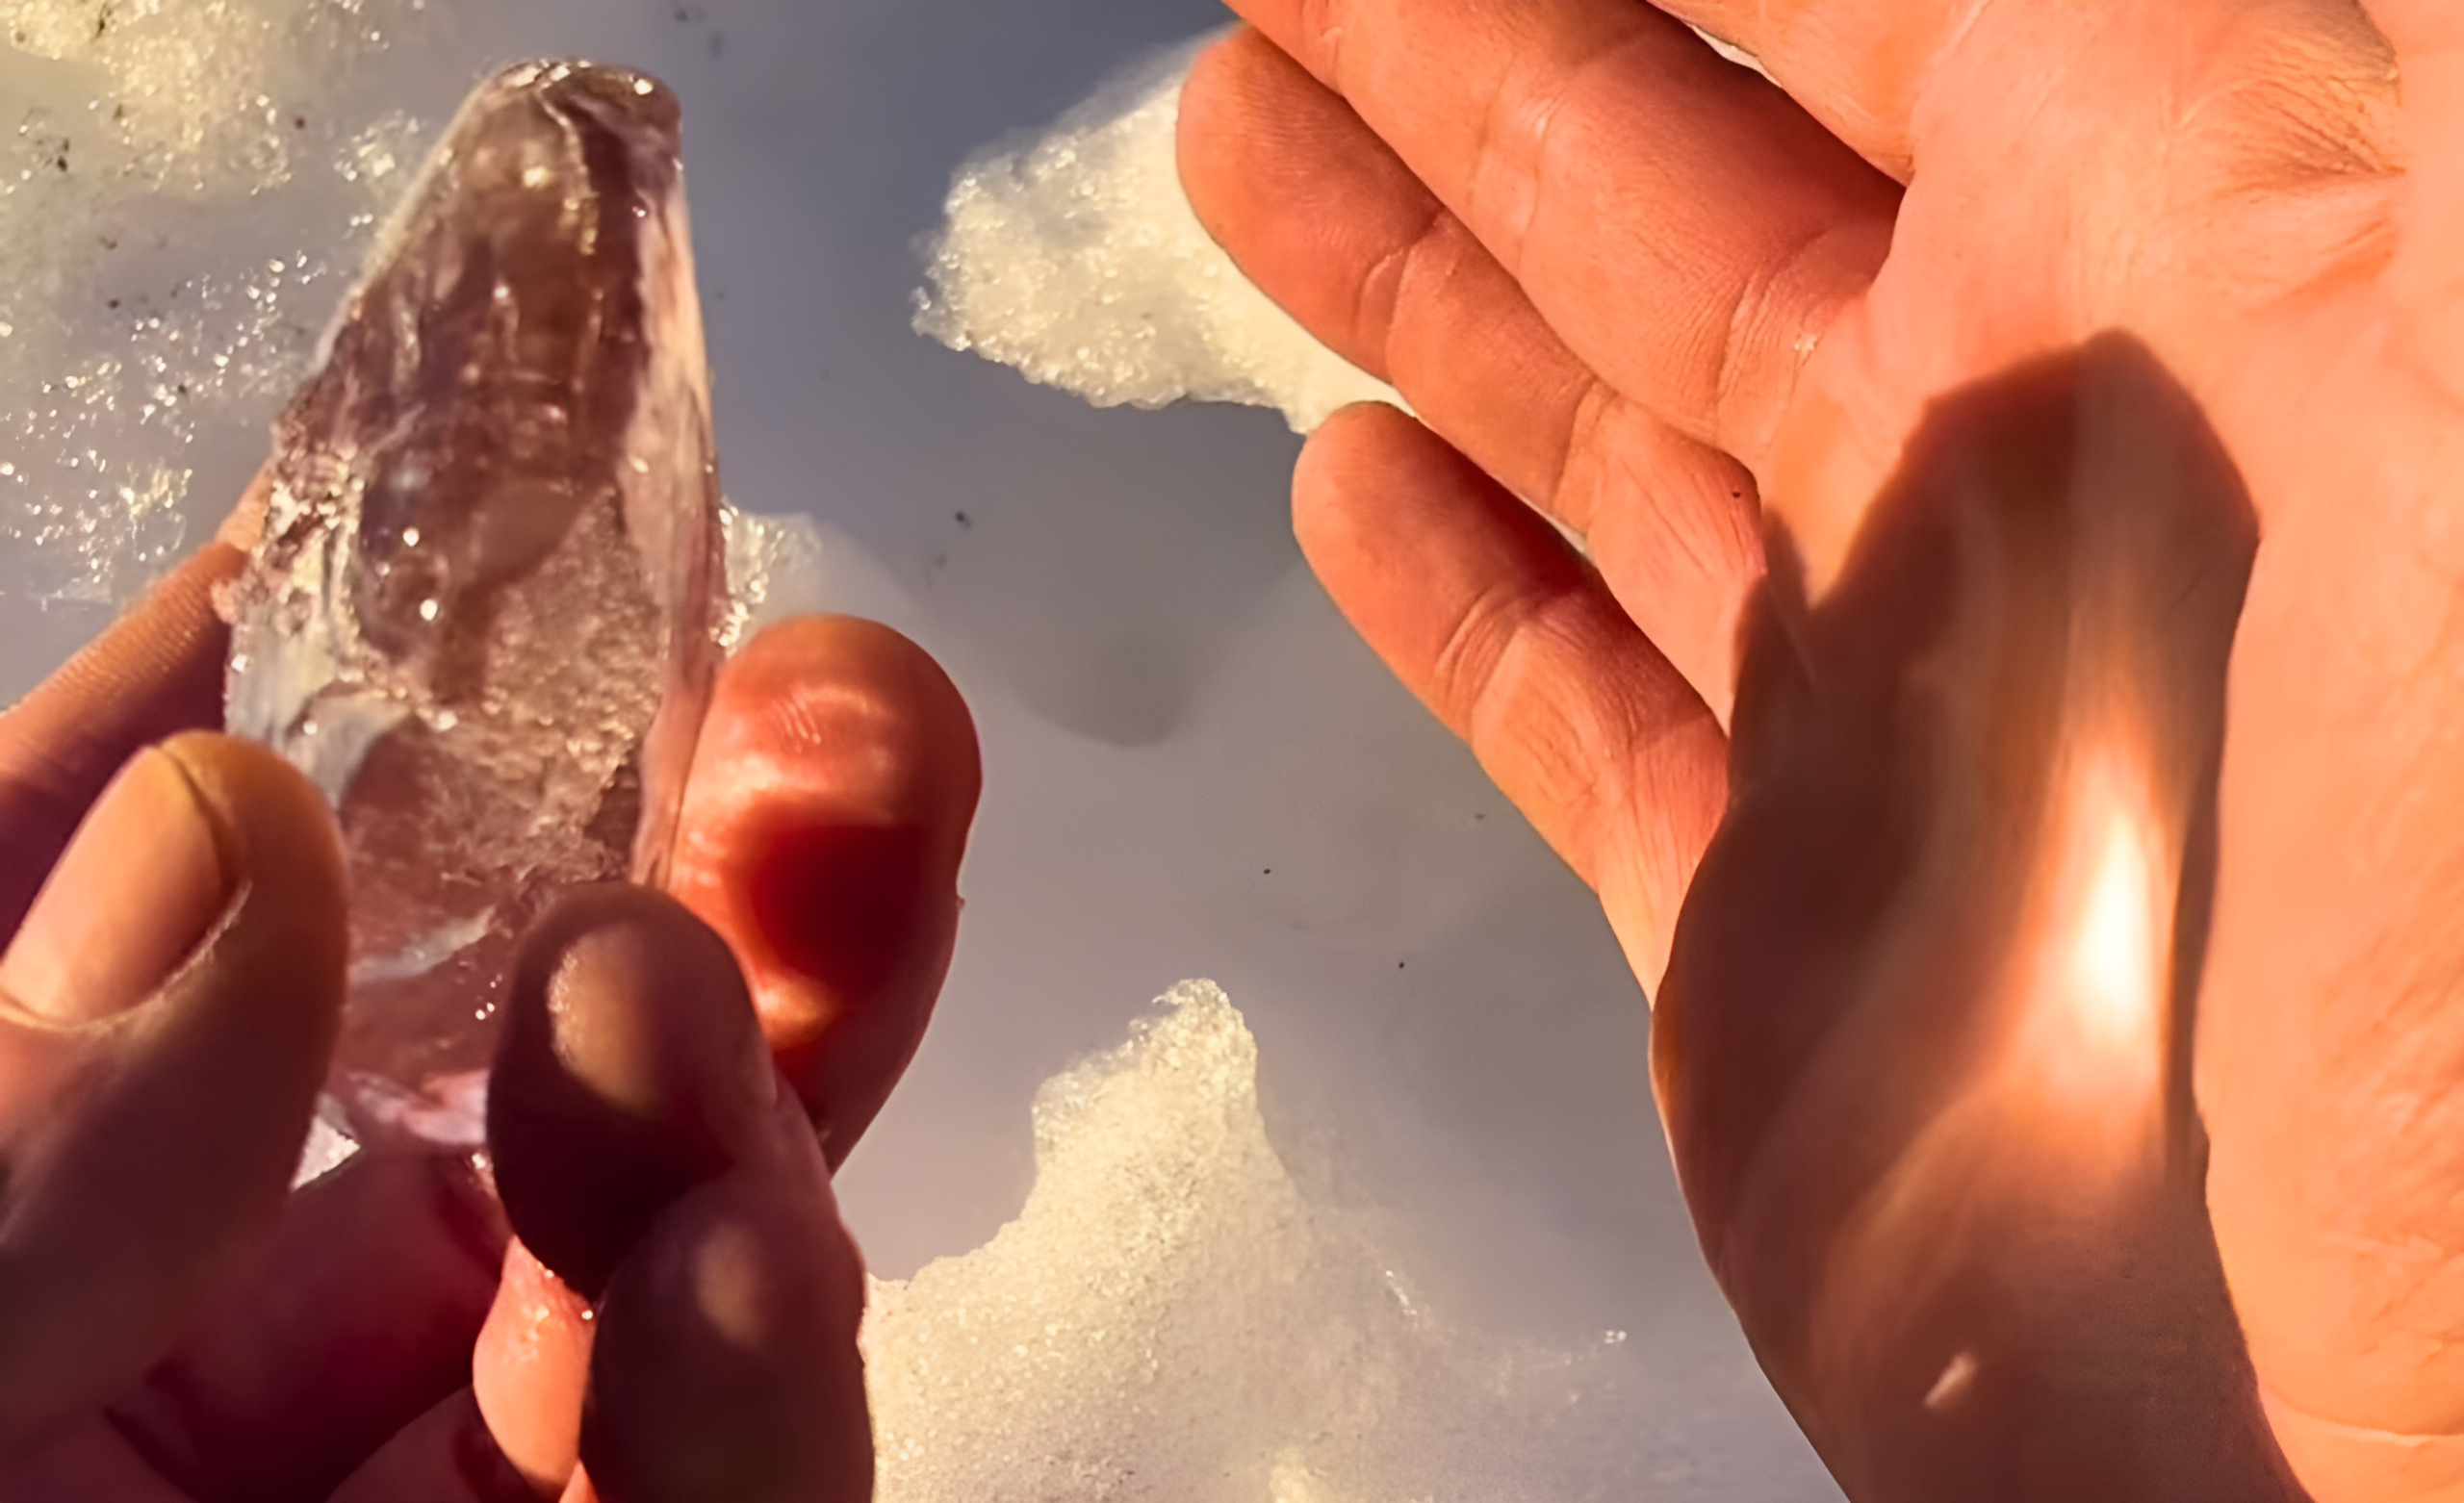
Step 4: Removing the Ice from the Mold
Once your ice has frozen solid, it’s time to remove it from the mold. This step requires a gentle touch to avoid cracking or breaking your precious lens.
Start by running warm water over the outside of the mold for a few seconds. The warmth will help loosen the ice without melting it too much. You want to maintain its clarity and shape.
If you’re using a plastic container, gently squeeze or flex it to release the ice. For silicone molds, simply peel them away carefully.
Once it’s out, inspect your lens for any imperfections that may affect its performance later on. If there are bubbles or uneven surfaces, you can smooth them down with careful scraping.
Keep your lens chilled until you’re ready to use it; this will ensure optimal clarity when focusing sunlight onto kindling.
Tips and Tricks for Success
To enhance your chances of success with making an ice lens, clarity is key. Use distilled water if possible. It freezes clearer than tap water, reducing the chance of bubbles or impurities that can obstruct light. When creating your mold, opt for a smooth surface to minimize imperfections on the ice.
This will aid in focusing sunlight more effectively. If you’re working in less-than-ideal temperatures, try placing your mold in a shaded area to help it freeze uniformly. Rapid freezing can cause cracks and weaken the lens quality. Consider crafting multiple lenses during one session.
Not every attempt may yield perfection, so having backups increases your odds of striking fire. Practice patience when removing the ice from its mold. Rushing this step can lead to breakage or distortion—both detrimental to functionality.
Alternative Methods for Starting a Fire with Ice
Ice isn’t just for creating lenses; it can serve other creative purposes in fire-starting. One alternative method involves using a block of ice as an insulator. If you have access to sunlight, focus rays through the ice onto dry tinder or wood shavings. The concentrated heat can spark a flame without needing a lens shape.
Another approach is to use snow. Pack it tightly into a form and allow sunlight to melt the surface slightly before exposing the underlying layer. Friction from rubbing two sticks together on this wet base may ignite your materials more effectively than on dry ground.
Consider layering thin sheets of clear ice over flammable objects like cotton balls or dryer lint. As they melt under direct sunlight, they create moisture that helps sustain ignition once flames catch hold. Each technique requires patience but offers exciting alternatives when conventional methods aren’t available.
Safety Precautions when Using an Ice Lens
When using an ice lens to start a fire, safety should be your top priority. Always choose a location that’s safe and free from flammable materials nearby. It’s essential to have control over the environment in which you’re working. Additionally, take care when handling the ice itself.
Though it may seem harmless, sharp edges can easily cause cuts or bruises if mishandled. Be mindful of your surroundings while focusing sunlight through the lens. The concentrated rays can ignite materials quickly, so keep anything combustible at a safe distance until you’re ready to use them.
Ensure you have water available for extinguishing flames if they get out of hand. Being prepared will help you enjoy this unique skill without unnecessary risks or accidents disrupting your experience.
Conclusion: Making Your Own Ice Lens
Making your own ice lens can be a rewarding and practical skill. It’s a fascinating way to harness the power of nature for survival. With just a few materials and some patience, you can create a fire starter that utilizes the sun’s rays.
As you venture into this hands-on project, remember that practice makes perfect. The experience not only enhances your outdoor skills but also brings an element of creativity to fire-starting techniques. Whether you find yourself in an emergency or simply want to impress friends with your resourcefulness, an ice lens is sure to make an impression.
Embrace the challenge and enjoy the process of learning something new. You’ll gain confidence in your ability to adapt and thrive in various situations by mastering this unique method for starting fires using ice. Happy crafting!
Related Posts
How To Survive Your Wife’s Death
Starting A Fire With A Ferro Rod
