How To Recondition A Boat Battery
Welcome to our step-by-step guide on how to recondition a boat battery. If you’re a boat owner, you know that a reliable battery is crucial for smooth sailing. Whether it’s powering your engine or running onboard electronics, the health of your boat battery can make or break your time on the water.
But what happens when that vital power source starts to fade? Instead of immediately tossing it aside and shelling out for a new one, have you considered reconditioning? Reconditioning a boat battery not only saves you money but also extends its lifespan significantly.
In this guide, we’ll explore how to breathe new life into an old battery so you can get back to enjoying those sunny days on the lake without worry. Ready to unlock the potential of your aging power source? Let’s dive in!
Understanding Boat Batteries
Boat batteries are essential for powering various systems on your vessel. They provide the energy needed to start the engine and run electronics like lights, radios, and navigation equipment. Most boat batteries fall into two main categories: starting batteries and deep-cycle batteries.
Starting batteries deliver a quick burst of power for ignition, while deep-cycle batteries are designed to provide sustained energy over longer periods. Different types of chemistry exist within these batteries as well. Lead-acid is the most common choice due to its affordability and reliability.
However, lithium-ion options are gaining popularity because they’re lighter and last longer. Understanding how these components work together can help you make informed decisions when it comes time for maintenance or replacement. Proper care ensures that your battery performs efficiently throughout its lifespan.
Signs of a Dead Battery
Identifying a dead boat battery can save you from unexpected breakdowns. Watch for these key signs. First, if your engine struggles to start or makes clicking sounds, it’s likely the battery is weak. A healthy battery should provide enough power to crank the engine smoothly.
Another warning sign is dimming lights or flickering gauges when you turn on electrical components. This indicates insufficient voltage reaching those systems. If your battery case appears swollen or cracked, this could mean internal damage and a loss of effectiveness.
Physical deformities often point towards deeper issues. Check the age of your battery; most last about three to five years. If yours is nearing this mark and showing any symptoms mentioned above, it’s time to investigate further.
Reconditioning a Boat Battery: Step-by-Step Guide
Reconditioning a boat battery is a practical way to extend its life.
A. Gather Necessary Materials
Before diving into the reconditioning process, it’s essential to gather all necessary materials. Having everything on hand streamlines your efforts and ensures a smooth experience.
You’ll need safety gear first—gloves and goggles are non-negotiable. Batteries contain acid, so taking precautions is vital for your safety.
Next up, grab a battery charger suitable for lead-acid batteries. This will play an important role in reviving those old cells back to life.
A multimeter is also key—it helps you measure voltage accurately. You want to know precisely how much juice you’re working with before proceeding.
Additionally, have some baking soda handy; it’s excellent for neutralizing any acid spills. A brush or cloth will come in useful too for cleaning surfaces and terminals effectively.
Don’t forget distilled water! It’s crucial for replenishing the electrolyte levels if they’re low during the reconditioning process.
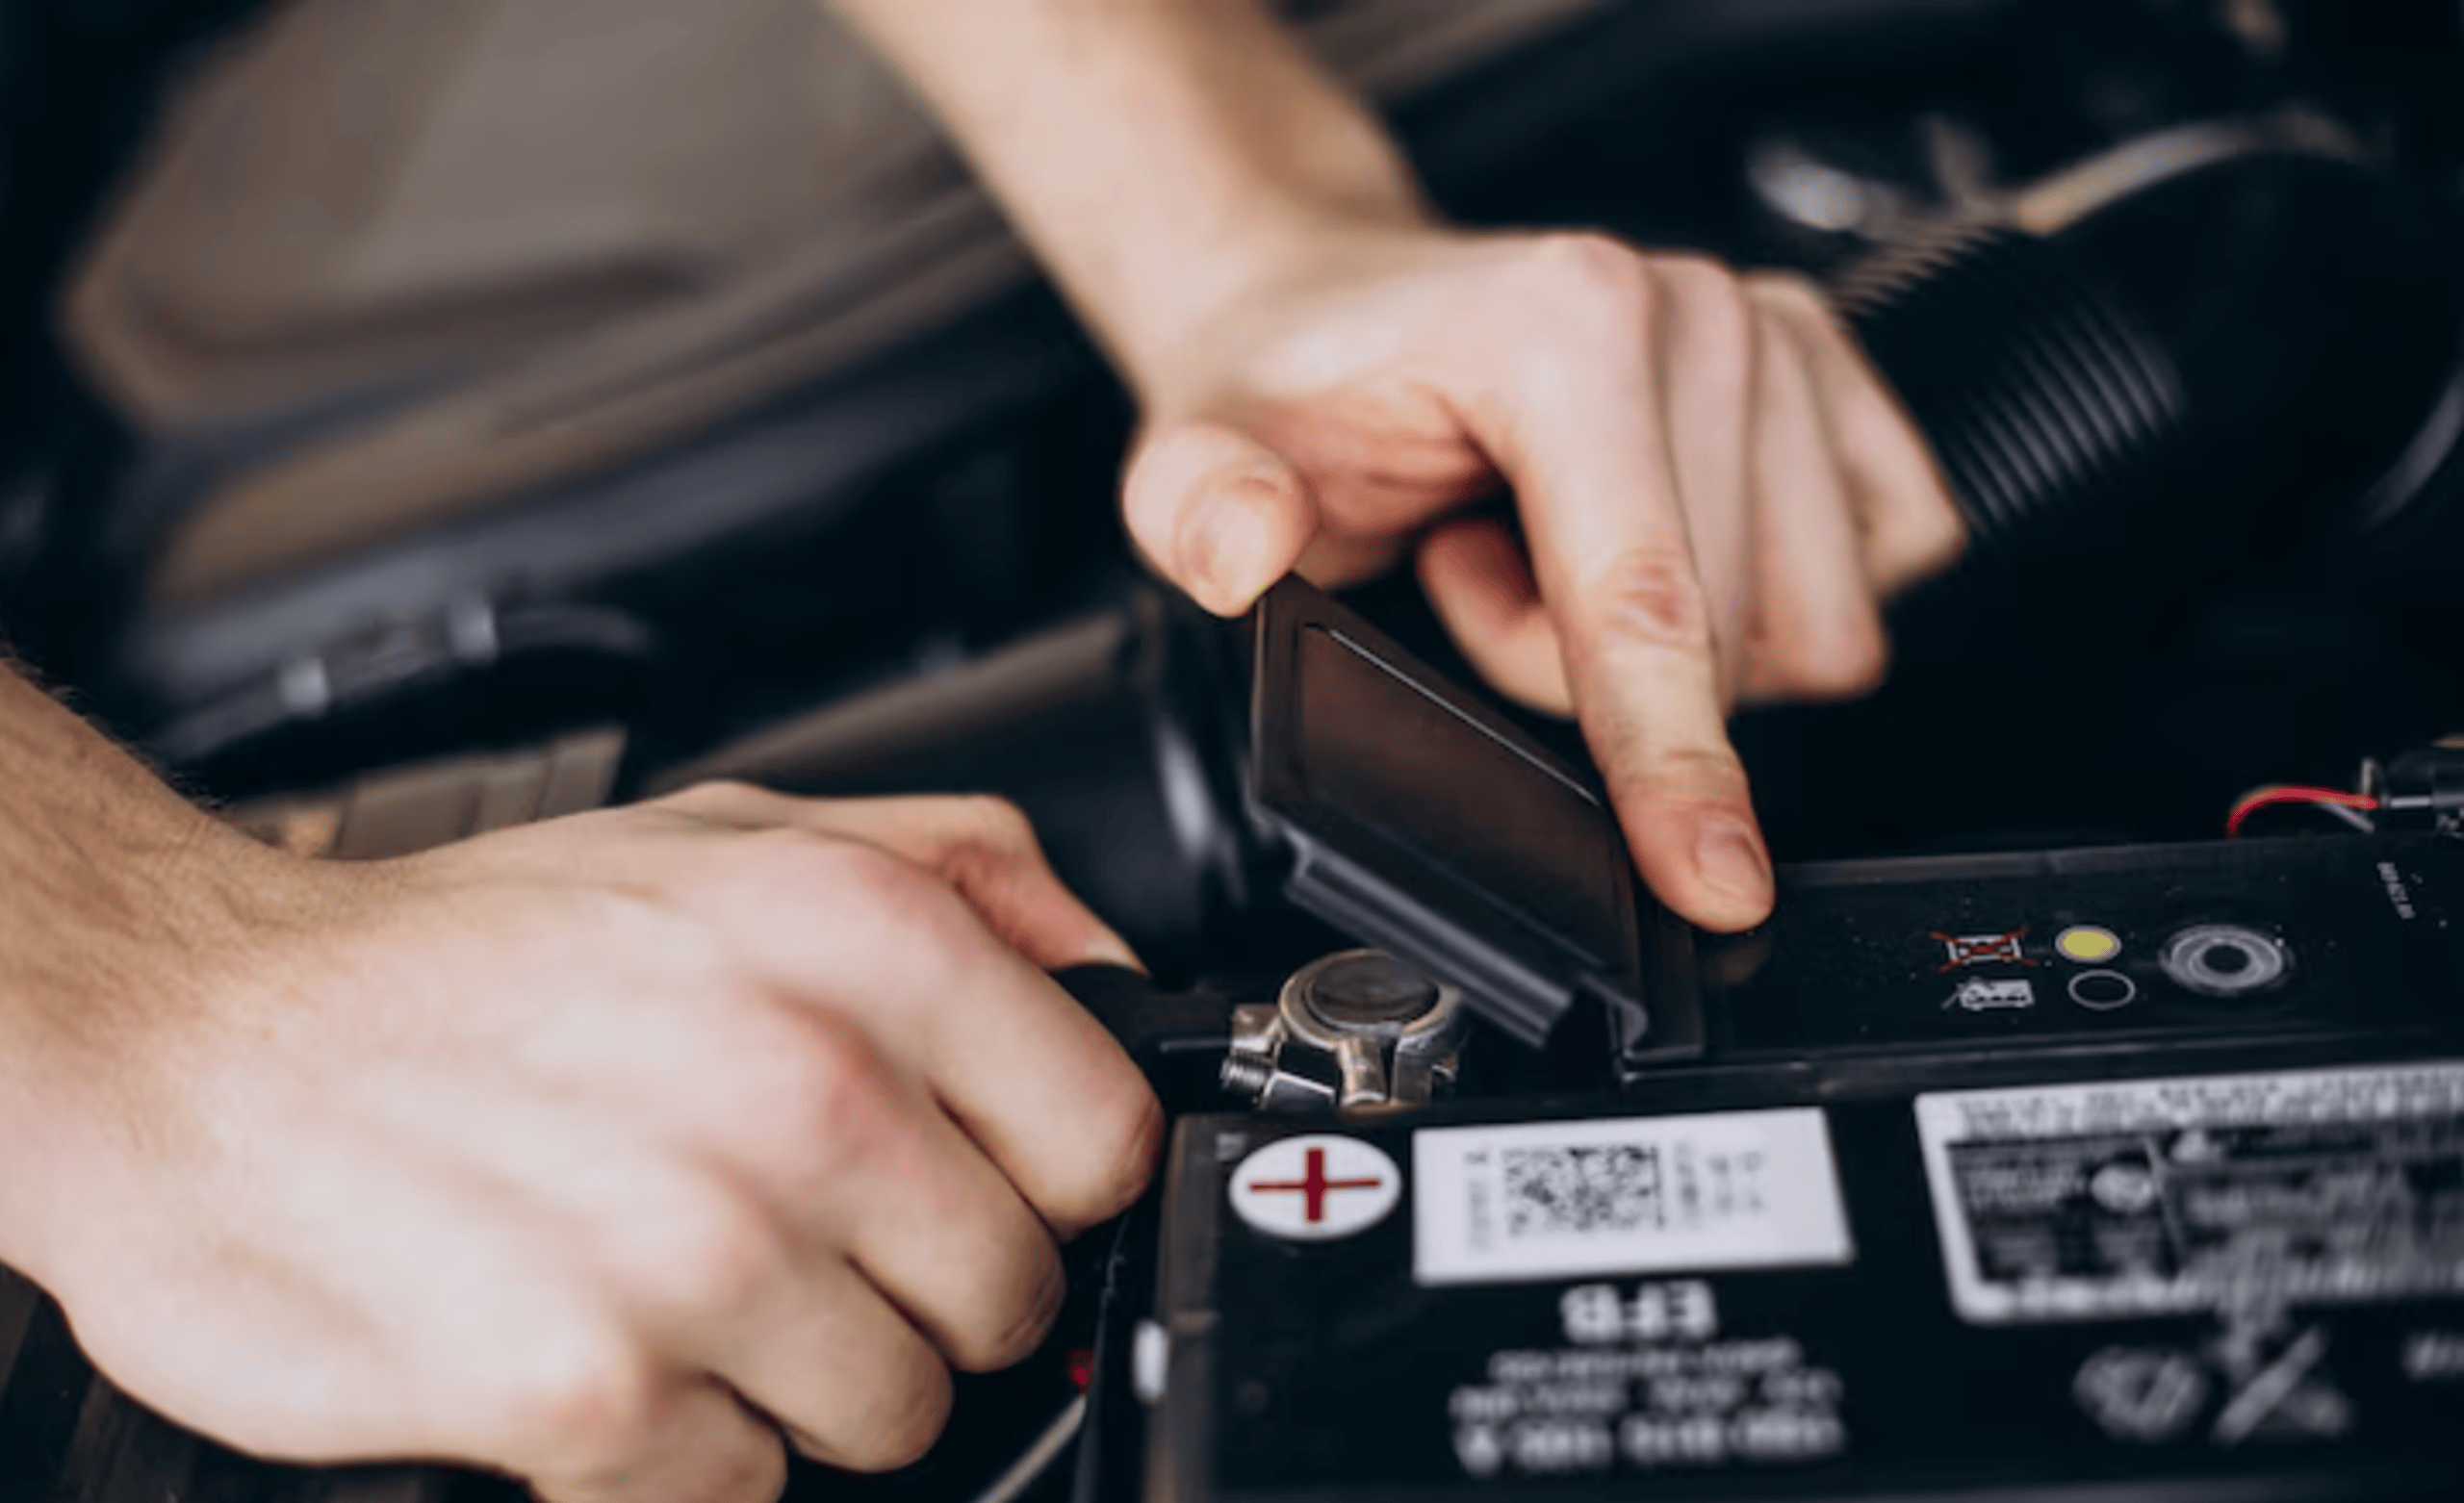
B. Cleaning the Battery
Cleaning the battery is crucial for reconditioning. A dirty battery can lead to poor connections and reduced performance.
Start by ensuring you’re wearing protective gloves and goggles. Safety first! Disconnect the terminals, starting with the negative one to prevent any short circuits.
Use a mixture of baking soda and water to neutralize acid corrosion. Apply this solution carefully with an old toothbrush or cloth. You’ll notice fizzing as it works on grime.
Rinse off any residue with clean water but avoid soaking the battery itself. Make sure everything is dry before reconnecting the terminals. Remember, cleanliness enhances conductivity!
Check for any cracks or damage while you clean; these could indicate larger issues that need addressing later on. Keeping your boat’s power source tidy will help extend its lifespan significantly, making future trips smoother and more enjoyable.
C. Removing Corrosion and Sulfation
Corrosion and sulfation are common issues that affect boat batteries. These problems can significantly reduce battery performance if left untreated.
Start by inspecting the terminals for any signs of white or powdery residue. This is a clear indicator of corrosion. To tackle this, mix baking soda with water to create a paste. Gently apply it to the corroded areas using an old toothbrush or a soft cloth.
For sulfation, which appears as a crusty layer on battery plates, you’ll need to be more careful. A specialized desulfator charger can help break down these deposits effectively without harming the battery.
After cleaning, rinse off any baking soda residue with clear water and dry everything thoroughly before reassembling your connections. Regular maintenance helps prevent these issues from recurring and keeps your battery running smoothly longer.
D. Reviving the Battery Cells
Reviving the battery cells is a critical step in the reconditioning process. Start by assessing each cell individually for damage or leaks. If any are found, replacement may be necessary.
Next, you’ll want to use distilled water to fill each cell. This helps dilute any remaining acid and can improve conductivity. Be careful not to overfill; just enough to cover the plates is ideal.
After adding water, consider using a specific revitalizing solution designed for lead-acid batteries. It can help break down sulfation and restore lost capacity.
Gently shake or tap the battery to ensure even distribution of fluids inside the cells. This action assists in loosening buildup on plate surfaces.
Let it sit for several hours before moving onto charging steps, allowing time for chemical reactions that enhance performance efficiency within those revived cells.
E. Charging the Battery
Once you’ve revived the battery cells, it’s time to charge them properly. Use a compatible battery charger that matches your boat battery type. This ensures optimal charging without damaging the cells.
Start with a slow charge if possible. A lower amp setting is gentler and helps restore capacity effectively over time. Monitor the process closely, especially during initial charging stages.
Check for signs of bubbling or excessive heat—these can indicate problems. If things seem off, disconnect immediately to prevent further damage.
As you charge, keep an eye on voltmeter readings if available. It gives insight into how well the battery is responding to rejuvenation efforts.
After several hours, check voltage again before attempting to use or reinstall your battery in your boat. You want it at an acceptable level for reliable performance on water trips ahead!
Safety Precautions
Safety should always be your top priority when reconditioning a boat battery. Start by wearing protective gear, including gloves and goggles. Lead-acid batteries contain hazardous materials that can cause harm if mishandled. Work in a well-ventilated area to minimize the risk of inhaling harmful fumes.
Avoid sparks or open flames nearby; batteries can release explosive gases during the charging process. When handling battery acid, proceed with caution. If any acid spills on your skin or clothing, rinse immediately with plenty of water.
Always use insulated tools to prevent short circuits while working on terminals and connections. The last thing you want is an accidental shock. If unsure about any step in this process, consult professionals for guidance before proceeding further. Taking these precautions helps ensure that reconditioning goes smoothly and safely.
Tips for Maintaining a Healthy Boat Battery
Regularly check the battery water levels. Distilled water is ideal for topping off. This prevents damage and ensures optimal performance. Keep your battery clean. Dirt and grime can lead to corrosion, which affects efficiency. Wipe down terminals and connections frequently.
Inspect the cables for wear or fraying. Tighten any loose connections to maintain a strong power flow. Ensure proper ventilation in storage areas to prevent gas buildup from batteries during charging. Avoid deep discharges whenever possible; aim to recharge after every use.
A fully charged battery lasts longer and functions better. Consider investing in a quality charger with maintenance features, as this can prolong battery life significantly. Be mindful of temperature fluctuations; extreme heat or cold can harm your battery’s health over time.
Common Mistakes to Avoid
One common mistake many boat owners make is neglecting regular maintenance. Skipping routine checks can lead to unexpected failure when you’re out on the water. Another pitfall is using tap water instead of distilled water for battery maintenance. Tap water contains minerals that can cause damage over time.
Failing to fully charge the battery before storing it is also a frequent error. A partially charged battery can freeze in cold weather, leading to permanent damage. Many assume all batteries are interchangeable and use incorrect chargers or settings.
This practice can drastically reduce battery life and efficiency. Overlooking safety precautions while working with batteries can be dangerous. Always wear protective gear and ensure good ventilation when performing any reconditioning tasks.
When to Replace Your Boat Battery
Knowing when to replace your boat battery can save you from unexpected failures. A typical marine battery lasts around three to five years, but performance can vary based on usage and maintenance. If you notice a decline in starting power or if the battery frequently needs recharging, it’s time for a change.
Look for physical signs like corrosion on terminals or swelling of the casing. These indicate serious issues that often signal impending failure. Pay attention to age as well. If your battery is nearing its lifespan and shows any symptoms of weakness, consider replacing it before your next trip out.
Regularly run tests with a multimeter to check voltage levels too; readings below 12.4 volts typically suggest replacement might be necessary soon. Trusting your instincts goes a long way—if something feels off, don’t hesitate to seek out a new battery for peace of mind on water adventures.
Conclusion: Reconditioning Your Boat Battery
Reconditioning your boat battery can breathe new life into an essential component of your vessel. It’s a cost-effective way to extend the lifespan of your battery and improve performance. By following the steps outlined earlier, you can restore functionality and save money on replacements.
Regular maintenance is key to ensuring optimal performance. Keeping an eye out for signs of wear or damage will help you catch issues early. With proper care, you’ll enjoy smoother sailing without unexpected electrical failures.
Whether you’re gearing up for fishing trips or weekend getaways, knowing how to recondition a boat battery equips you with valuable skills that enhance your boating experience. Taking control of your battery’s health ensures you’re always ready for adventure on the water!
Related Posts

How To Recondition A Cordless Drill Battery
How To Recondition A Forklift Battery