How To Make Your Own Ammunition
Whether you’re a seasoned marksman or just starting out, understanding how to make your own ammunition can be incredibly rewarding. Ammunition plays a crucial role in shooting sports, hunting, and self-defense. Imagine having the ability to customize rounds that fit your specific needs and preferences while also saving money in the long run.
In today’s world of rising prices and supply chain issues, crafting your own ammo is not just an intriguing skill—it’s becoming essential for many gun enthusiasts. The process may seem daunting at first, but with the right knowledge and tools at hand, anyone can learn how to create high-quality ammunition from scratch.
Ready to dive into this fascinating DIY endeavor? Let’s explore everything you need to know about making your own ammunition!
The Benefits of Making Your Own Ammunition
Creating your own ammunition offers a range of benefits that many enthusiasts appreciate. First and foremost, it allows for customization. You can tailor the load to match your specific needs, whether it’s for competitive shooting or hunting.
Another significant advantage is cost savings. Purchasing components in bulk often reduces expenses compared to buying factory-made rounds. As prices fluctuate, this becomes an essential factor for regular shooters. Additionally, making ammo gives you complete control over quality.
You can select high-grade materials and ensure consistency with each round produced. There’s also a sense of accomplishment that comes from crafting your own ammunition. The process itself can be rewarding and adds depth to your understanding of firearms.
Handloading provides an opportunity to experiment with different powders and bullet types, enhancing both skills and knowledge in ballistics.
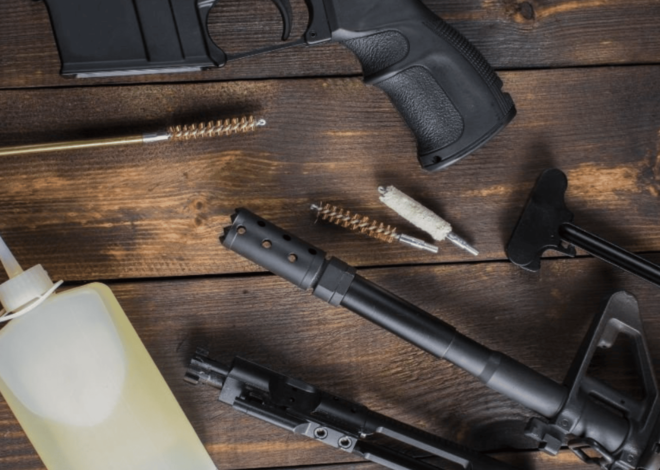
Necessary Equipment and Tools
To embark on the journey of making your own ammunition, having the right equipment is crucial. Start with a reliable reloading press. This will be your main tool for assembling cartridges efficiently. Next, invest in quality dies that fit the caliber you plan to work with.
They help shape and size cases accurately. A good powder scale is essential for measuring gunpowder precisely. Consistency in measurements can significantly affect performance and safety. Don’t forget about case cleaning tools. Dirty brass can lead to poor performance or even dangerous situations during firing.
Safety gear should also be part of your setup—gloves, goggles, and ear protection are paramount when handling components and machinery. Storage containers keep everything organized while ensuring easy access to materials needed for your projects. With these tools at hand, you’re well on your way to crafting custom ammunition tailored just for you!
Step-by-Step Guide: How to Make Your Own Ammunition
Creating your own ammunition can be an enriching experience. Stay patient throughout this process; practice makes perfect when learning how to make your own ammunition effectively!
Step 1: Research and Understand the Process
Before diving into ammunition production, take the time to thoroughly research the entire process. Knowledge is your most valuable asset here.
Start by exploring various resources like books, forums, and instructional videos. This will provide insights into different types of ammo and components involved in their creation.
Understand the terminology used in reloading—terms like “case,” “powder charge,” and “projectile” are crucial for effective communication within this community.
Familiarize yourself with standard practices as well as safety protocols. Knowing what to expect minimizes risks while enhancing your efficiency.
Don’t hesitate to reach out to experienced individuals or join local workshops. Engaging with a community can help you grasp nuances that aren’t always clear from written material alone.
With solid groundwork laid down through research, you’ll be better prepared for the subsequent steps ahead.
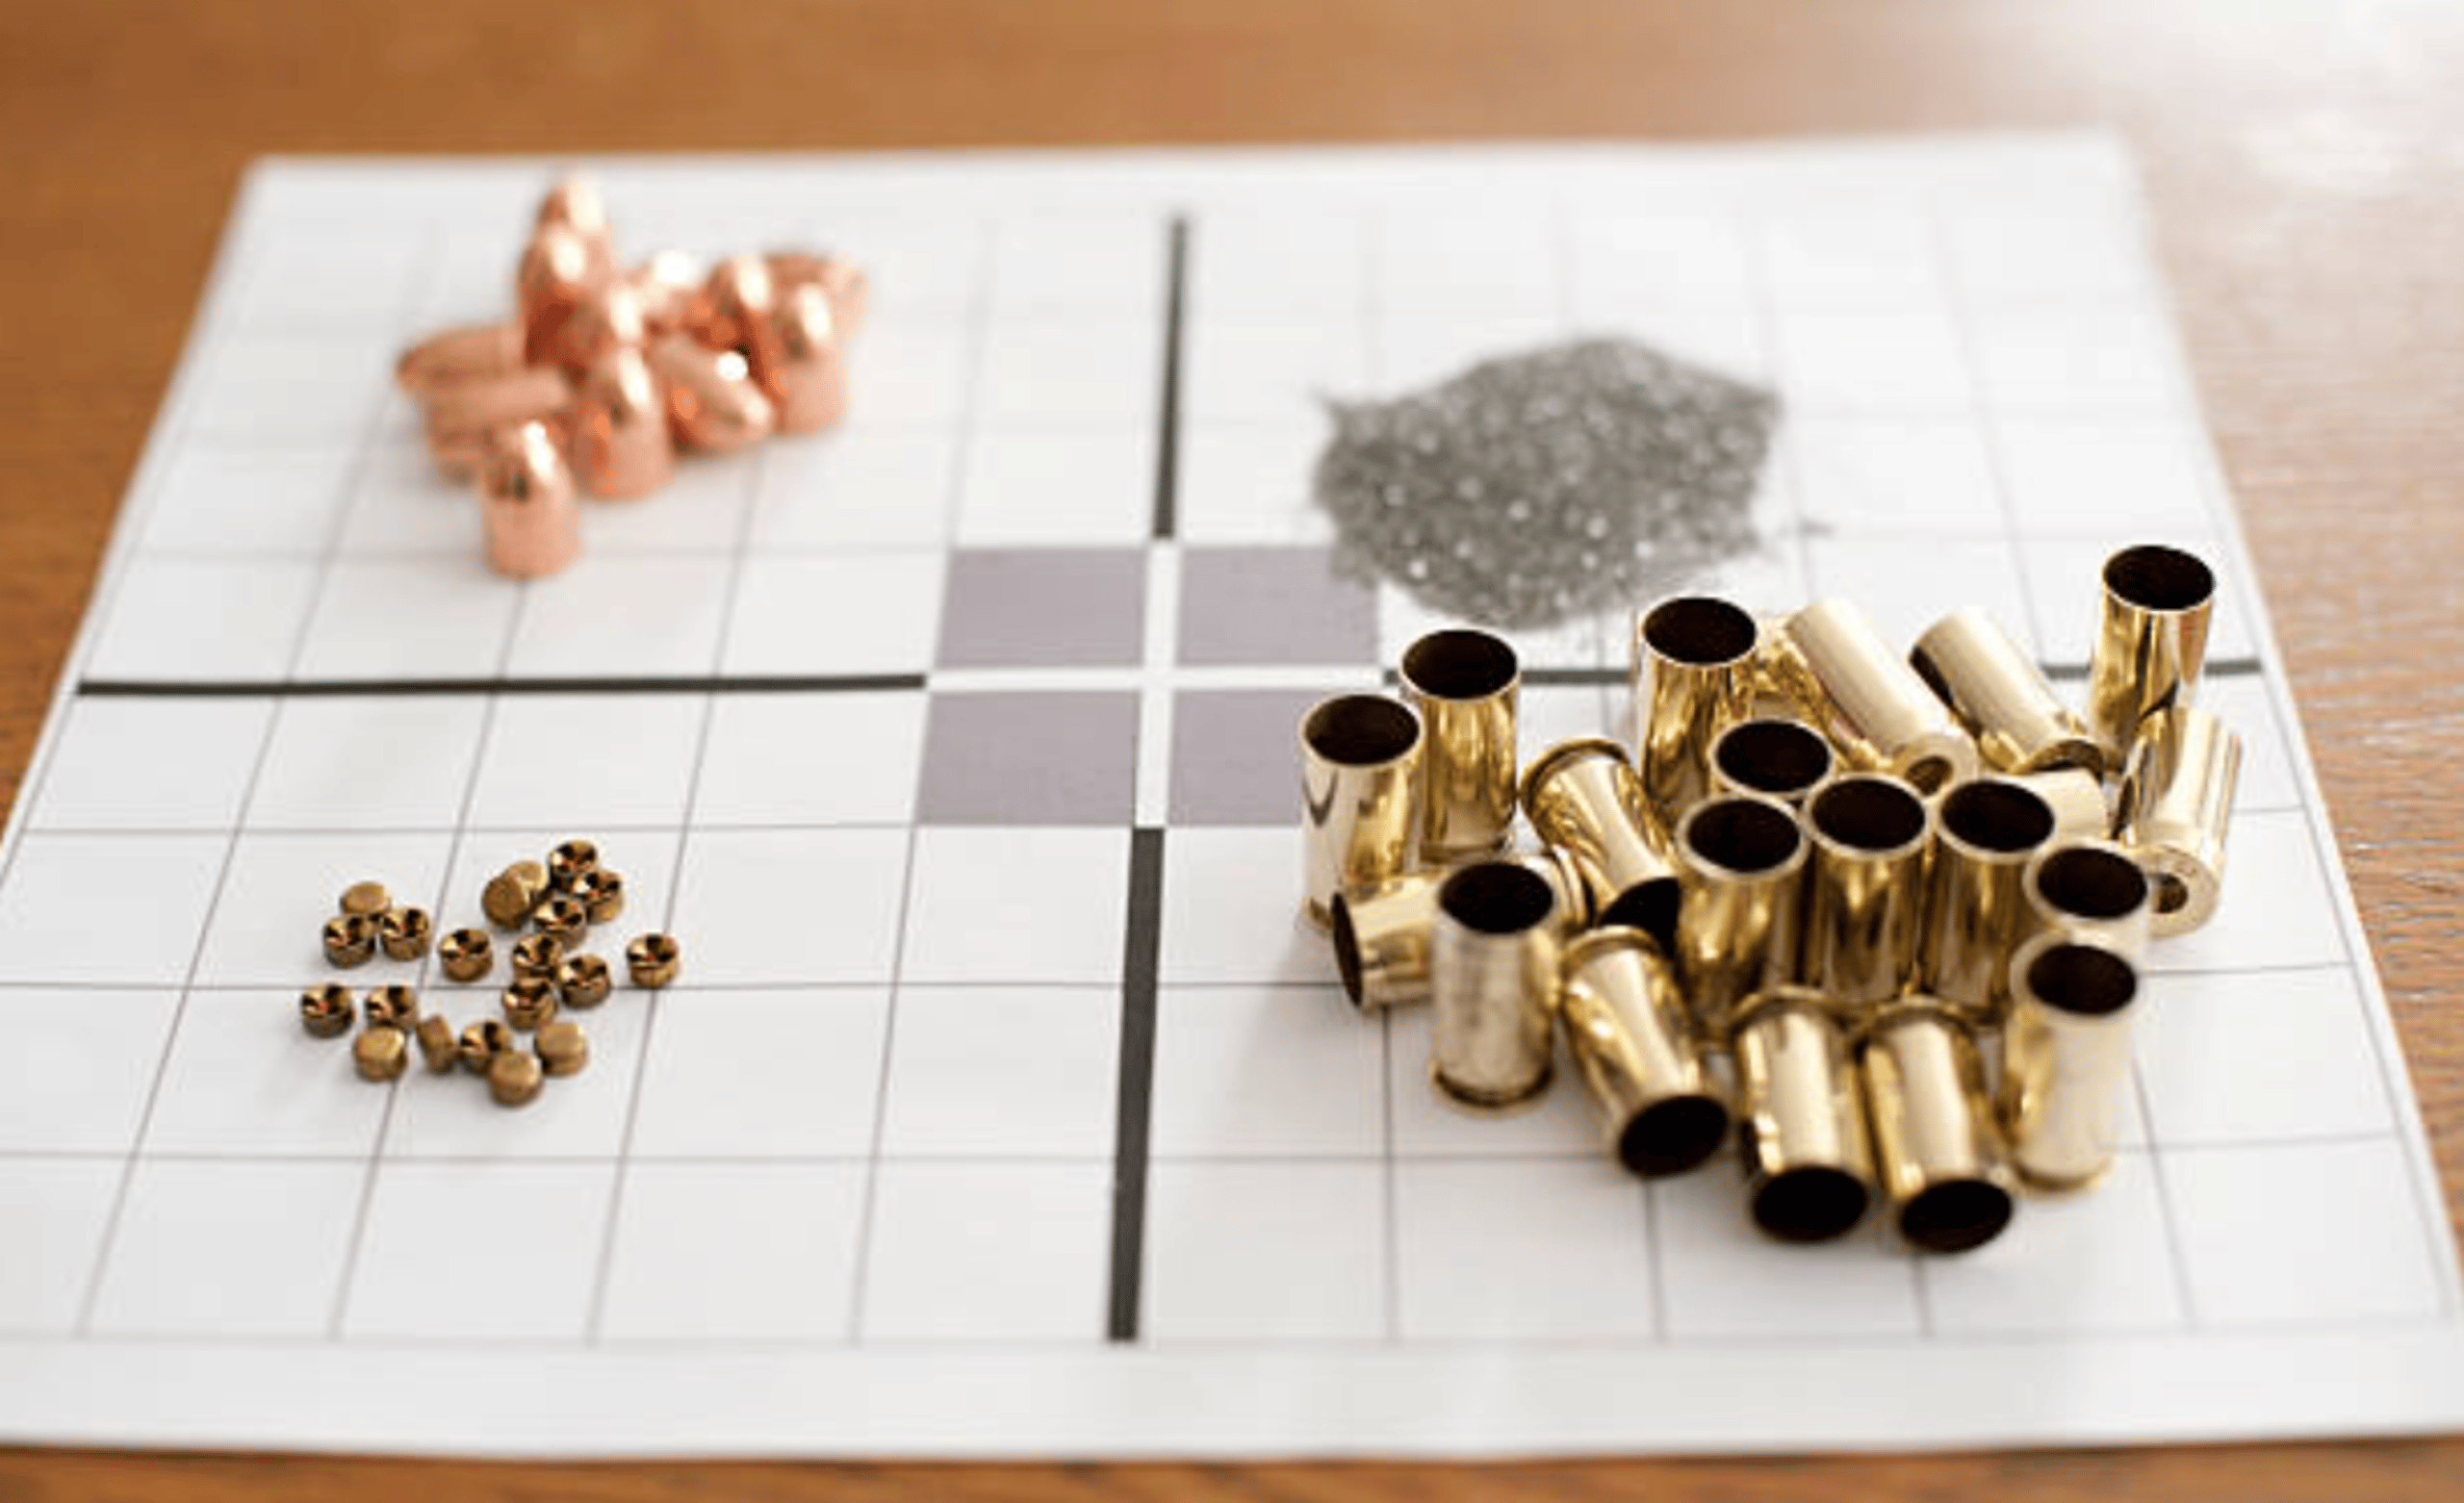
Step 2: Gather Necessary Components
To make your own ammunition, you’ll need to gather specific components. These include brass casings, primers, gunpowder, and projectiles. Each part plays a crucial role in the performance of your finished rounds.
Brass casings are often reusable but can be purchased new if needed. Ensure they’re clean and free from damage before use.
Primers ignite the powder when struck by the firing pin. Choose the right type based on your firearm’s specifications—small or large rifle/pistol primers.
Gunpowder comes in various types and granulations. Select one suited for your desired load and caliber; it significantly affects accuracy and velocity.
Consider projectiles carefully. They vary in weight and design—hollow points for expansion or full metal jackets for penetration might suit different purposes better.
Make sure to source high-quality materials from reputable suppliers to ensure safety during loading and shooting processes.
Step 3: Assemble the Ammunition
Assembling your own ammunition is where the magic happens. Start with a clean workspace to ensure safety and organization.
First, take the casing you’ve prepared. Insert the primer carefully into its designated slot at the base of the casing, ensuring it’s seated properly. A good fit is crucial for consistent ignition.
Next, measure out your powder charge using a precise scale. Pour this measured powder gently into the casing without spilling any outside.
Now comes the bullet itself. Place it on top of the powder-filled case and use a seating die to push it down firmly yet evenly until it’s securely in place.
After assembling each round, inspect them closely for uniformity and quality. Any inconsistencies could impact performance downrange, so take your time with this step to ensure everything meets your standards before moving on.
Step 4: Test and Adjust if Needed
Testing your homemade ammunition is a vital step in the process. Once you’ve assembled your rounds, it’s time to head to the range or a safe testing area.
Start with a few test shots using different batches. Observe how each round performs in terms of accuracy and reliability. Pay attention to factors like recoil, ejection patterns, and any unusual sounds during firing.
If something feels off—like excessive kick or misfires—it could indicate that adjustments are necessary. Don’t hesitate to take notes during this phase; they’ll be invaluable for future reference.
Adjusting powder charges, bullet seating depth, or case preparation can make all the difference in performance. Each tweak brings you closer to perfecting your custom ammo load.
Always prioritize safety while testing. Wear protective gear and ensure bystanders remain at a safe distance as you assess your creations on the range.
Common Mistakes Making Your Own Ammunition
One of the most common mistakes when making your own ammunition is skipping research. Many newcomers dive in without understanding the components and processes involved. This can lead to inefficient or dangerous rounds. Another frequent error is improper measurement of ingredients.
Precision is crucial in reloading; even a slight variation can affect performance significantly. Failing to clean equipment thoroughly before starting also poses risks. Residue from previous loads can contaminate new batches, leading to inconsistent results.
Ignoring safety protocols during assembly can have serious consequences too. Always wear protective gear and work in a well-ventilated space. Many overlook the importance of record-keeping. Documenting each batch helps track successes and failures, which is essential for improving future efforts.
Safety Precautions and Tips
Safety must always be your top priority when making your own ammunition. Proper precautions can prevent accidents and ensure a smooth reloading experience. Always wear protective gear, including safety glasses and gloves. These items shield you from debris and hazardous materials during the process.
Work in a well-ventilated area to minimize exposure to fumes or dust. Adequate airflow is essential for maintaining a safe environment while handling gunpowder or primers. Keep your workspace organized. A clutter-free area reduces the risk of mishaps with tools or components that could lead to dangerous situations.
Store all materials securely, away from heat sources and out of reach of children or pets. An organized storage system will help keep everything safe until you’re ready to use it. Familiarize yourself with emergency procedures so you know how to act if something goes wrong. Preparedness is just as important as prevention when it comes to DIY ammunition crafting.
Saving Money with DIY Ammo
Making your own ammunition can lead to significant savings over time. The cost of factory-made ammo can quickly add up, especially for avid shooters. By taking the DIY route, you control material costs and production processes. When sourcing components, buy in bulk whenever possible.
This can reduce per-unit prices significantly. Many enthusiasts find that reusing brass casings is a game-changer; it cuts down expenses while also being environmentally friendly. Additionally, crafting your own rounds allows you to customize loads based on your specific needs or preferences.
You might find cheaper options that still deliver great performance at the range. Don’t forget about long-term savings as well—homemade ammunition tends to be more reliable once you’ve mastered the process. For those who shoot frequently, these benefits make DIY ammo an attractive option financially and practically.
Legal Considerations and Regulations
Understanding legal considerations is crucial when making your own ammunition. Each state has specific laws governing the manufacturing of ammo, and these can vary widely. Familiarizing yourself with local regulations will help you stay compliant.
Licensing may be required in some jurisdictions, especially if you’re producing large quantities or engaging in commercial sales. Research whether you need a Federal Firearms License (FFL) or other permits for personal use.
Be aware that certain components, like primers and powders, might have restrictions on purchase and storage. Keeping detailed records of your production process can also provide protection should any questions arise regarding legality.
Always check updates to laws since they can change frequently. Staying informed ensures that your DIY ammunition efforts remain within legal boundaries while allowing you to enjoy this rewarding hobby responsibly.
Conclusion: Making Your Own Ammunition
Making your own ammunition can be a rewarding and cost-effective endeavor. Not only does it allow for greater customization to suit your specific needs, but it also fosters a deeper understanding of the mechanics involved in shooting sports.
By following the step-by-step guide and adhering to safety precautions, you can create quality rounds that enhance your shooting experience. Remember that patience and precision are key throughout the process. Engaging in this hobby requires diligence regarding legal regulations in your area. Always stay informed about local laws to ensure compliance while enjoying this craft responsibly.
Making your own ammunition empowers you with knowledge and skills, allowing for a more personalized approach to shooting. With practice, you’ll improve not just your techniques but also gain confidence as an ammo maker. So gather those tools, do thorough research, and embrace the journey of crafting your very own ammunition.
Related Posts

How To Shoot A Musket Accurately

How To Safely Store Ammunition