How To Make Pemmican
Welcome to the ultimate guide on how to make pemmican. Pemmican, a nutrient-dense superfood with roots steeped in history, has captured the attention of health enthusiasts and outdoor adventurers alike. This ancient recipe combines dried meat, fat, and berries into a compact energy powerhouse that can last for months.
Whether you’re hiking through rugged terrain or simply looking to boost your nutrition at home, learning how to make pemmican is both rewarding and practical. But what makes this traditional food so special? The answer lies not just in its ingredients but also in its fascinating origins within Native American culture.
As we explore the art of making pemmican, you’ll discover why it has stood the test of time and how you can incorporate it into your modern diet for optimal benefits. Grab your apron; let’s dive into the world of pemmican!
History of Pemmican & Native American Culture
Pemmican has deep roots in Native American culture, dating back centuries. Indigenous peoples crafted this nutrient-dense food as a survival staple, especially during harsh winters and long journeys. The process of making pemmican was both practical and ingenious.
By drying meat and mixing it with rendered fat, they created a portable source of energy that could last for years. This method not only preserved the nutrients but also showcased their resourcefulness in utilizing every part of the animal.
Tribes like the Cree and Lakota valued pemmican for its ability to sustain them through tough times. It became crucial during trade expeditions and hunting trips, symbolizing resilience amidst adversity.
As European settlers arrived, they recognized pemmican’s importance too. They adopted this traditional food into their own diets, further intertwining cultures while respecting its origins within Native communities across North America.
Benefits of Making Pemmican
Making pemmican offers numerous advantages that appeal to health enthusiasts and outdoor adventurers alike. First, it’s a nutrient-dense food packed with protein, healthy fats, and essential vitamins. This makes it an excellent option for anyone looking to fuel their body efficiently.
Another significant benefit is its long shelf life. When prepared correctly, pemmican can last for years without refrigeration. This feature is particularly useful for camping trips or emergency preparedness. Crafting your own pemmican allows you full control over the ingredients.
You can select high-quality meat and choose natural sweeteners or spices to suit your taste preferences. Additionally, making pemmican fosters a connection with traditional food practices. Embracing this ancient method not only enhances cooking skills but also deepens appreciation for cultural heritage.
It’s a fun and rewarding activity that brings creativity into meal prep while promoting sustainable eating habits.
Traditional vs Modern Pemmican Recipes
Traditional pemmican recipes have deep roots in Native American culture. They typically consist of dried meat, rendered fat, and sometimes fruit or berries. This combination creates a nutrient-dense food that sustains energy during long journeys.
In contrast, modern pemmican has evolved to suit contemporary tastes and dietary preferences. Many people opt for variations that include nuts, seeds, and even chocolate for added flavor. The process may also vary; while traditional methods rely on sun drying or smoking the meat, modern techniques can involve dehydrators or ovens for convenience.
Some enthusiasts are experimenting with plant-based alternatives to create vegan-friendly versions of this historic delicacy. No matter which recipe you choose, both offer unique textures and flavors that pay homage to their origins while embracing innovation.
The Ingredients and Tools Needed to Make Pemmican
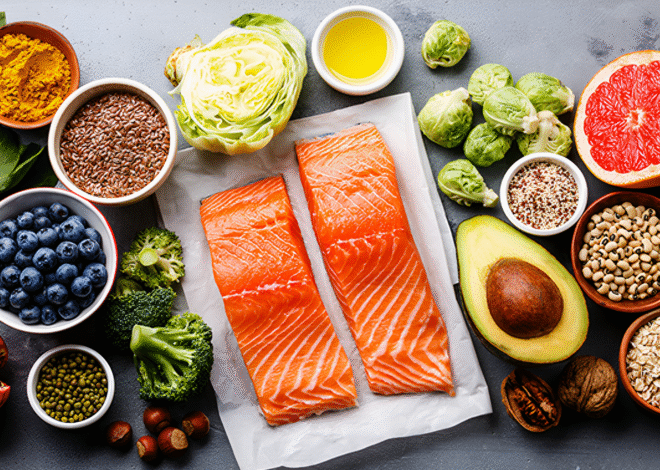
To make pemmican, you’ll need a few essential ingredients. The star of the show is lean meat. Beef, bison or elk works well, but you can also use venison for a traditional flair. Next up is rendered fat, often referred to as tallow.
This ingredient binds everything together and enhances the energy-boosting properties of your pemmican. Dried fruits add flavor and sweetness. Common choices include berries like blueberries or cranberries, which complement the savory meat perfectly.
As for tools, having a dehydrator makes drying out your meat much easier. If you don’t have one, an oven set on low heat will do just fine. A food processor is handy for breaking down dried ingredients into small pieces that mix easily. Don’t forget mixing bowls and airtight containers to store your finished product securely!
Step-by-Step Guide to Making Traditional Pemmican
Step 1: Preparing the Meat
Preparing the meat is a crucial step in making traditional pemmican. Start with high-quality, lean cuts of meat. Bison, venison, or beef are great options. These meats have low moisture content and will dry well.
Trim away any visible fat to ensure your pemmican doesn’t become greasy. Cut the meat into thin strips; this increases surface area for drying and speeds up the process.
Once you’ve sliced the meat, it’s time to dry it out. You can use a dehydrator, an oven set on low heat, or even air-dry it if conditions permit. The goal is to remove as much moisture as possible without cooking the meat.
Keep an eye on it throughout the drying process—this may take several hours depending on your method and thickness of slices. Properly dried meat should be brittle but not burnt when finished. This preparation sets the stage for creating a nutrient-packed food source that has stood the test of time.
Step 2: Rendering Fat
Rendering fat is a crucial step in making traditional pemmican. It transforms solid fat into a liquid form, creating the perfect binder for your meat.
Start by selecting high-quality animal fat. Beef tallow or rendered pork lard works wonderfully. Cut the fat into small chunks to speed up the process.
Place it in a heavy pot over low heat. Patience is key here; slow and steady will yield better results than rushing things along. As it melts, stir occasionally to ensure even cooking.
You’ll notice impurities rising to the surface as it renders down. Skim these off with a spoon when they become visible. This helps create a cleaner, tastier final product.
Once you have a clear golden liquid, strain it through cheesecloth or a fine mesh sieve to remove any remaining solids. Your rendered fat should now be ready for mixing—a silky smooth addition that elevates your pemmican game!
Step 3: Mixing the Meat and Fat
Once you have your rendered fat ready, it’s time to combine it with the dried meat. This step is crucial for achieving that signature texture and flavor profile of traditional pemmican.
Start by shredding or chopping your dried meat into small pieces. The finer the meat, the better it will blend with the fat. Aim for uniformity; this helps everything bind together seamlessly.
Next, pour your warm rendered fat over the shredded meat in a large mixing bowl. Use a sturdy spoon or spatula to thoroughly mix them together until every morsel of meat is coated in fat.
The warmth from the fat helps release some of its flavor and ensures an even distribution throughout the mixture. You want a consistency that holds together but isn’t overly greasy—just enough to keep everything moist and flavorful without feeling heavy on the palate.
Step 4: Adding Berries (Optional)
Adding berries to your pemmican isn’t just a matter of taste; it’s about infusing nutrition and flavor. Berries like blueberries, cranberries, or raspberries bring a burst of sweetness that beautifully contrasts with the savory meat.
When using dried berries, ensure they are properly dehydrated. Fresh ones can introduce moisture, which isn’t ideal for long-term storage. Chop them finely before mixing to distribute their flavor evenly throughout your mixture.
The addition of berries also enhances the nutrient profile of your pemmican. They provide essential vitamins and antioxidants that complement the protein-rich meat and fat content.
Feel free to experiment with different types or blends of berries based on what you have available. Each variation offers its own unique twist on this traditional recipe!
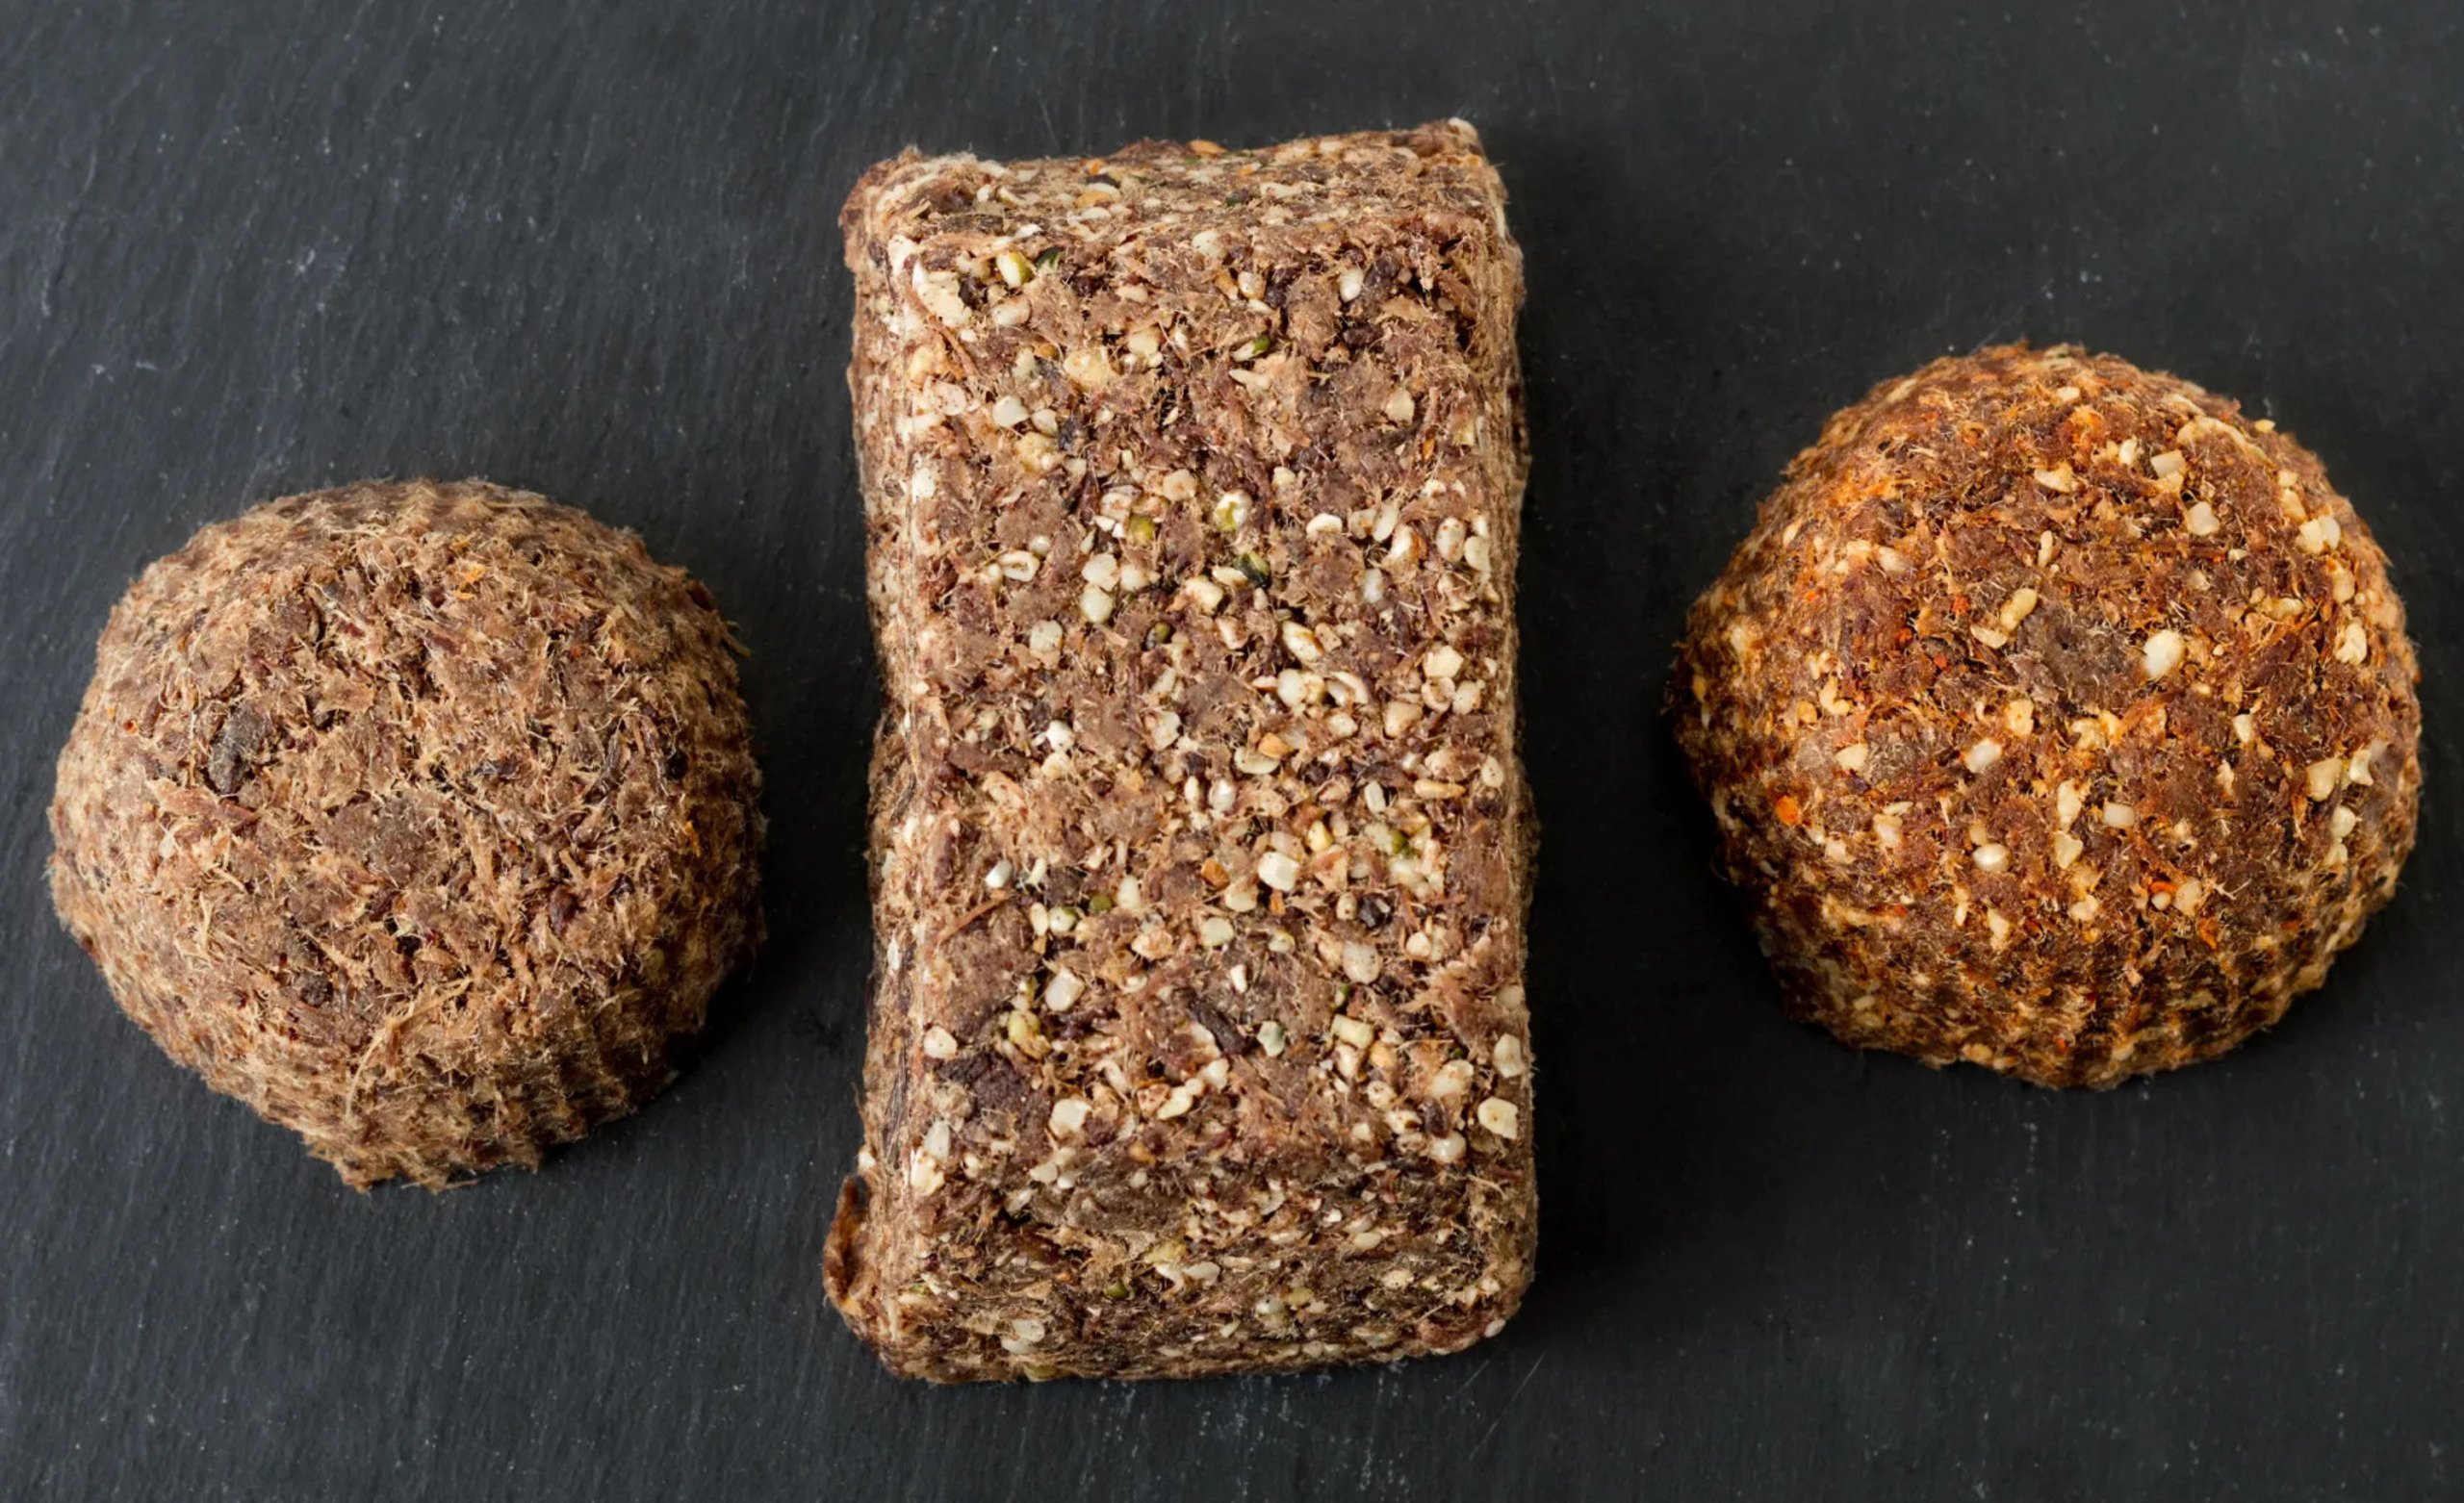
Step 5: Forming and Storing Pemmican
Once your mixture is ready, it’s time to form the pemmican. You can shape it into bars or balls based on your preference. If you want a classic approach, use parchment paper to press the blend into flat slabs. This makes for easy storage and portioning later.
Let the formed pemmican cool at room temperature before transferring it to an airtight container. Proper sealing is essential; moisture can compromise its longevity.
For longer preservation, consider vacuum-sealing individual portions or wrapping them tightly in wax paper before placing them in a jar. Store in a cool, dry place away from direct sunlight.
Pemmican has an impressive shelf life due to its low moisture content and high fat concentration. With proper care, this nutrient-dense snack can last for months—or even years!
Benefits of Adding Pemmican to Your Diet
Adding pemmican to your diet brings numerous advantages. This nutrient-dense food packs a punch with high protein and healthy fats, making it an excellent energy source for active individuals. Rich in vitamins and minerals, pemmican supports overall health.
The dried fruits often included provide antioxidants that help combat oxidative stress. Pemmican is incredibly versatile as well. It can serve as a quick snack during hikes or an ingredient in meals. Its portability makes it ideal for outdoor adventures or busy days when you need sustained energy.
For those looking to manage weight, the combination of protein and fat keeps you feeling full longer. This helps curb unhealthy cravings throughout the day. Incorporating pemmican into your routine can enhance meal variety. Experimenting with different flavors allows you to create unique blends tailored to your taste preferences.
Tips for Storage and Shelf Life of Pemmican
To maximize the shelf life of your pemmican, proper storage is essential. Start by using an airtight container. Glass jars or vacuum-sealed bags work wonders at keeping moisture and air out. Store your pemmican in a cool, dark place. A pantry or cupboard away from direct sunlight is ideal.
Avoid areas with temperature fluctuations, as this can affect quality. For longer preservation, refrigeration is a viable option. Pemmican kept in the fridge can last up to six months without compromising taste or texture. If you want to extend its lifespan even further, consider freezing it.
Properly packaged pemmican can remain edible for over a year when stored frozen. Always check for any signs of spoilage before consuming. If it smells off or has changed color significantly, it’s best to discard it and make a fresh batch!
Creative Ways to Incorporate Pemmican into Your Diet
Pemmican can be a game changer in your meals. Try adding it to breakfast by crumbling some into oatmeal or yogurt for added protein and energy. For lunch, mix shredded pemmican with greens and vinaigrette. This creates a hearty salad that’s both nutritious and filling.
Snack time? Pair small pieces of pemmican with nuts or dried fruit to create an energizing trail mix. It’s perfect for outdoor adventures. Incorporate it into dinner by using diluted pemmican broth as a base for soups or stews, giving them depth and richness.
Blend pemmican into smoothies for an unusual twist on nutrition. Just remember to balance the flavors so it’s not overpowering! Each method brings unique tastes while reaping the benefits of this ancient food source.
Conclusion
Pemmican is a fascinating and versatile food that has stood the test of time. Its roots in Native American culture underscore its significance as a sustenance staple, valued for both its nutritional content and portability. Whether you opt for traditional recipes or put your own spin on this ancient dish, making pemmican offers numerous benefits.
Crafting pemmican doesn’t require much beyond some quality ingredients and basic tools. The step-by-step guide simplifies the process, making it accessible even to novice cooks. Plus, with modern variations available, you can easily adapt pemmican to fit your dietary preferences.
Incorporating pemmican into your diet not only boosts energy levels but also provides essential nutrients needed for an active lifestyle. With proper storage techniques, you can enjoy this nutrient-dense snack long after you’ve made it.
Explore different ways to incorporate pemmican into meals or snacks—the possibilities are endless! So gather your ingredients and start creating this remarkable food today; it might just become a beloved part of your culinary repertoire.
4 thoughts on “How To Make Pemmican”
Leave a Reply
Related Posts
Top 10 Survival Foods
Best Ways To Cook Superfoods
Wow, this is a fantastic find for me! I’ve been searching for something like this to make at home for my hiking trips. I love how you explained the history and benefits, and the step-by-step guide on how to make pemmican is especially helpful. This is going on my cooking list—thanks for sharing!
Hey Vlad,
Thanks for stopping by and checking out my article on how to make pemmican. If you have never tried pemmican before, you’re in for a real treat! Go ahead and give this pemmican recipe a try and let me know what you think. Thanks again for stopping by and sharing your thoughts as well. Keep enjoying the great outdoors!
In step 2 you do not indicate how much “dry” fat to start with in proportion to how much meat a person might utilize to make their pemmican. As well, in step 3 you do not indicate how much meat (weight wise) to mix with how much fat (quantity wise) to yield a proper mixture so as not to over-burden the meat with too much fat.
Hey Floyd,
I’m sorry for the late response. My wife has been in the hospital for the last 3 weeks so I spend most of my time there so I’m not able to stay on top of things like I normally do. You want to use just enough rendered lard (fat) to mix with the dried meat to keep everything together. You don’t want to use too much rendered lard because it will make your pemmican too greasy. In step #3, I never gave a specific amount of meat to use because it all depends on how much pemmican you intend to make. Remember, it doesn’t matter how much meat you decide to use. The most important you need to know is how much rendered lard to mix with your meat. Good luck and please come back and let me know how your pemmican turns out.
Best wishes,