How To Make Fishing Flies
Welcome to our step-by-step guide on how to make fishing flies. Fly fishing has a unique charm that draws enthusiasts from all walks of life. The thrill of casting your line and outsmarting fish is exhilarating, but have you ever considered the artistry behind the flies themselves? Crafting your own fishing flies (fly tying) not only enhances your experience on the water but also allows for a personal touch in every cast.
Imagine sitting by a quiet stream, meticulously tying together feathers, fur, and thread to create something that could lure in the big catch. The process can be incredibly satisfying as it combines creativity with skill. Whether you’re an experienced angler looking to refine your craft or a beginner eager to dive into this rewarding hobby, learning how to make fishing flies opens up a world of possibilities.
In this guide, we’ll walk through everything you need to know about making your own fishing flies—from selecting materials and tools to mastering various techniques. Get ready to embark on an exciting journey where you blend tradition with innovation!
Materials Needed for Making Fishing Flies
To create your own fishing flies, gather a few essential materials. The right tools make a significant difference in the crafting process. Start with hooks. Various sizes and shapes cater to different fish species. Research local waters for optimal hook selection.
Next, choose thread that suits your fly pattern. A strong, durable thread is crucial for holding everything together securely. Don’t forget about feathers and fur! Natural materials like marabou or hackle add lifelike movement and color to your flies.
Additionally, you’ll need tools like scissors, pliers, and a vise to hold the hook steady while you work on it. Adhesives can come in handy too; they help secure certain components of the fly better than thread alone. Have some beads or eyes ready if you want added flair or weight to enhance performance on the water. Each material plays its part in crafting effective fishing flies.
Step-by-Step Process of Making a Basic Fishing Fly
Making a basic fishing fly is an exciting journey. Each step allows you to express creativity while honing your skills. Every fly tells its own story!
Step 1: Choosing the Right Hook
Choosing the right hook is the first crucial step in making your fishing fly. The hook isn’t just a tool; it’s the foundation of your creation.
Start by considering the fish species you’re targeting. Different fish require different hook sizes and styles. A larger hook may be perfect for bass, while smaller hooks are ideal for trout.
Next, think about the type of fly you want to create. Dry flies, nymphs, and streamers all have specific hooks designed to enhance their effectiveness on water.
Material matters too—hooks can be made from various metals that affect strength and corrosion resistance. Look for quality over quantity; a well-made hook will make all the difference when landing that trophy catch.
Don’t forget to consider barb versus barbless options based on local regulations or personal preference. Each choice shapes your overall fly design and functionality in unexpected ways.
Step 2: Selecting the Appropriate Thread and Starting the Thread Base
Choosing the right thread is crucial for your fishing flies. It should be strong yet lightweight, as it will hold everything together without adding unnecessary bulk. Most fly tiers prefer nylon or polyester threads because of their durability and ease of use.
Once you’ve selected your thread, it’s time to start the thread base. Begin by securing the end of the thread to the hook shank with a few tight wraps near the eye. This will anchor everything in place.
Make sure you create a smooth foundation by wrapping evenly along the shank. Keeping consistent tension helps maintain an even surface, which is essential for attaching materials later on. Avoid overlapping too much; this can lead to uneven layers that may affect how your fly performs in water.
Remember, a well-prepared thread base sets you up for success as you move forward in crafting your unique fishing flies!
Step 3: Adding the Tail and Body of the Fly
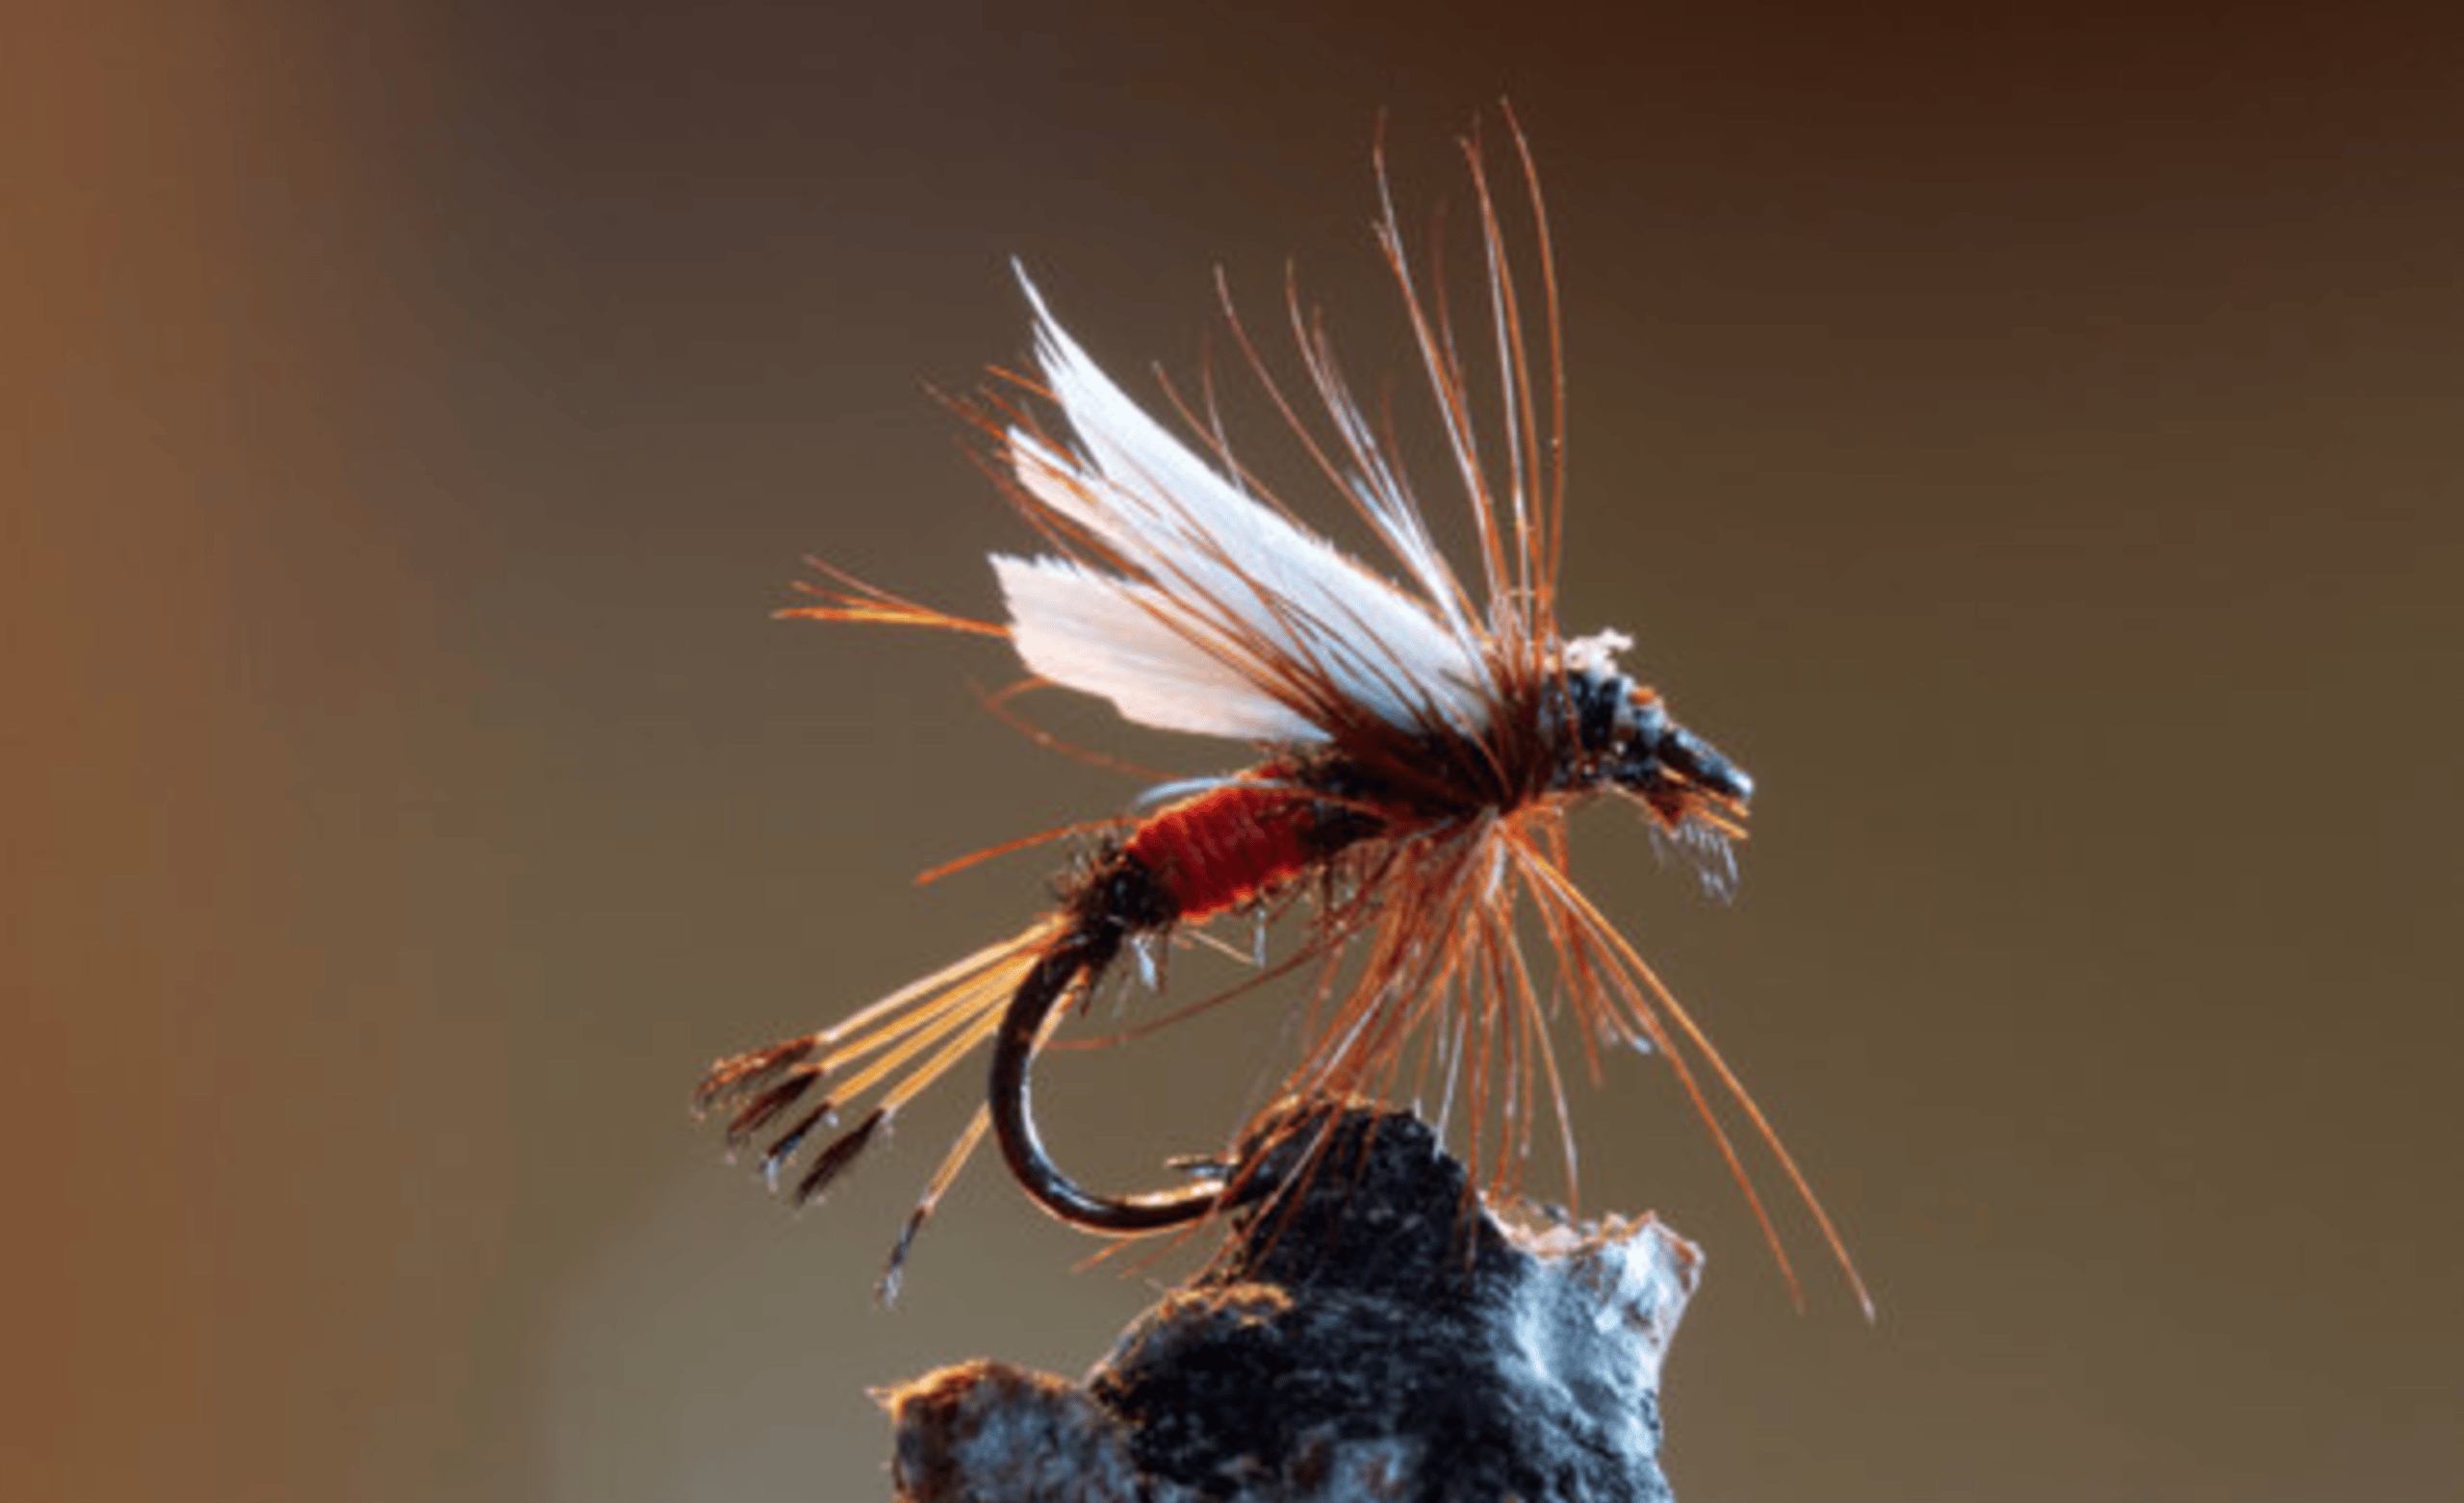
Now it’s time to bring your fly to life by adding the tail and body. Start with the tail material, which can vary from feathers to synthetic fibers. Trim a small bunch of material and measure it against the hook shank. Aim for about half the length of the hook.
Secure this tail with a few tight wraps of thread at its base, ensuring it’s firmly in place. The next step is crafting the body. You might choose materials like fur dubbing or chenille for added texture.
Begin wrapping your chosen body material around the hook shank, moving towards where you plan to attach the wing later on. Each wrap should be snug but not overly tight; you want that nice taper effect as well as flexibility in movement once it’s wet.
Use thread wraps to bind everything down securely before proceeding further in your creation process!
Step 4: Creating the Wing
Creating the wing of your fishing fly is where it starts to take shape. This part adds both functionality and appeal. A well-crafted wing can mimic a real insect’s movement on the water.
Begin by selecting materials for the wing. Feathers, foam, or synthetic fibers work wonders here. Choose colors that match local insects; this makes your fly more enticing to fish.
Attach the chosen material securely at the right spot on your hook. Ensure it extends beyond the body but not too far. The aim is balance and realism.
Next, consider shaping techniques like folding or cutting to enhance its look. Experiment with different styles—some flies benefit from upright wings while others prefer flat designs.
Take time to adjust as you go along; small tweaks can make a big difference in how effective your fly will be on the water.
Step 5: Adding Hackle
Adding hackle is a vital step that brings your fishing fly to life. The hackle serves as the legs or fins of the fly, mimicking natural insects and creating enticing movement in the water.
Choose feathers from birds like chickens or roosters for their durability and flexibility. Ideally, you want long, slender fibers that will create a realistic look when wet.
Position the feather on top of your fly, ensuring it extends back past the body. Secure it with tight wraps of thread to prevent any slipping during use.
Once attached, carefully wrap the hackle around the hook shank several times. This creates volume and enhances visibility underwater. Remember to keep tension consistent while wrapping; too loose can result in an unruly mess.
Trim excess feather length if needed to achieve your desired appearance. Your fly should now have added texture and movement—key attributes for attracting fish!
Step 6: Securing the Fly
Securing the fly is a crucial step in ensuring your hard work doesn’t unravel during use. Once you’ve added all the materials, it’s time to make sure everything stays in place.
Use several tight wraps of thread around the base of your materials. This not only holds them securely but also gives your fly a polished look. Don’t rush this part; take your time to ensure even tension throughout.
After securing everything, finish off with a couple of half-hitches or an alternative knot method that suits you best. This will lock everything down and prevent any accidental slips as you fish.
Trim excess material carefully to maintain a neat appearance while avoiding any jagged edges that could interfere with casting or presentation. The finer details make all the difference when you’re out on the water!
Step 7: Finishing Touches
Once you have secured all components of your fishing fly, it’s time to focus on the finishing touches. This phase is crucial for both aesthetics and functionality.
Begin by trimming any excess thread or feather material. A clean finish enhances the fly’s appearance and prevents unwanted snagging during casting.
Next, consider adding a touch of head cement or varnish to secure knots further. This not only strengthens your work but also adds a glossy sheen that can attract fish.
Inspect your creation closely. Look for any uneven sections or loose parts that might affect performance in water. Adjust as needed to ensure everything is just right before heading out on your next fishing adventure.
These small details can make a significant difference when presenting your flies to eager fish below the surface.
Tips and Tricks for Creating Effective Fishing Flies
Experiment with colors and materials. Bright hues can attract fish, especially in murky waters. Meanwhile, natural tones blend seamlessly into the environment. Vary your hook sizes based on target species. Larger hooks work well for bigger fish, while smaller ones are ideal for trout or panfish.
Incorporate textures to mimic real-life insects and baitfish. Mixing synthetic fibers with natural materials adds depth and intrigue to your flies. Try different techniques like using flash materials or adding weight to alter the fly’s movement in water. A little shimmer can catch a fish’s eye from afar.
Don’t shy away from improvisation. Use leftovers from previous projects as inspiration; they might lead you to discover unique combinations that yield great results. Always keep a journal of your creations and their performance on the water. This will help refine your skills over time and inspire new ideas each season.
Different Types of Fishing Flies and When to Use Them
Fishing flies come in various types, each designed for specific conditions and target species. Dry flies float on the water’s surface, mimicking insects that fish often feed on. They’re perfect for catching trout during hatch seasons. Wet flies sink beneath the surface, imitating drowning insects or small baitfish.
Use these when fishing in deeper waters or during times when fish are less likely to rise. Nymphs represent the larval stage of aquatic insects and work well just below the surface. They’re highly effective in rivers where current hides them from predators.
Streamers are larger patterns that mimic baitfish or other prey. These attract aggressive species like bass and pike, especially in fast-moving water. Knowing which fly to use can significantly increase your chances of success. Consider factors such as weather, time of day, and local insect activity before making your selection.
Common Mistakes to Avoid When Making Fishing Flies
When crafting fishing flies, attention to detail is crucial. One common mistake is using the wrong hook size. A mismatched hook can affect the fly’s performance and your success on the water. Another frequent error involves thread tension.
Too tight, and you risk breaking materials; too loose, and components may unravel during use. Striking a balance here is key. Many beginners overlook color combinations. Using clashing colors can deter fish rather than attract them. Choose hues that mimic local baitfish or insects for better results.
Neglecting proper finishing techniques leads to weak flies that fall apart easily. Always secure knots neatly and apply head cement for durability. Rushing through the process often results in subpar creations. Take your time with each step to ensure quality craftsmanship in every fly you make.
Conclusion: The Art of Crafting Your Own Fishing Flies
Crafting your own fishing flies is not just a practical skill; it’s an art form that brings immense satisfaction. The process allows you to connect with nature in a unique way, understanding the insects fish feed on and replicating them through your creations.
Every fly you tie carries a piece of your creativity and effort, making each fishing trip more rewarding. You’ll find joy in experimenting with different materials and techniques while also developing personal preferences over time.
The peacefulness of sitting down to create something by hand cannot be overstated. As you watch those colorful threads come together into beautiful patterns, you’ll feel accomplished knowing they were made by you for potential catches ahead.
Fishing becomes more than just casting lines when you’ve crafted the tools yourself. It transforms into a journey filled with anticipation as you test out your handmade flies on the water. Each outing can lead to exciting discoveries about what works best during various seasons or conditions.
Embrace this craftsmanship; let it inspire patience and creativity within you. Whether you’re fishing for leisure or competition, there’s no denying that creating your own flies adds depth to the experience—one that every angler should explore at some point on their adventure through this wonderful hobby.


