How To Make A Deer Blind
Whether you’re an experienced hunter or just starting out, understanding how to make a deer blind can elevate your hunting game. When the leaves start to change and the air turns crisp, many outdoor enthusiasts begin to think about hunting season.
For serious deer hunters, having a reliable place to observe and wait is essential. That’s where a deer blind comes in—a strategic hideaway that can significantly increase your chances of spotting that trophy buck. Imagine this: you’re nestled quietly in your custom-built structure, surrounded by nature’s beauty, with nothing but anticipation buzzing in the air.
A well-constructed deer blind not only offers camouflage but also comfort during those long hours of waiting. Ready to dive into the world of DIY blinds? Let’s explore everything from selecting the perfect location to crafting your own unique space for observation and relaxation amidst nature’s wonders!
Benefits of Using a Deer Blind
Using a deer blind offers hunters numerous advantages that enhance the overall experience. One of the main benefits is increased concealment. These structures allow you to blend into your surroundings, making it harder for deer to detect your presence.
Comfort is another key factor. Many blinds provide shelter from harsh weather conditions, allowing you to stay dry and warm during long waits in the field. This added comfort can make hunting trips more enjoyable. Deer blinds also grant improved visibility and shooting angles.
You can strategically position them for better sightlines, increasing your chances of spotting game without having to move around too much. They promote patience and focus. With less disruption from wind or noise, you’re able to remain still and concentrate on tracking movements effectively. This combination creates an ideal environment for successful hunting expeditions.
Choosing the Right Location for Your Deer Blind
Choosing the right location for your deer blind is crucial for a successful hunt. Look for areas with ample deer activity, such as trails, feeding zones, or near water sources. Observing these patterns can lead you to prime spots. Consider the wind direction as well. Positioning your blind downwind helps mask your scent from wary deer.
This small detail can make a significant difference in attracting them closer. Also, think about cover and concealment. A site surrounded by natural vegetation provides better camouflage and protection from prying eyes—both human and animal alike. Accessibility matters too; ensure you have easy access without disturbing nearby wildlife.
A quiet approach keeps disturbances low while maintaining an effective hunting zone. Check local regulations regarding placement near property lines or public roads to avoid issues later on. Careful planning here sets the stage for a fruitful hunting experience ahead.
Materials and Tools Needed for Building a Deer Blind
Building a deer blind requires specific materials and tools to ensure durability and effectiveness. Start with sturdy lumber for the frame. Pressure-treated wood is ideal, as it withstands moisture better. Next, you’ll need plywood or OSB (oriented strand board) for the walls.
These provide insulation and concealment from curious deer. For roofing, corrugated metal sheets or shingles can be used. They offer protection against harsh weather while blending into natural surroundings. Don’t forget about fasteners—nails and screws are essential for assembly.
A good quality drill will make your life easier during this process. In addition to these basics, consider adding camouflage fabric or paint to help disguise your blind further in its environment. Gather safety gear like gloves and goggles; they’re crucial when working with power tools and heavy materials.
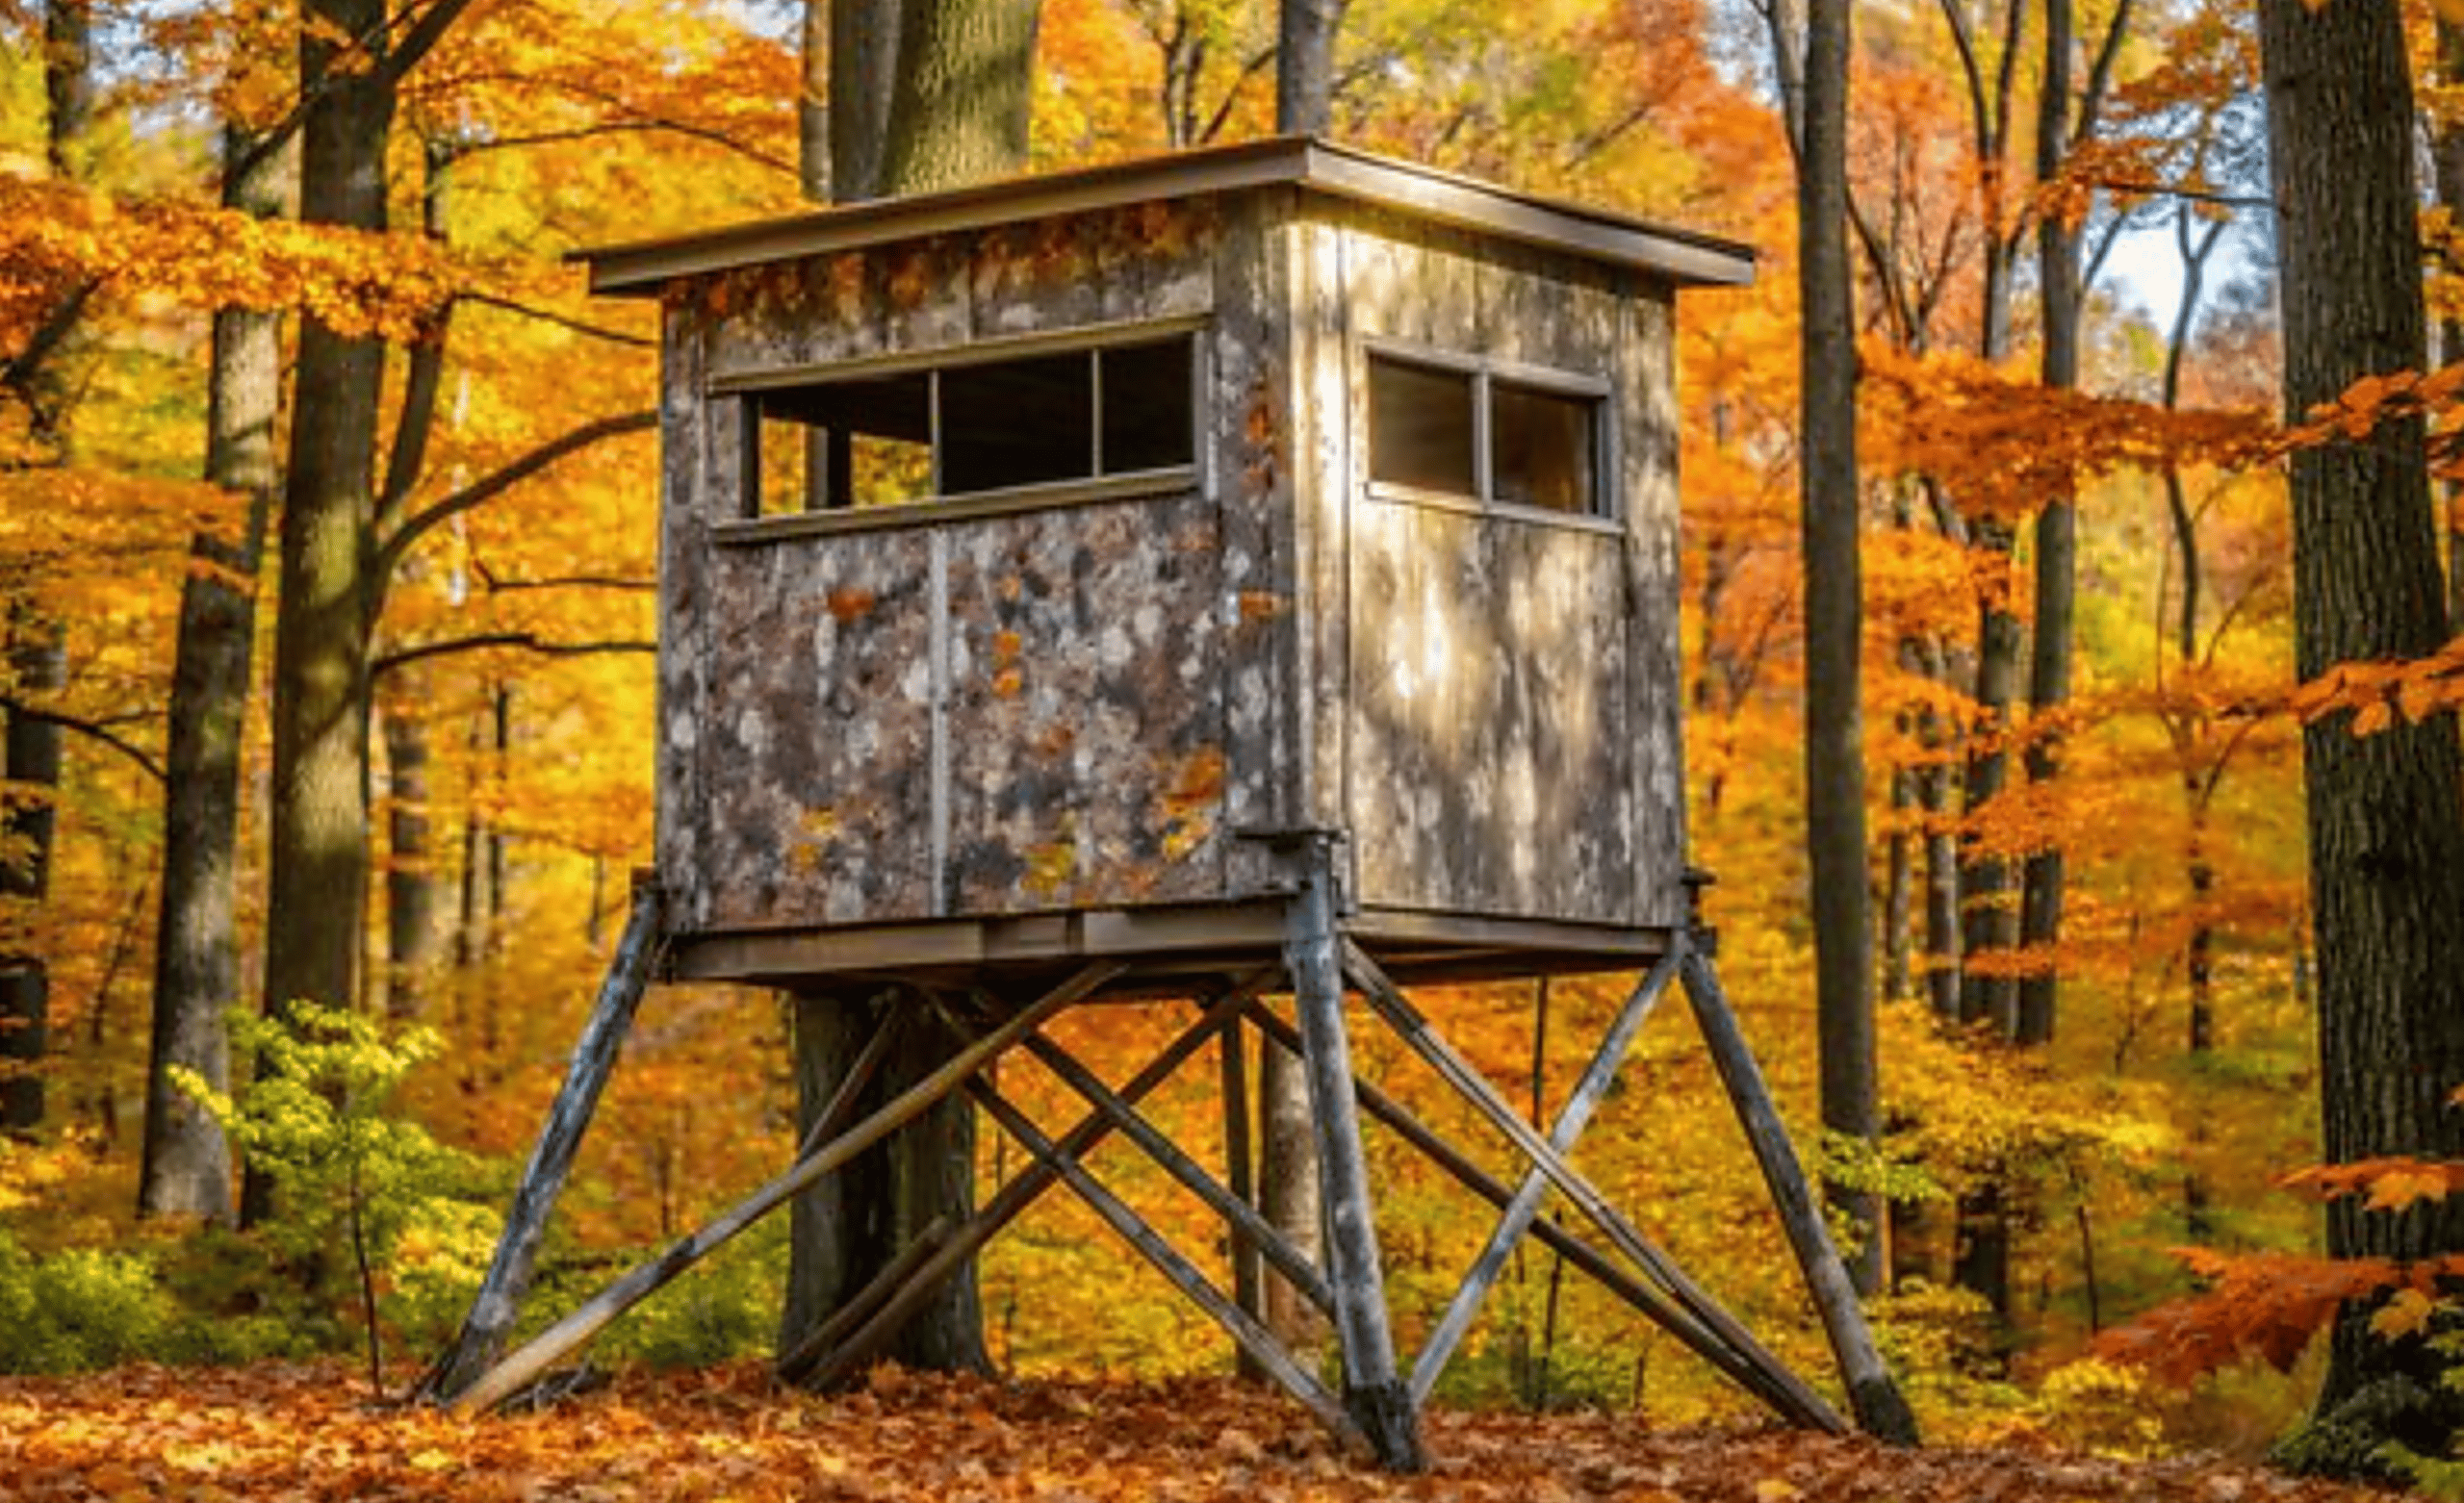
Step-by-Step Guide to Building a Basic Deer Blind
Building a deer blind can be an exciting project. Let’s dive into the steps to create your own.
Step 1: Building the Frame of the Deer Blind
Building the frame of your deer blind is crucial for stability and durability. Start by selecting a level area that’s free from debris. This will serve as the foundation for your structure.
Use pressure-treated lumber to withstand the elements. Cut two long pieces for the sides, then add cross supports to create a sturdy base.
Make sure your corners are square; this will help with alignment later on. Secure each joint with screws or nails, ensuring they’re tight enough to hold under stress.
As you build upward, keep in mind how tall you want your blind to be. A height of around 5-6 feet works well for visibility while remaining low-profile.
Don’t rush through this step—the frame is what holds everything together. Take pride in creating a solid base that can support not just yourself but also any added features down the line.
Step 2: Adding Walls and a Roof to the Frame
With the frame securely built, it’s time to add walls and a roof. This step is crucial for both protection from the elements and concealment from deer.
Start with your chosen wall material. Plywood or OSB board are popular choices due to their durability. Cut the panels to size before attaching them to the frame using screws or nails. Ensure each panel fits snugly against the frame for better insulation and structural integrity.
Next, focus on the roof. A slanted design helps in shedding rain and snow, reducing weight on your structure over time. Use roofing materials like shingles or metal sheets, which will provide lasting defense against weather conditions.
Don’t forget about ventilation! A few strategically placed vents can help regulate temperature inside while keeping scent contained.
Step 3: Creating Windows and Doors for Visibility and Access
Creating windows and doors is a crucial step in enhancing your deer blind’s functionality. Choose strategically placed openings that offer the best sightlines while maintaining concealment.
For windows, cut rectangular or square shapes into the walls, ensuring they are wide enough for a clear view without compromising your cover. Consider using Plexiglass or mesh to keep out pests while allowing you to see clearly.
As for doors, opt for a design that’s easy to open and close quietly. A simple hinged door can work wonders here; just ensure it blends well with the blind’s structure.
Utilizing camouflaged materials helps maintain stealth. Paint or cover any exposed edges with natural colors found in your hunting environment, making it harder for deer to spot movement from within the blind. This attention to detail will significantly enhance your chances of a successful hunt.
Step 4: Furnishing and Personalizing Your Deer Blind
Now that your deer blind is built, it’s time to make it comfortable and uniquely yours. Start with basic furnishings like a sturdy chair or stool. This will keep you relaxed during long hours of waiting.
Consider adding camouflage fabric for added comfort and stealth. Pillows can also help make those chilly mornings more enjoyable.
Next, think about organization—install small shelves or hooks for gear storage. Keeping everything within reach ensures you won’t fumble when action happens.
Lighting is essential too; battery-operated lanterns add ambiance without straying from the natural vibe.
Personal touches like photos or mementos can create a welcoming atmosphere while reminding you of past hunts. These elements not only enhance your experience but also transform your blind into a true refuge in nature.
Tips for Making Your Deer Blind More Effective
To enhance the effectiveness of your deer blind, consider using natural camouflage. Surrounding it with branches, leaves, and other elements from the local environment helps it blend in seamlessly. Sound dampening is crucial. Line the interior walls with carpet or foam to muffle any noise you make while waiting for deer.
Every sound can alert wildlife to your presence. Keep scent control in mind as well. Use unscented soaps and detergents on clothing before heading out. Additionally, store gear outside when possible to minimize odors. Consider installing a small fan inside for ventilation without compromising stealth.
Fresh air can keep you comfortable during long waits while also reducing human scents that drift into the area. Plan your hunting times according to deer activity patterns. Early mornings and late afternoons are typically more fruitful—maximize these opportunities by being ready in advance!
Safety Measures When Using a Deer Blind
Safety is paramount when using a deer blind. Always ensure your structure is sturdy and stable. Inspect it regularly for any signs of wear or damage, especially after harsh weather. When setting up, avoid placing the blind in areas prone to falling branches or flooding.
Choose solid ground that won’t shift underfoot during use. Be mindful of your surroundings. Remain aware of other hunters in the area to prevent accidents. Wearing bright colors while approaching can help signal your presence without disturbing wildlife.
If you’re hunting with others, establish clear communication signals before heading out. This helps everyone stay informed about each other’s locations and intentions. Keep emergency supplies handy—first aid kits, water, and a fully charged phone can be lifesavers if something goes wrong while you’re enjoying time in nature.
Creative Ideas for Customizing Your Deer Blind
Personalizing your deer blind can enhance both functionality and comfort. Consider adding camouflage paint or vinyl wraps that blend seamlessly with the surrounding environment. This not only helps you stay hidden but also adds a touch of flair.
Install shelves inside for easy access to gear, snacks, or even a small portable heater. You might want to incorporate comfortable seating—think cushioned chairs or foldable stools that won’t cramp your space. For those who enjoy photography, consider installing window mounts for cameras.
This allows for steady shots without disturbing wildlife too much. Don’t forget about lighting! Solar-powered LED lights can provide visibility at dawn and dusk while being eco-friendly. A small battery-operated fan could help keep air circulating during warmer days in the field.
Personalize it with keepsakes like photos from previous hunts or motivational quotes on the walls to inspire you every time you’re out there.
Alternatives to Building Your Own Deer Blind
If building your own deer blind isn’t in the cards, there are several convenient alternatives available. Pre-made blinds come ready to use and often boast advanced features like camouflage patterns and sound-dampening materials. Another option is portable hunting blinds.
These lightweight structures can be set up quickly and moved as needed. They’re perfect for adapting to changing conditions or locations while still providing cover. For those who prefer a more natural approach, consider using brush or fallen branches to create makeshift concealment. This method blends seamlessly into the environment, making it harder for deer to spot you.
Rental options exist too; some companies offer high-quality blinds for lease during hunting season. This allows you to experience various styles without a long-term commitment. Don’t overlook tree stands as an alternative. Elevated positions provide excellent visibility and keep you out of sight from ground-level wildlife movements.
Conclusion: Using your Deer Blind
Using your deer blind can significantly enhance your hunting experience. The structure provides a concealed and comfortable space where you can patiently wait for deer to come into range. Whether you’re an experienced hunter or just beginning, utilizing a well-constructed blind will increase your chances of success.
Remember to regularly check on the condition of your blind, ensuring it remains camouflaged and secure throughout the hunting season. Personalizing the interior with seating options and storage solutions can make those long waits more enjoyable.
The thrill of harvesting a deer is not just about the kill; it’s also about enjoying nature and spending time outdoors. A properly built deer blind allows you to immerse yourself in this experience while maintaining focus on safety and effectiveness.
So gather your materials, choose that perfect spot in the woods, and get started on creating a functional space tailored to your needs as an avid hunter. Happy hunting!
Related Posts
Big Game Hunting With A Bow & Arrow
Deer Hunting With A Crossbow