How To Build A Log Raft
Whether you’re seeking a new hobby or dreaming of summer escapades with friends and family, learning how to build a log raft can be both rewarding and fun. Building a log raft is not just an exciting DIY project; it’s an adventure that connects you to nature and ignites your creativity.
Imagine floating down a serene river, surrounded by lush greenery, all while enjoying the fruits of your labor. The rhythmic sound of water lapping against your handcrafted vessel enhances the experience as you glide over shimmering waters.
With just a few materials and some basic skills, you can create something truly special that brings joy for years to come. So grab your tools and let’s dive into the art of log raft building!
The History of Log Rafts
Log rafts have a fascinating history that stretches back thousands of years. Ancient cultures used these simple vessels for transportation, fishing, and trade along rivers and lakes. The Egyptians crafted log rafts from papyrus reeds, showcasing their ingenuity in harnessing natural resources.
In North America, Indigenous peoples relied on logs to navigate waterways long before European settlers arrived. As people sought new ways to transport goods, the design of log rafts evolved. By the 19th century, timber rafting became prominent in logging industries across Europe and North America. Loggers would assemble large rafts to float lumber down rivers to processing mills.
This method was both efficient and practical, allowing communities to thrive through resourceful means. Today, while modern technology has replaced many traditional methods, the art of building log rafts remains cherished by enthusiasts looking for adventure on the water.
Benefits of Building a Log Raft
Building a log raft offers numerous benefits that go beyond just enjoying the great outdoors. For starters, it’s an excellent way to connect with nature and immerse yourself in your environment. The process can be incredibly meditative.
Crafting your own raft also promotes hands-on skills. You’ll learn about woodworking, knot tying, and basic engineering principles as you design and construct your floating masterpiece. This knowledge can empower you for future projects.
Log rafts are eco-friendly too. By using natural materials, you’re minimizing environmental impact compared to factory-made alternatives. Plus, it’s a sustainable way of utilizing fallen timber or wood waste.
There’s a unique thrill in navigating waterways on something you’ve built yourself. It creates lasting memories with family or friends while fostering teamwork as everyone pitches in to create the perfect vessel for adventure.
Materials Needed
Building a log raft requires specific materials to ensure both functionality and safety. First, you’ll need logs that are sturdy enough to float and support weight. Look for hardwood options like oak or maple, as they provide durability. Next, gather rope or strong twine for securing the logs together.
Natural fiber ropes can offer good grip while synthetic options may withstand water exposure better. Don’t forget about additional materials such as a saw for cutting your logs to size. A measuring tape will help with precision during assembly.
If you’re planning on reinforcing your raft, consider using barrels or flotation devices filled with air. These can add buoyancy and stability to your build. A few other handy tools include gloves for protection and a life jacket for safety while working near water. Gathering these items beforehand will make the building process smoother.
Step-by-Step Guide:
With these steps followed carefully, you’re well on your way!
A. Choosing the Right Logs
When embarking on your log raft adventure, selecting the right logs is crucial. Not all wood is created equal. Look for logs that are buoyant and sturdy. Species like cedar, pine, or spruce often work well due to their lightweight properties.
Consider the size of the logs too. Thicker logs provide better stability while thinner ones can be easier to maneuver and transport. Aim for a mix that balances both aspects.
Inspect each log carefully for rot or damage. A solid structure is key to safety on water. Freshly cut logs tend to have more buoyancy than older ones, so keep an eye out for recently fallen trees.
Think about where you source your materials. Local timber yards or sustainable forests can offer quality options without harming the environment. Choosing wisely sets a strong foundation for your floating creation!
B. Preparing the Logs for Building
Once you’ve chosen the right logs, it’s time to prepare them for building your log raft. Start by cleaning the logs thoroughly. Remove any bark, dirt, or debris that could weaken their structure or create imbalance.
Next, inspect each log carefully for signs of rot or damage. You want strong and sturdy timber to ensure safety on water. If you find imperfections, consider discarding those pieces or using them in less critical areas of the raft.
Cut your logs to a uniform length if needed. Consistency will help with assembly and stability once you’re out on the water.
Sand down any rough edges or sharp points. This not only makes handling safer but also enhances overall aesthetics of your raft. With well-prepared logs in hand, you’re ready for the exciting task of assembling your floating masterpiece!
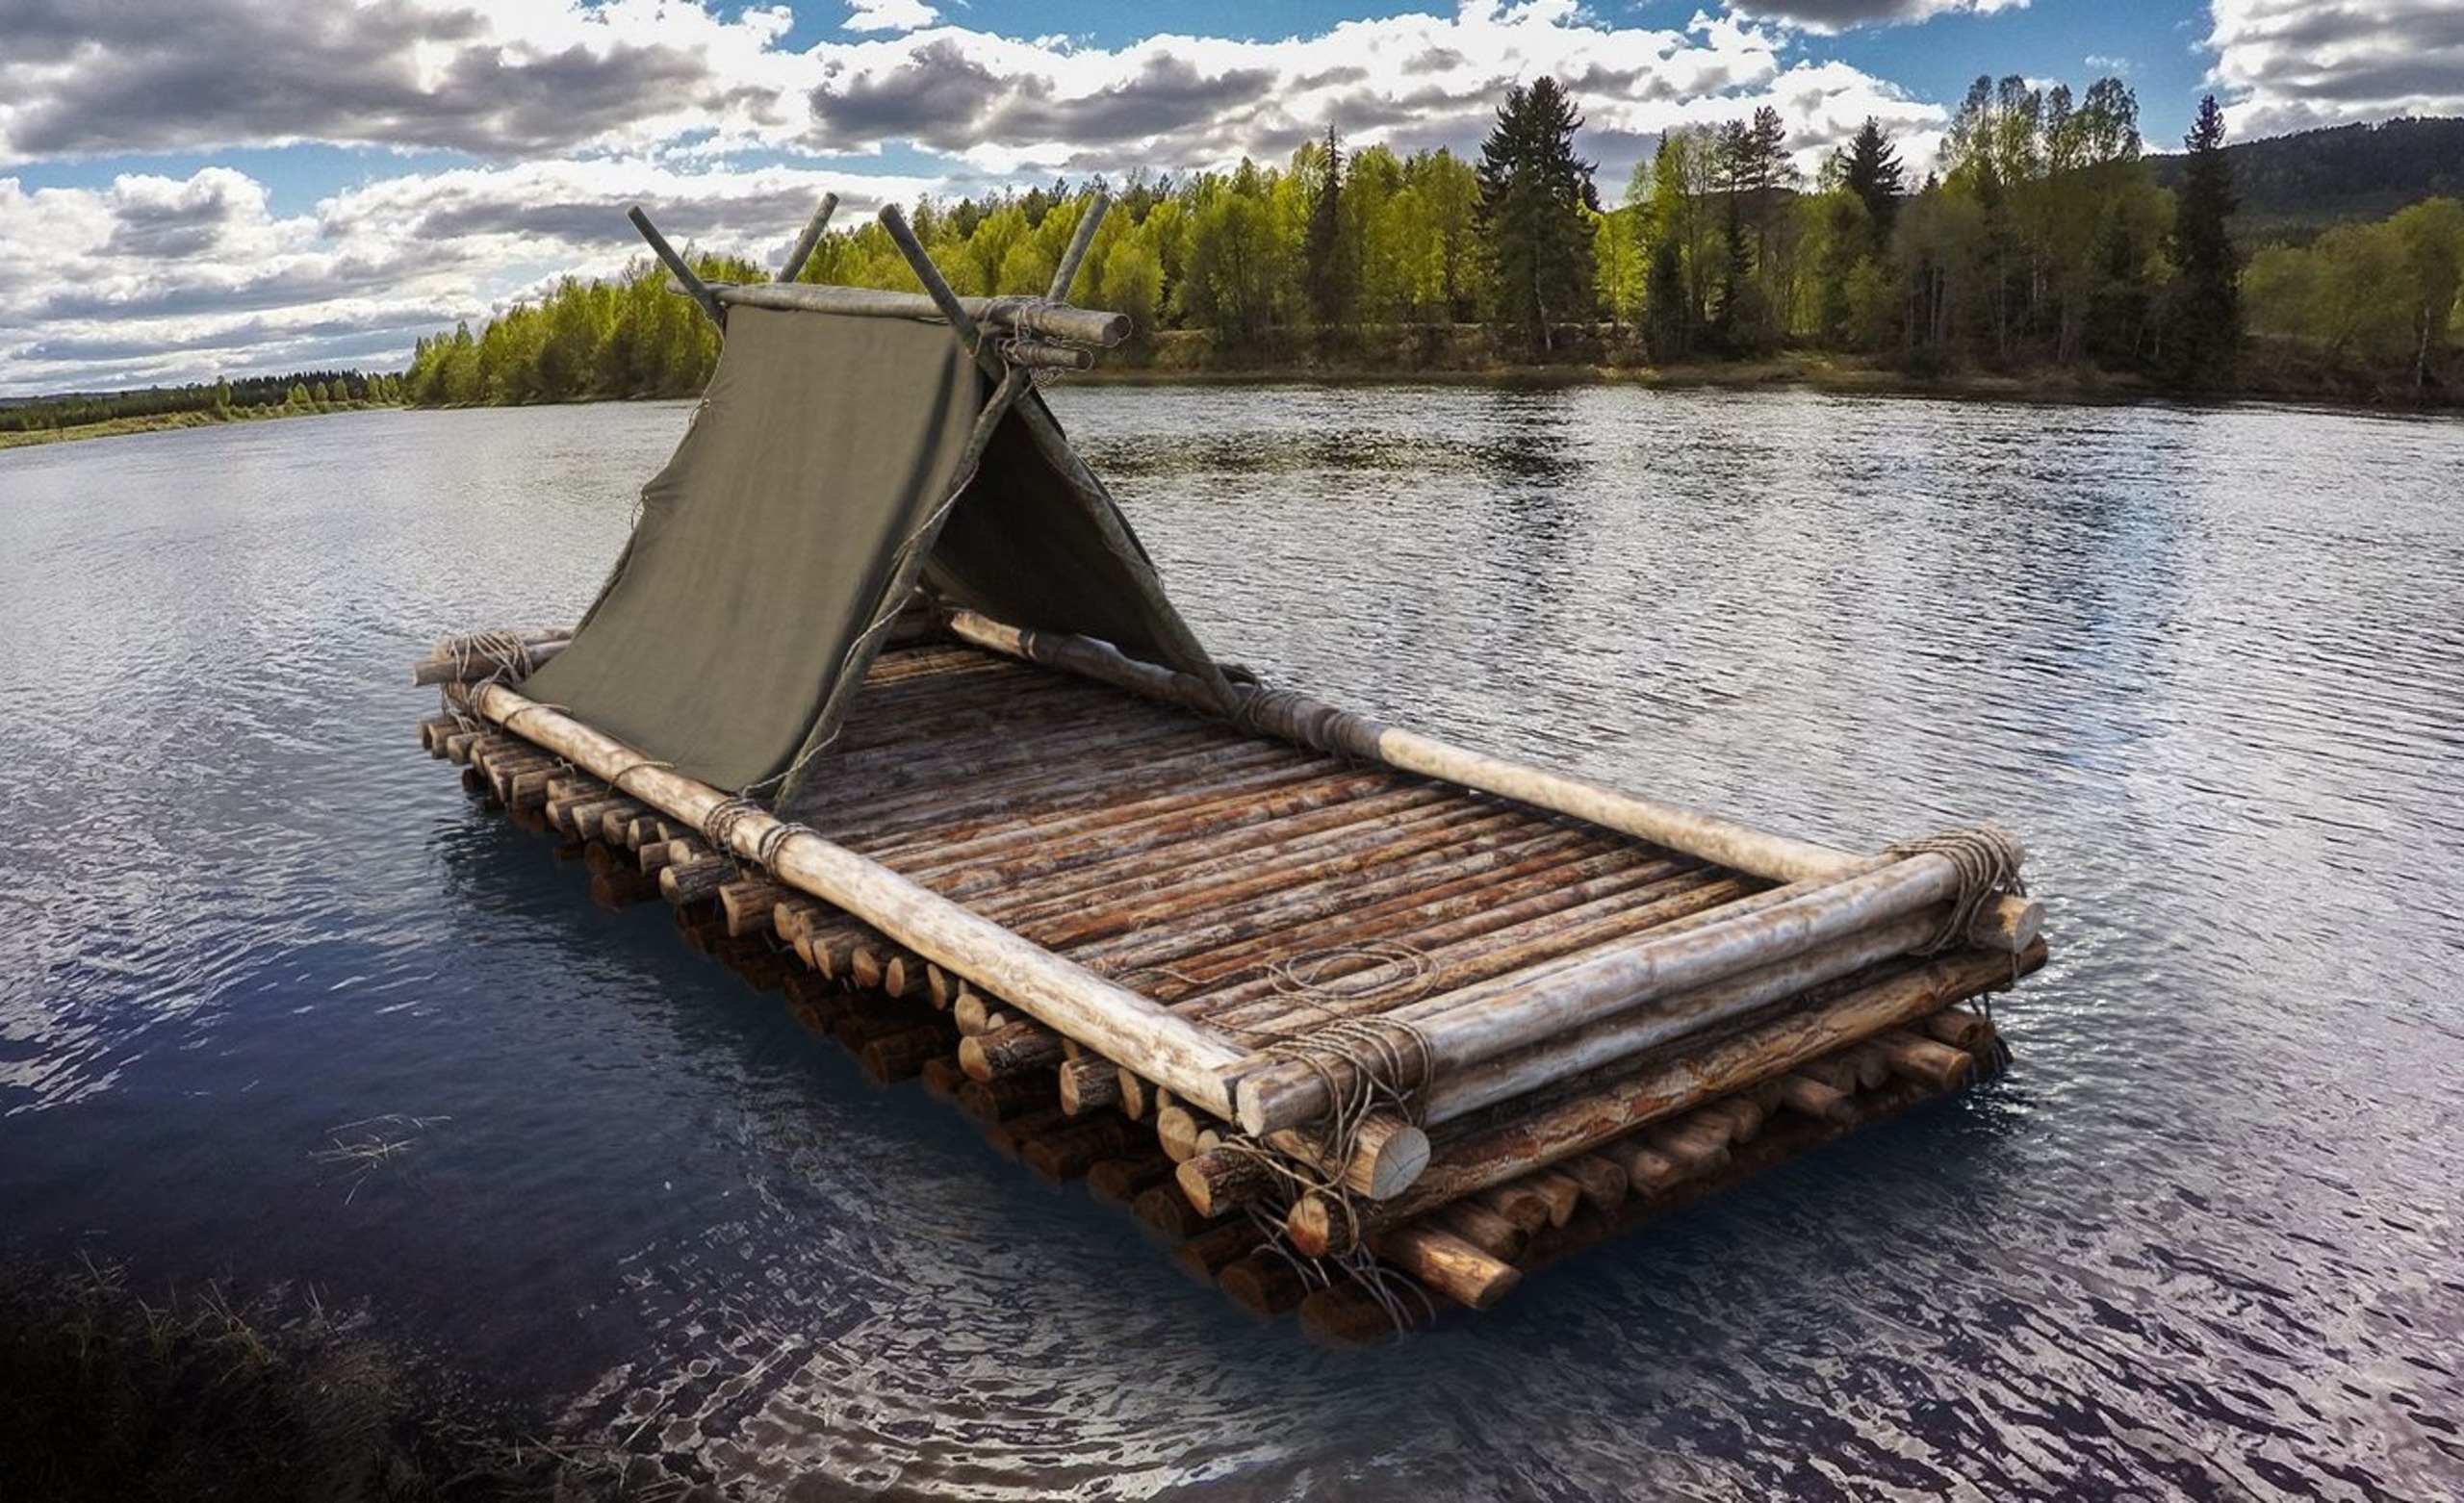
C. Assembling the Raft
Once you’ve prepared your logs, it’s time to start assembling the raft. Begin by laying out the logs in parallel rows. Ensure they are evenly spaced for stability.
Next, place crossbeams between the rows of logs. These beams will provide additional support and structure. Use sturdy materials like wood or metal for this part.
After positioning the crossbeams, secure them tightly using rope or brackets. Tight knots are essential; you don’t want anything coming loose while you’re on water.
As you work, step back occasionally to check alignment and balance. This is crucial for a safe ride!
If desired, add flotation devices between logs for extra buoyancy. They can help keep your raft afloat even when it’s heavily loaded.
Remember that patience is key here—take your time to ensure everything fits snugly before moving forward with securing and reinforcing your creation!
D. Securing and Reinforcing the Raft
Once your log raft is assembled, securing and reinforcing it is crucial for safety and stability. Start by using sturdy rope or heavy-duty straps to tightly bind the logs together. This will help prevent any shifting during your adventures on the water.
Consider adding cross-bracing between logs. Diagonal supports not only enhance strength but also improve balance. Use shorter pieces of wood to create a crisscross pattern that distributes weight evenly across the structure.
Don’t forget about flotation devices if you plan on taking longer journeys. Attaching barrels or sealed containers beneath the raft can provide additional buoyancy, making your adventure more enjoyable.
Inspect all connections regularly as wear can happen over time with exposure to elements like sun and water. A well-secured raft ensures peace of mind while you explore serene waterways.
Tips for a Successful Build
To ensure a successful log raft build, start by selecting logs of similar size and weight. This will help create balance and stability on the water. Consider using durable materials for any additional components, such as ropes or nets. High-quality choices can prevent failures during use.
Pay attention to local weather conditions before embarking on your project. Working in stable weather makes the building process much easier. Don’t rush through assembly; take your time with each step to guarantee everything fits well together. A sturdy raft is safer and more enjoyable.
Enlist friends or family for assistance. Not only does this make the work lighter, but it also adds a layer of safety while you’re out there constructing your floating masterpiece.
Safety Precautions
Safety is paramount when building a log raft. Before starting, assess your surroundings for potential hazards. Look out for sharp objects, slippery surfaces, or unstable ground that could lead to accidents. Always wear protective gear such as gloves and sturdy footwear.
This protects against splinters and injuries while working with heavy logs. A hard hat can help guard against falling debris during construction. Consider the water conditions where you’ll be launching your raft. Strong currents or unpredictable weather can pose significant risks. Always check local forecasts before heading out.
Never work alone when constructing your raft; having a partner not only makes the task easier but also ensures there’s someone to assist in case of an emergency. Ensure you have safety equipment on hand once you’re ready to set sail—life jackets are essential for everyone aboard, regardless of swimming ability.
Conclusion: Enjoying Your Log Raft Adventure
Building a log raft can be an exhilarating adventure. Once you’ve crafted your floating masterpiece, it’s time to enjoy the fruits of your labor. Picture yourself gliding across calm waters, soaking in the beauty of nature around you. Gather friends or family for a day on the water.
Pack some snacks and drinks, and don’t forget the sunscreen! A log raft is not just about building; it’s also about creating memories. Ensure that everyone knows basic safety protocols while on board. Have life jackets handy and stay aware of weather conditions as well as local regulations regarding watercraft usage.
Whether you’re fishing, relaxing, or simply enjoying the ride, your log raft opens up new opportunities for fun and exploration. Embrace this rustic method of transport and let each trip become an unforgettable experience filled with laughter and joy on the water!
Related Posts
How To Build A Plywood Boat
How To Build A Small Boat