How To Build A Ham Radio
Are you ready to learn how to build a ham radio? If so, you’ve come to the right place! Ham radios have a unique charm that draws in hobbyists and tech enthusiasts alike. They serve as a bridge between people, allowing you to connect with others across vast distances without relying on conventional communication networks.
The thrill of sending your voice into the ether, knowing someone miles away is tuning in, is unlike any other experience. Building your own ham radio can be both rewarding and educational. It’s not just about assembling parts; it’s an opportunity to learn about electronics, signal processing, and even physics.
Whether you’re aiming for emergency communications or simply want to chat with fellow radio operators around the world, constructing your own device opens up endless possibilities. Ready to dive into this exciting project? Let’s walk through everything you need to know about how to build a ham radio from scratch!
The Legal Requirements for Building a Ham Radio
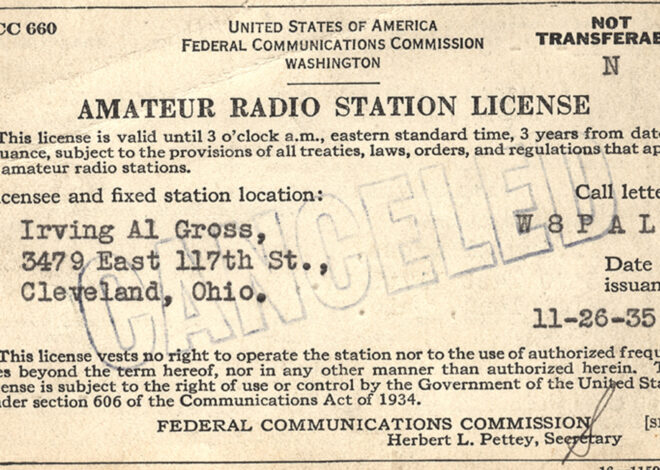
Before embarking on your ham radio journey, it’s essential to understand the legal landscape surrounding its construction and use. The Federal Communications Commission (FCC) governs amateur radio regulations in the United States. To operate a ham radio legally, you’ll need to obtain an amateur radio license.
There are three main classes: Technician, General, and Extra. Each class has different privileges and requires passing specific exams. Familiarize yourself with frequency allocations as well. Certain bands are designated for amateurs only, while others may have restrictions or require advanced permissions.
Additionally, always adhere to power limits specified by the FCC. Exceeding these can lead to interference with other communications and potential fines. Being informed about local laws is also critical since some areas might have additional regulations regarding antennas or equipment modifications.
Tools and Equipment Needed
Before diving into the world of ham radio construction, it’s essential to gather the right tools and equipment. You’ll need a reliable soldering iron for joining components together. A quality multimeter is crucial for measuring voltage, resistance, and current throughout your project.
Wire strippers will help you prepare cables without damage while pliers are handy for twisting wires securely. Don’t forget about small screwdrivers; they’ll be useful when tightening connections. Having a sturdy workbench can make all the difference in your setup. It provides ample space and keeps everything organized.
Additionally, consider investing in safety goggles to protect your eyes from any accidental sparks or debris during assembly. Having an electronics kit with assorted resistors, capacitors, and transistors on hand will save time as you progress through each stage of building your ham radio.
Step-by-Step Guide to Building a Ham Radio:
Building your own ham radio can be an exhilarating project. With the right approach, it’s achievable even if you’re a beginner. Let’s get started!
Step 1: Design and Plan Your Radio
Designing and planning your ham radio is an exciting first step. Start by defining the purpose of your radio. Will it be for local communication, emergency use, or experimenting with different frequencies?
Next, sketch out a basic design. Visualize where components like the transmitter and receiver will fit together. Consider how you’ll integrate features such as frequency modulation and power output.
Research existing designs to inspire your blueprint. You can find plans online from amateur radio enthusiasts who share their experiences.
Don’t forget about size constraints! Think about how portable or stationary you want your setup to be. This will influence everything from component selection to enclosure design.
Jot down a list of required materials based on your plan. A well-thought-out design lays the groundwork for a successful build that meets your needs perfectly.
Step 2: Setting Up Your Workstation
Creating an efficient workstation is crucial for building your ham radio. Start by selecting a clean, well-lit area to set up your workspace. Adequate light will help you see small components clearly and avoid mistakes.
Next, gather essential tools and materials within arm’s reach. A sturdy workbench or table is ideal. Keep screwdrivers, pliers, soldering iron, and a multimeter organized in toolboxes or trays.
Make sure your setup includes anti-static measures to protect sensitive electronics from damage. An ESD mat can be very helpful.
Ensure that you have good ventilation if you’re using soldering equipment frequently. This will keep the air clear of fumes while you work on your project. A comfortable chair also goes a long way in maintaining focus during those long build sessions.
Step 3: Gather and Prepare Components
Gathering the right components is a crucial step in building your ham radio. Start by making a comprehensive list based on your design plan. This ensures you won’t miss any essential parts.
Visit local electronics stores or check online retailers for specific items. Common components include resistors, capacitors, transistors, and integrated circuits. Pay attention to specifications; they can make or break your build.
Organize everything neatly before assembling. Use small containers or zip bags to keep similar items together. Label each container if needed; it saves time during assembly.
Consider sourcing some materials from old electronics too—recycling can be both fun and cost-effective! By being resourceful, you’ll not only save money but also gain hands-on experience with various components.
Set up a clean workspace where you’ll lay out all these gathered pieces. A tidy area enhances focus and minimizes mistakes as you dive deeper into the assembly process ahead.
Step 4: Assembling the Transmitter
Assembling the transmitter is a crucial step in building your ham radio. This component allows you to send signals, making it central to your communication.
Begin by securing all necessary parts laid out from your preparation phase. The key components include the oscillator, modulator, and power amplifier. Each part plays a distinct role in ensuring clear transmission.
Carefully follow the schematic diagram you’ve designed earlier. It provides guidance on how these components connect. Pay attention to polarity when inserting capacitors and transistors; mistakes can lead to malfunction or damage.
Once everything is connected, take time for soldering each joint meticulously. Strong connections are essential for optimal performance. Consider using heat sinks where needed to prevent overheating during operation.
After assembly is complete, ensure that there’s no short circuit between any of the components before moving forward with testing this vital part of your radio system.
Step 5: Building the Receiver
Building the receiver is a crucial stage in your ham radio project. It’s where you transform signals into sound that you can actually understand.
Start by selecting the right components. Look for quality capacitors, resistors, and coils tailored to your design specifications. Each part plays its role in filtering and amplifying signals.
Once everything is gathered, connect the parts carefully according to your schematic diagram. Precision matters here; any misconnection could lead to poor performance or even damage.
Pay close attention to tuning elements during assembly. They’ll help you adjust frequencies effectively later on.
Testing each section as you build allows for early troubleshooting. Don’t rush; patience will pay off when it comes time to hear those first crystal-clear transmissions through your receiver!
Step 6: Assemble the Circuit Board
Assembling the circuit board is a critical step in your ham radio project. This is where you bring together all your hard work and planning into a functional unit.
Begin by laying out your components on the board according to your design. Make sure everything fits properly before starting any attachment process. It’s essential to follow the schematic closely, as even minor errors can lead to significant issues later.
Once you’re satisfied with the layout, start soldering each component in place. Keep your soldering iron clean for optimal performance. A steady hand will ensure strong connections that last over time.
After soldering, double-check every connection using a multimeter. This simple step helps catch mistakes early on, saving you from potential headaches down the line while troubleshooting or testing.
Patience is key here; take your time and enjoy this fulfilling part of building your ham radio!
Step 7: Creating the Antenna
Creating the antenna is a crucial part of your ham radio project. The type of antenna can significantly influence your radio’s performance. Choices range from simple wire antennas to more complex designs.
Start by determining what frequency bands you plan to use. This will guide you in selecting an appropriate antenna design, such as dipole or vertical antennas.
Gather materials like copper wire, connectors, and insulators for the build. For a basic dipole, cut two equal lengths of wire tailored to your desired frequency.
Next, attach the wires to a central connector using proper techniques for optimal signal quality. Ensure everything is secure and weather-resistant if you’ll be using it outdoors.
Don’t forget about grounding! A well-grounded antenna system minimizes interference and improves transmission clarity. Properly creating your antenna sets the stage for effective communication on airwaves.
Step 8: Soldering and Wiring
Soldering and wiring are crucial steps in building your ham radio. It’s where the magic happens, connecting all those tiny components into a functioning unit.
Before you start, gather your soldering iron, solder wire, and other essential tools. Make sure everything is clean and organized. A clutter-free workspace helps reduce mistakes.
Heat the soldering iron until it reaches the right temperature—typically around 350°C. This ensures a good bond between wires and components without damaging them.
When you’re ready to begin, hold the solder against both parts you want to join. Apply heat with the iron for a second or two before introducing solder wire to the joint. The melted solder should flow smoothly around connections, forming secure joints.
Always check each connection visually after you’re done; cold or dull-looking joints can lead to failures down the line. Patience is key during this process—it pays off later when you’re enjoying clear signals on your new creation.
Step 9: Building the Enclosure
Building the enclosure for your ham radio is an essential step that protects all your hard work. A well-constructed casing keeps dust, moisture, and physical damage at bay.
Start by selecting a sturdy material like aluminum or high-quality plastic. These options provide durability while ensuring lightweight portability. Measure twice before cutting; precision matters here.
Use screws or rivets to secure panels together effectively. This method allows easy access for repairs and modifications down the line. Ensure there are ventilation holes to prevent overheating during operation.
Consider aesthetics too! Paint it in a color that inspires you or add labels for controls and features. Personal touches can make your radio feel truly yours, enhancing both functionality and charm.
Don’t forget about mounting points for internal components as you design the layout inside the enclosure. Having everything organized will facilitate easier troubleshooting later on.
Step 10: Test and Troubleshoot
Testing your ham radio is an exciting phase. You finally get to see if all your hard work has paid off. Start by powering it up in a controlled environment.
Listen for any signals. If you hear static, that’s a good sign, but don’t stop there. Use a known frequency and try to make contact with another operator. This step will help you gauge the effectiveness of both transmitter and receiver.
If things aren’t working as expected, don’t panic. Troubleshooting requires patience and attention to detail. Check your connections first; ensure everything is soldered properly and securely fastened.
Next, inspect components for faults or damage—especially capacitors and resistors. A simple multimeter can help identify issues quickly.
Consult online forums or local ham clubs for guidance if needed. Many experienced builders are willing to share their insights!
Tips for Improving Your Ham Radio’s Performance
To enhance your ham radio’s performance, focus on antenna quality. A well-constructed antenna can vastly improve your signal strength and clarity. Experiment with different designs to find what works best for your setup. Regular maintenance is crucial too.
Clean all connections to prevent corrosion and ensure optimal conductivity. This simple step can lead to clearer transmissions. Consider adding filters or preamps if you’re experiencing interference or weak signals. They can help boost the overall quality of your broadcasts.
Engage with local ham communities online or in person. Sharing experiences and tips from fellow enthusiasts can provide insights that may not be found in manuals or guides. You’ll discover practical advice that could significantly elevate your station’s performance over time.
Conclusion: Building Your Own Ham Radio
Building your own ham radio can be an incredibly rewarding experience. It allows you to dive deep into the world of electronics and communications, while also giving you the chance to create something uniquely yours. As you navigate through each step—from planning and assembling components to testing and troubleshooting—you’ll gain valuable skills that extend beyond just radio technology.
This hands-on project fosters creativity and problem-solving abilities. Plus, it connects you with a global community of fellow enthusiasts who share your passion for amateur radio. Whether you’re looking to communicate across long distances or experiment with different frequencies, crafting your own ham radio opens up a realm of possibilities.
Embrace the journey as much as the end product. The knowledge gained along the way is invaluable, making every challenge worth tackling. So gather your tools, follow these steps closely, and enjoy the process of building your very own ham radio—an adventure that will resonate for years to come!
Related Posts
How To Get A Ham Radio License
How To Use A Ham Radio