How To Build A Generator
Welcome to our step-by-step guide on how to build a generator. Generators are an essential tool for anyone looking to have power on the go, whether for camping trips, emergency backup during outages, or off-grid living.
Building your own generator may seem daunting at first, but with the right guidance and a little bit of know-how, you can create a reliable power source tailored to your specific needs. Imagine having the freedom to generate electricity wherever you are!
In this guide, we’ll walk through everything from understanding what generators do to constructing one yourself. Whether you’re a DIY enthusiast or just curious about how it all works, let’s dive into the world of generators and empower your projects like never before!
The Different Types of Generators
Generators come in various types, each designed for specific needs and applications. Portable generators are perfect for outdoor activities or emergency power supply at home. They’re compact, easy to transport, and can run essential appliances during outages.
Standby generators offer a permanent solution. Installed outside your home, they automatically kick in when the power goes out. This makes them ideal for those who want peace of mind without manual intervention. Inverter generators stand out due to their quiet operation and fuel efficiency.
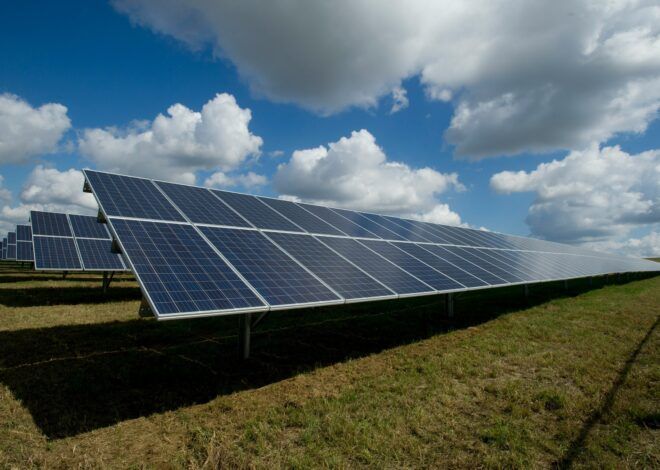
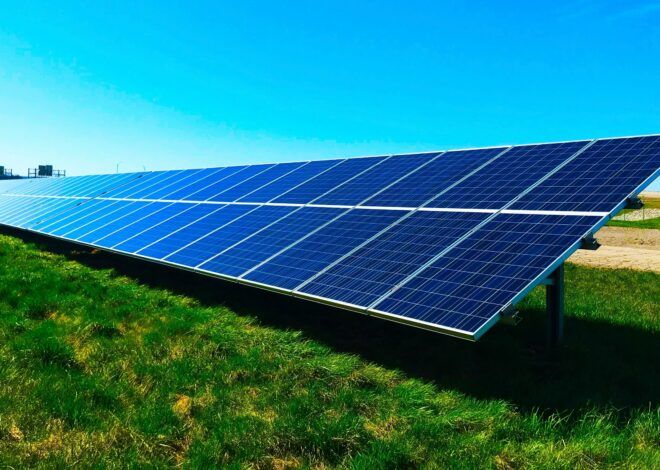
These models produce clean energy suitable for sensitive electronics such as laptops or smartphones. Then there are solar generators that harness the sun’s energy, making them eco-friendly options with minimal running costs. They are excellent for camping trips where traditional fuel sources may be limited.
Each generator type serves unique purposes based on your lifestyle and requirements.
Tools and Materials Needed
When embarking on your generator-building journey, having the right tools and materials is crucial. Start with a sturdy workbench for stability. This will be your command center. You’ll need basic hand tools like wrenches, screwdrivers, and pliers. These are essential for assembling parts efficiently.
A power drill can save time when making holes or tightening screws. Don’t forget safety goggles to protect your eyes from debris. For materials, gather an engine suitable for your generator’s size and capacity. An alternator is another key component that converts mechanical energy into electrical energy.
Frame material could range from metal tubing to wood; choose what fits your design best. Stock up on wiring supplies—cables of various lengths and connectors will help ensure everything runs smoothly. Keep a first-aid kit nearby just in case accidents happen while working. It’s better to be prepared than caught off guard!
Step-by-step Guide to Building a Generator
Step 1: Creating a Base for the Generator
Creating a solid base for your generator is crucial. This foundation will support the entire structure and ensure stability during operation.
Start by selecting a flat surface. Concrete or heavy-duty plywood works best. Make sure it’s level to prevent vibrations that can lead to wear and tear over time.
Next, cut the material to the desired size based on your generator’s dimensions. A footprint of at least 3 feet by 2 feet usually suffices for most home generators.
If using concrete, pour it into a mold and let it set completely before proceeding. For plywood, treat it with weatherproofing sealant if you plan on placing your generator outdoors.
Once your base is ready, check its strength by applying pressure in various spots. It should not show signs of bending or cracking under force. This sturdy foundation sets the stage for all subsequent steps in building your generator efficiently.
Step 2: Assembling the Frame
Assembling the frame is a crucial part of building your generator. A sturdy frame ensures that all components remain secure during operation. Start by laying out the metal or wood pieces according to your design.
Use bolts and screws to connect each section, ensuring everything fits snugly. A level surface will help maintain accuracy as you work, preventing any misalignment later on.
Don’t rush this step; precision matters here more than anywhere else in the build process. Double-check every joint for stability before moving on.
Once assembled, inspect the frame for sharp edges or rough spots that could cause injury during installation or use. Sanding these areas smooth can save future headaches and improve safety significantly.
With a solid foundation ready, you’ll be well-prepared for the next stages of assembly! Stay focused and enjoy seeing your generator take shape.
Step 3: Installing the Engine
Installing the engine is a crucial step in building your generator. Start by carefully lifting the engine into place on the frame you assembled earlier. Make sure it’s centered and aligned with any pre-drilled holes.
Secure it using bolts, ensuring they are tightened adequately to prevent vibrations during operation. Remember, stability is key for reliable performance.
Next, connect the fuel line and ensure all fittings are snug yet not overtightened; this helps avoid leaks later on. If your engine has a starter motor, attach it now as well.
Check that all connections align properly before moving forward. A misaligned engine can lead to significant issues down the road.
Take a moment to admire your work so far—each piece coming together brings you closer to having a functional generator at hand!
Step 4: Connecting the Alternator
With the frame and engine set, it’s time to connect the alternator. This is a crucial step in your generator build as it converts mechanical energy into electrical energy.
Start by positioning the alternator next to the engine. Ensure that it’s aligned properly for easy access to its mounting points.
Using bolts, secure it firmly in place. Check that everything feels stable; any movement could affect performance.
Next, you’ll need to connect the drive belt from the engine’s crankshaft to the alternator pulley. Make sure there’s just enough tension on this belt so that it doesn’t slip but isn’t overly tight either.
Inspect all connections for any signs of wear or potential issues before proceeding with wiring. Properly connecting your alternator sets a solid foundation for generating reliable power later on.
Step 5: Wiring the Generator
Wiring the generator is a crucial step. This is where you connect all electrical components to ensure your generator functions effectively.
Start by referring to the wiring diagram specific to your model. Each wire has its designated purpose, so it’s essential not to mix them up. Take your time in identifying each wire’s color and function.
Securely attach wires from the alternator to the voltage regulator. Use quality connectors for a reliable connection that can withstand vibrations during operation.
Grounding is also vital at this stage. Connect a grounding wire from the frame of the generator to a suitable ground point. This enhances safety and reduces electrical interference.
Double-check all connections before proceeding further. Any loose or misconnected wires could lead to malfunction or hazards down the road, so attention here pays off later on!
Safety Precautions
When building a generator, safety should be your top priority. Always work in a well-ventilated area to avoid inhaling harmful fumes. Carbon monoxide is a silent killer that can accumulate quickly. Use protective gear such as gloves and goggles.
This will protect your skin and eyes from debris or sharp objects during the assembly process. Ensure all electrical connections are secure to prevent shocks or short circuits. Double-check that you’re using the right components for your specific generator design.
Keep flammable materials away from your workspace. Gasoline, oil, and other fuels can easily ignite if exposed to sparks. Never operate the generator indoors or near open windows. Proper placement ensures you stay safe while enjoying the benefits of your hard work.
Tips for Maintaining and Troubleshooting Your Generator
Regular maintenance is key to keeping your generator running smoothly. Start by checking the oil level frequently. Dirty oil can lead to engine damage, so change it according to your manufacturer’s guidelines. Next, inspect the air filter. A clogged filter reduces efficiency and can cause overheating.
Clean or replace it as needed. Fuel quality matters too. Use fresh fuel and consider adding a stabilizer if you won’t use the generator for an extended period. This prevents corrosion and ensures optimal performance when you need it most. Listen for unusual noises during operation; they often signal potential issues.
If you notice vibrations or irregular sounds, turn off the unit immediately and investigate further. Familiarize yourself with basic troubleshooting techniques such as resetting circuit breakers or checking fuses to address common problems efficiently without professional help.
Final Thoughts
Building your own generator can be a rewarding and educational experience. It not only deepens your understanding of how these machines work, but it also provides you with a reliable power source for various needs.
By following this step-by-step guide to building a generator, you have the opportunity to customize your machine according to specific requirements. Remember that safety should always be at the forefront during any DIY project. Proper precautions will help ensure that you enjoy the process without unexpected mishaps.
Maintenance is key to keeping your generator running smoothly over time. Regular checks and troubleshooting will prolong its lifespan and efficiency. Embrace this journey as both an exciting challenge and an investment in self-sufficiency.
With some patience and determination, you’ll find that constructing a generator isn’t just about assembling parts; it’s about creating something functional from scratch. So gather those tools, roll up your sleeves, and get started on making your very own power solution today!
Related Posts
Off The Grid Energy Solutions